Scheduling
This document will walk you through student scheduling steps on Radix LMS. Only users with appropriate roles can do the scheduling. If you need access to scheduling modules, please contact your site administrator.
The scheduling links are located under School → Schedule
Creating courses
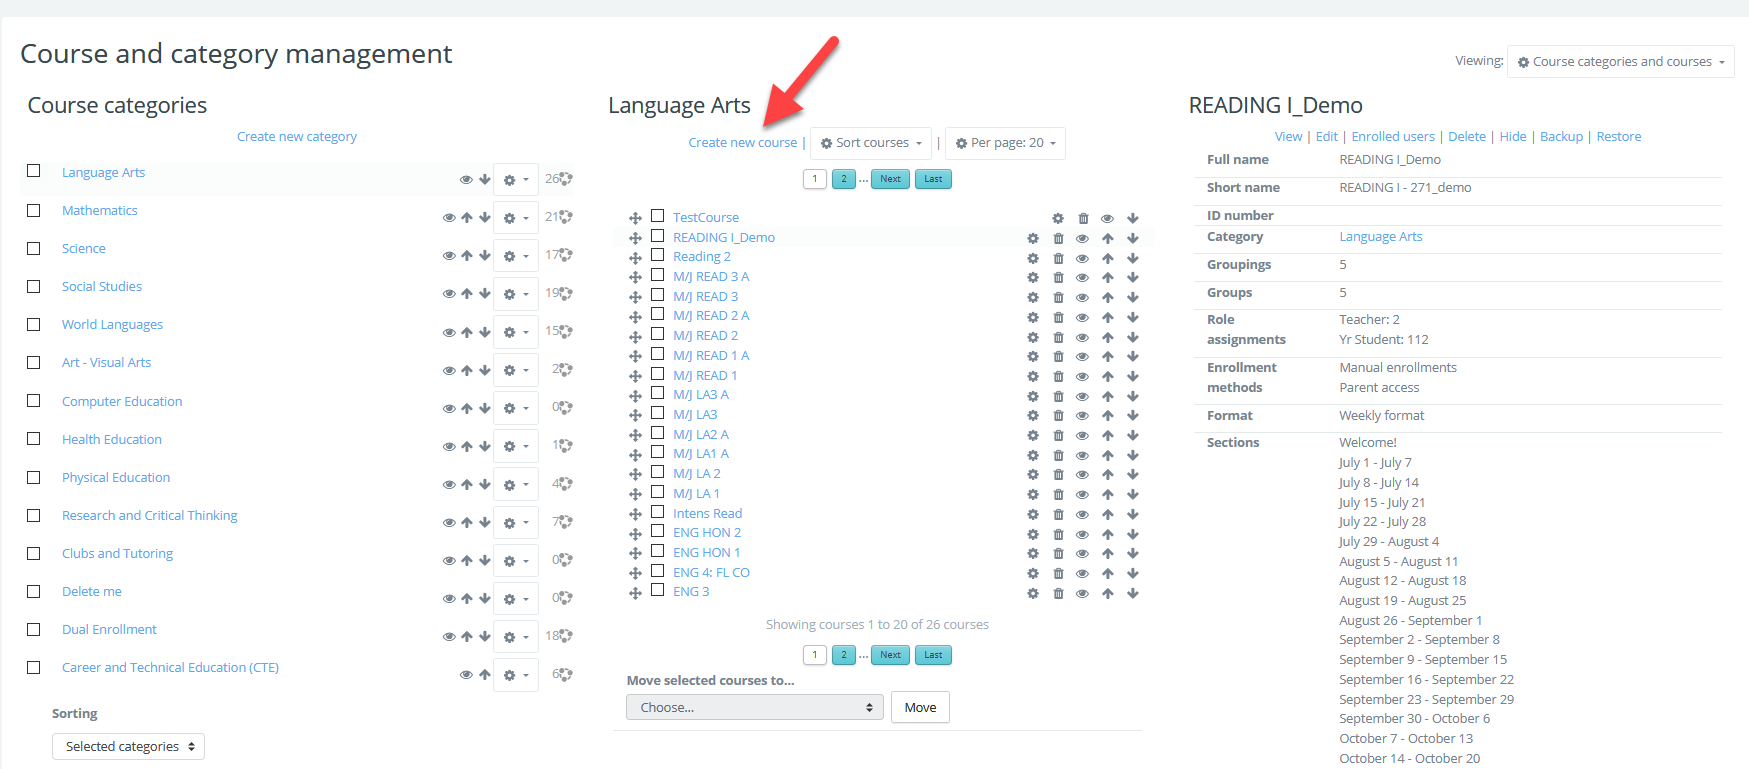
Click on "Manage courses and categories" under the schedule menu and you will be directed to the page where you can manage all the courses and categories (departments) on your site. When you click on a category and a course, the details will be listed on the right.
Click on "Create a new course" and fill in the information about the course.
Once you are on the new course settings, use the help icon next to each field for extra help. Here are some important points when creating a new course or editing an old one:
The course's short name must be a unique name throughout the site.
Select your course start and end dates, based on these dates, the participants will be able to access the course.
To enable and change the end date, uncheck the "Calculate the end date from the number of sections."
Decide if this course is official or not (unofficial courses will not be shown on grade reports or report cards, students will still be able access them via their dashboards)
Course ID numbers and universal course IDs are important for the official graded courses. You can use the "Course ID number" for the internal/local or district course codes, but the Universal ID must be the official course code assigned by the State. They must be unique for each course on your system. Universal IDs must be selected from the drop-down menu. if not in the menu, you must add the course to the list by clicking on the link below the dropdown menu.

The weight and credit are used in the GPA calculations. The grading category term must match your school's grading terms.
The course summary and image are shown to students on their dashboards.
The course format should be weekly to make sure it works with the other RadixLMS modules smoothly.
Unofficial courses can use any format that fits the need.
Completion tracking will allow teachers to be able to set activity completion conditions, it will also show the percent completed on students' dashboard.
Groups mode must be "Separate groups" and "Force group mode - Yes" to allow teachers to differentiate activities among groups.
The other settings can be kept with the default values. and once done, click save and return.
Adding periods and teacher
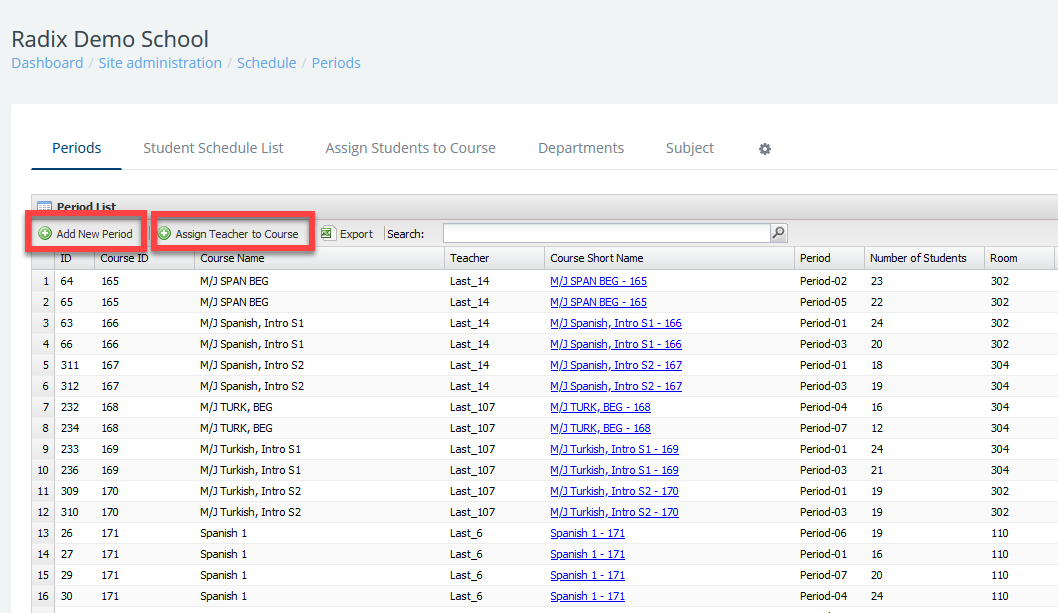
To add a period to a course and assign a teacher, go to Periods under the schedule menu. Here, you will see the buttons on the top left corner of the report table. Click on "Add new period".
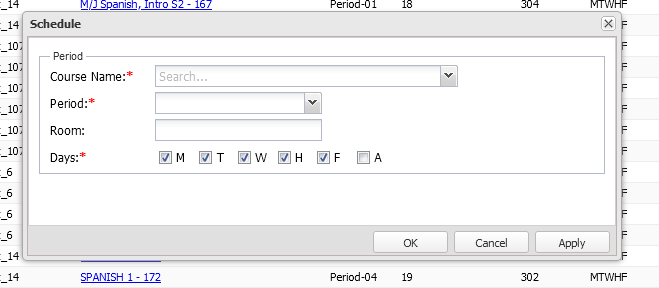
On the pop-up window, select your course from the drop-down menu. You can search your course by name or ID number in the drop-down box. Select the period you want to add and days of the course. Click "ok" when done.
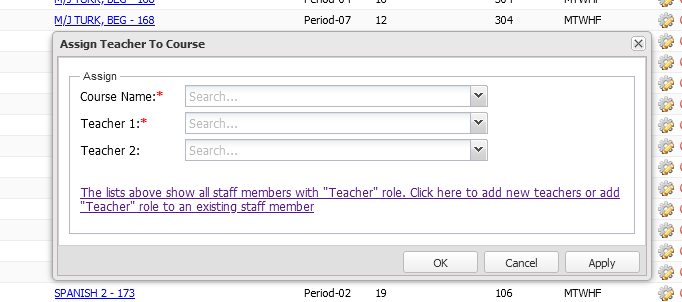
To assign a teacher to a course, click on the "Assign teacher to course" button. On the pop-up window, select your course and teacher(s) and click ok. Only your staff with the "Teacher" role will appear in this window. If you need to add new teachers to the site, please use the School → User → Staff menu.
Scheduling students
To add students to the courses/periods, go to the "Assign students to courses" link/tab under schedule. This link can be used to schedule multiple students to a course or multiple courses as well as a single student to multiple courses.
You can search the students by first, last, or StudentID. If you need to search multiple students, use student IDs separated by space in the search box. You may also filter your students using the individual columns. After you found your students, select them by checking the boxes on the left. Once they are selected, click and hold to the selection and drag them to the "selected students" window on the right. (see video below).
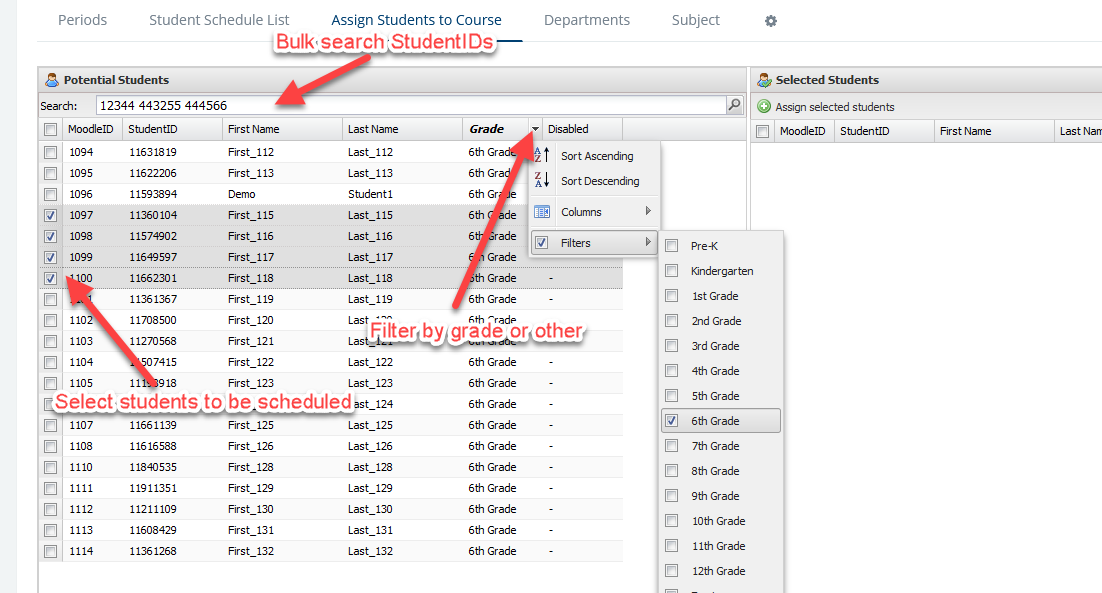
Once the selected students are in the window on the right, click on "Assign selected students" and open up each period you want to schedule these students by checking the corresponding boxes. For each period, select the students' role, the course you want to schedule to, and the enrollment start date.
For semester or quarter-long courses, select one of the Q or S roles. For year-long courses, select the yr-student role. Enrollment start dates are the same as the selected course's start date by default. You may change it to a different date if you like.
Click "OK" once you are done making selections for the periods you want. It may take a few seconds for it to process the enrollments and show the success message on the screen.
Unenrolling students / Removing them from a period or a course
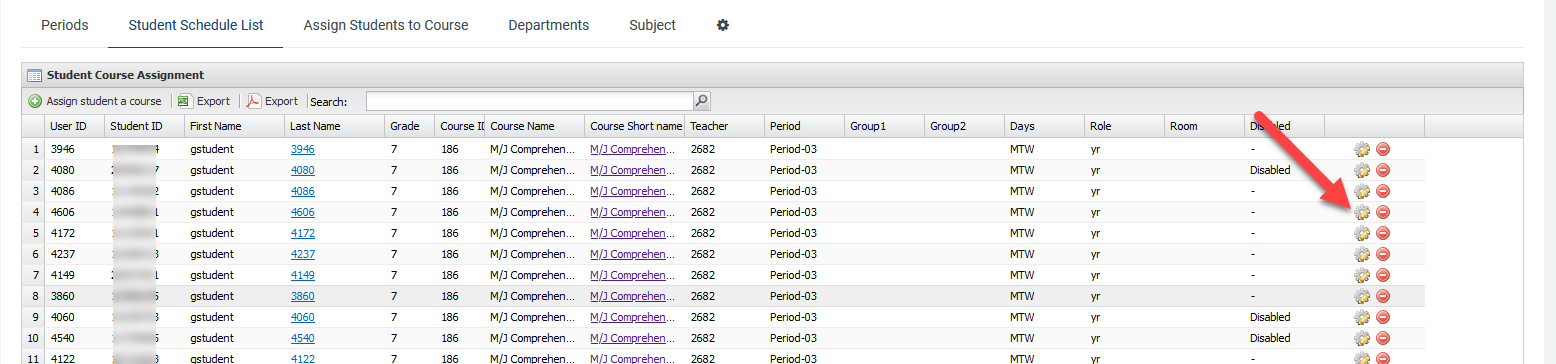
If a student is enrolled in a single period of a course, removing the student from that period will automatically unenroll him from the course as well. To remove a student from a period, find the student using student ID, last name, or first name. Find period you want to remove the student from and click on the "delete" icon at the end of the row. If the student is enrolled only in a single period of the course, the confirmation window will warn you that you are unenrolling the student from the course. If the student is enrolled in multiple periods in the same course, you will be informed that you are only removing the student from that period only.
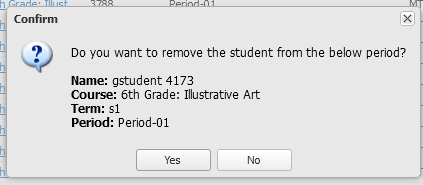 Removing a student from one period, because the student is enrolled | 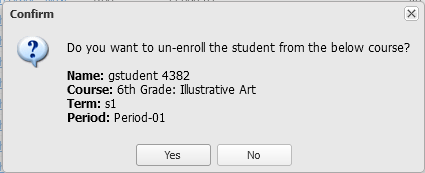 Unenrolling the student from the COURSE since the student is enrolled |
All the grades of a student will be preserved when unenrolled from a course with the exception of overwritten category averages (such as term average). This means, if you re-enroll the students back to the same course, grades will be recovered.
Changing student schedules (with term grade transfer)
You can change a student’s period within the same course, or move the student to a different course and transfer the term grades. This can be done with a few clicks on the student schedule list. First, filter the list to find the student, then click on the gear icon of the period or the course you are changing for this student.
To move the student into a new course, select the new course on the “Course” dropdown menu, select the period you want to enroll the student, select the option to transfer finalized term grades if you desire to and click ok.
If you only want to change the student’s period, select the new period and click OK. You can also change the students' unofficial groups here.
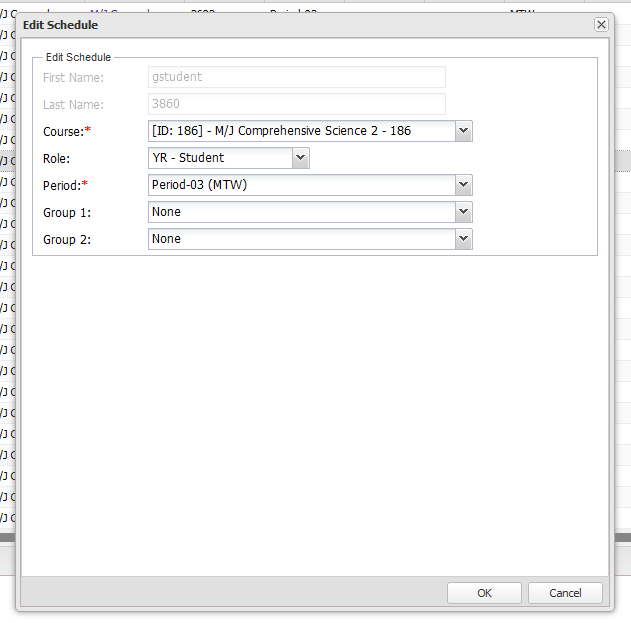 You can change the student’s period and unofficial groups. The transfer grade option will only appear if you change the course. | 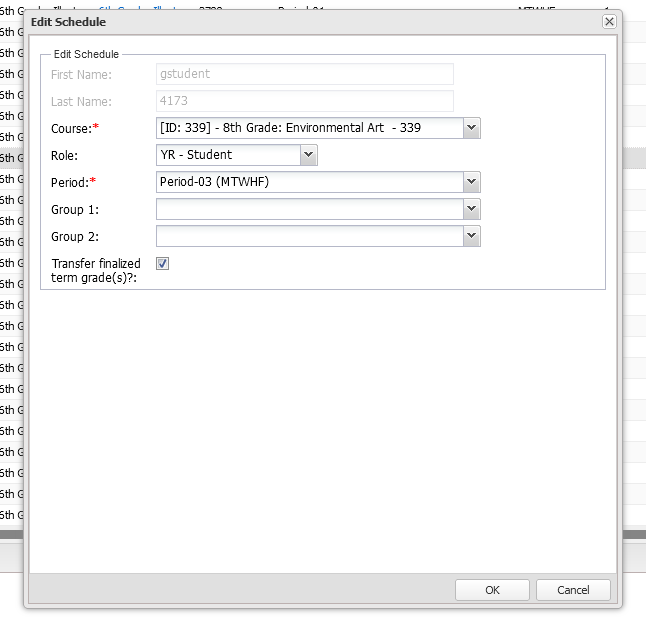 If you change student’s course, you have the option to transfer finalized term grades into the new course as well. | 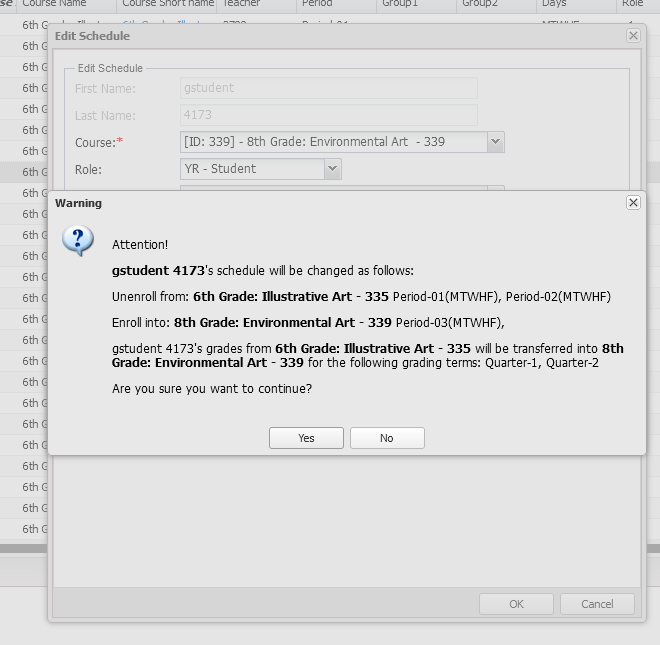 If the grade transfer is possible, you will be prompted with the above confirmation message where it will show the course unenrolled, course enrolled and term grades transferred. | 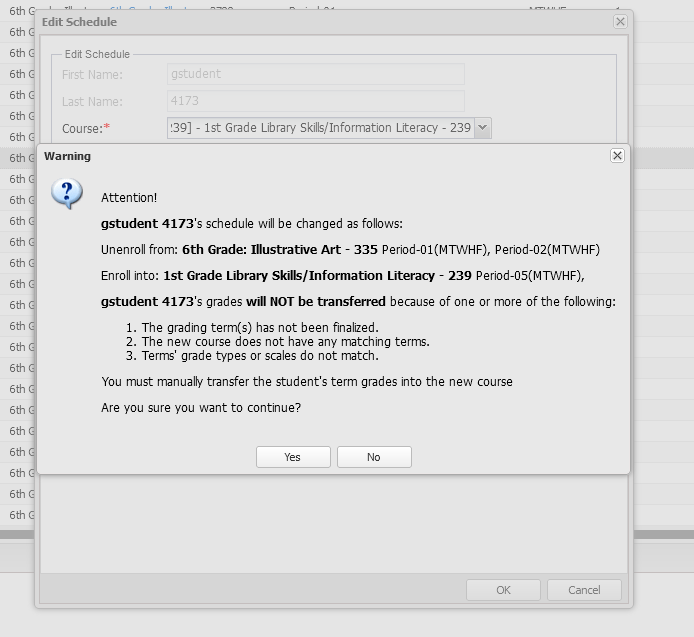 If the grade transfer is NOT possible, you will be prompted with the above confirmation message. You will still be able to move the student but the grades will have to be transferred manually. |
Below are the requirements for term grade transfer when changing a student’s course:
The grading term(s) must have been finalized. That means the Quarter or Semester must be ended.
Both the old and new courses must have matching grading terms. You can not transfer Quarter grades into Semester grades.
The grading terms' grade types or scales must match. You can not transfer the percent average into a scale course. Or you can not transfer one type of scale to another type.