Zoom Meeting
Zoom meetings can be integrated and used in two different ways: Zoom meeting activity and Zoom Meeting LTI (External tool). The Zoom Meeting activity is the simpler one compared to Zoom Meeting LTI. The Zoom LTI on the other hand gives more options to the user such as accessing pre-recorded meetings and creating personal meetings. Both options are explained below.
Adding Zoom meeting activity to your course
This activity requires a business or education Zoom account to be integrated with Radix LMS. If you do not see the zoom meeting in "activities" list or receiving an error message when you try accessing the activity, please contact your administrator. Please make sure that your school has created a zoom user for you with the email address you have on Radix LMS.
- Click the Turn editing on button in the upper right-hand corner of your site page.
- Click on the Add an activity or resource button where you want your Zoom meeting activity to be placed.
- Select Zoom meeting from the Add an activity or resource pop-up window.
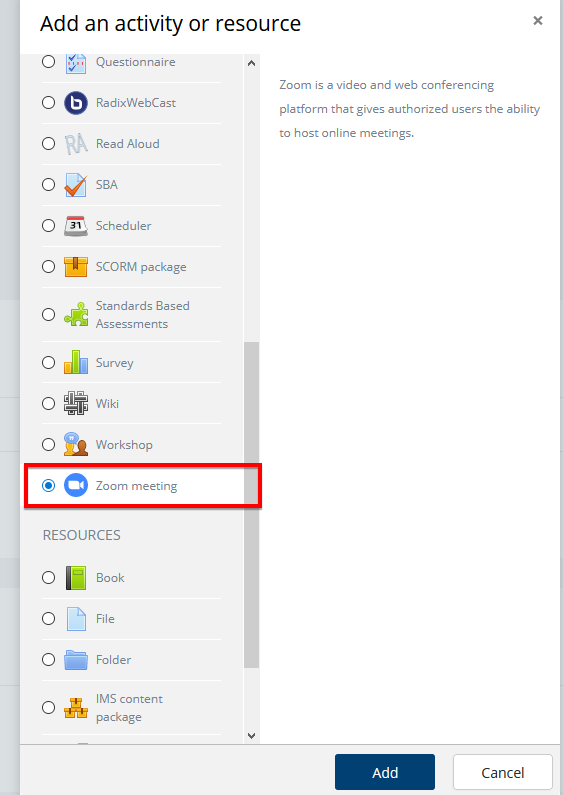
5. Click Add and a new screen will appear where you can create your Zoom meeting.
Setting up the zoom meeting
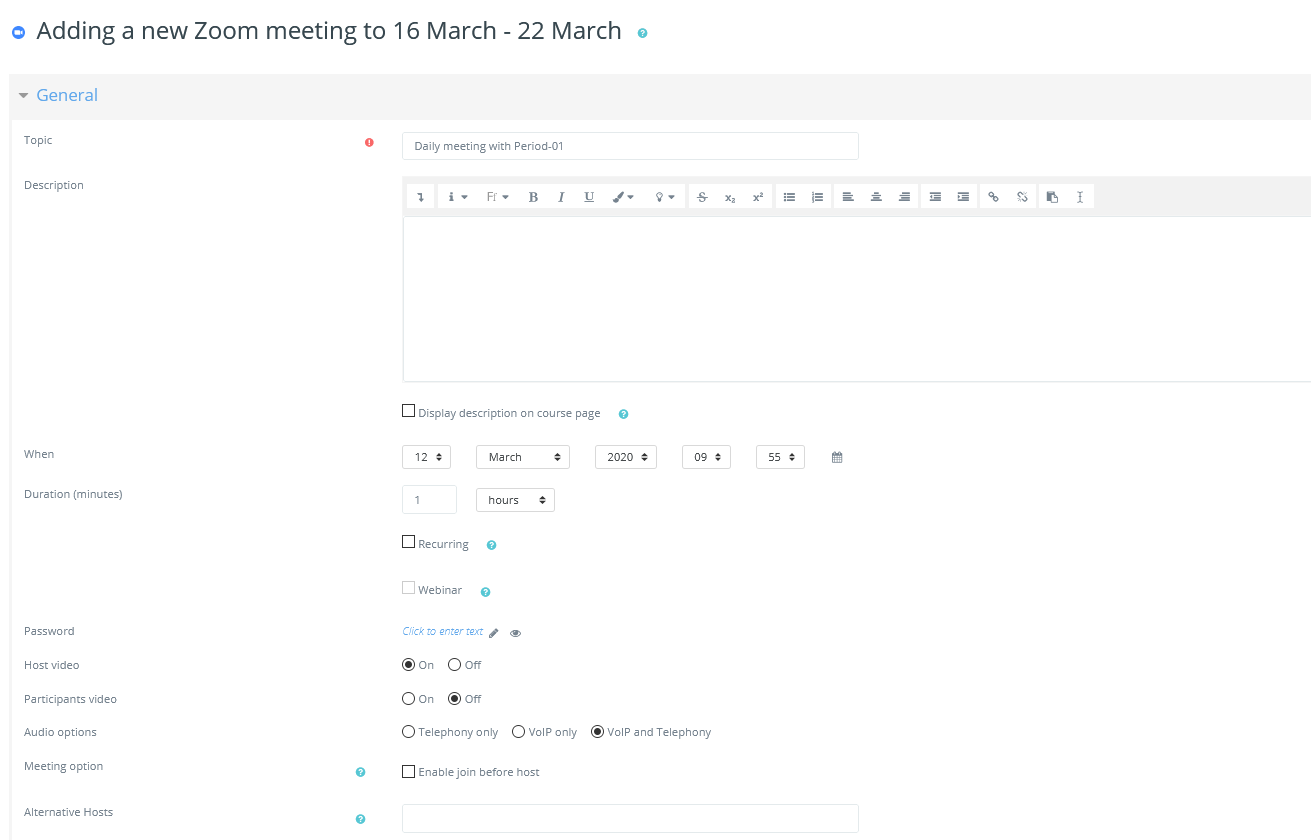
Meeting Configurations
| Setting | Description |
|---|---|
| Topic | Title of your Zoom Meeting that will be shown to users |
| Description | Description of your activity |
| Display description on course page | If enabled, the description above will be displayed on the course page just below the link to the activity or resource. |
| When | Set the Month, Date, Year, Hour and Minute of your Zoom Meeting |
| Duration (Minutes) | How long your meeting will last |
| Recurring | Create a meeting with no end date (i.e., the meeting "room" is always open/available. |
| Webinar | This option is only available to pre-authorized Zoom accounts. |
| Password | Setting a password for your meeting will require users to enter the password before joining |
| Host Video | Choose whether the host's video should be on or off when entering the meeting |
| Participants Video | Choose whether a student's video should be on or off when entering the meeting |
| Audio Options | Choose whether participants can join the meeting by phone, over the computer or use both options. |
| Enable join before host | Join before host allows attendees to join the meeting before the host joins or when the host cannot attend the meeting. |
| Alternative Hosts | The alternative host option allows you to schedule meetings and designate another Pro user on the same account to start the meeting or webinar if you are unable to. This user will receive an email notifying them that they've been added as an alternative host, with a link to start the meeting. Separate multiple emails by comma (without spaces). |
There are a number of optional settings for your Zoom meeting including under Grade, Common Module Settings and Restrict Access
Users will be marked complete upon joining a meeting if completion tracking is used.
When you are done setting up your meeting, click Save and display to add your Zoom meeting to the course.
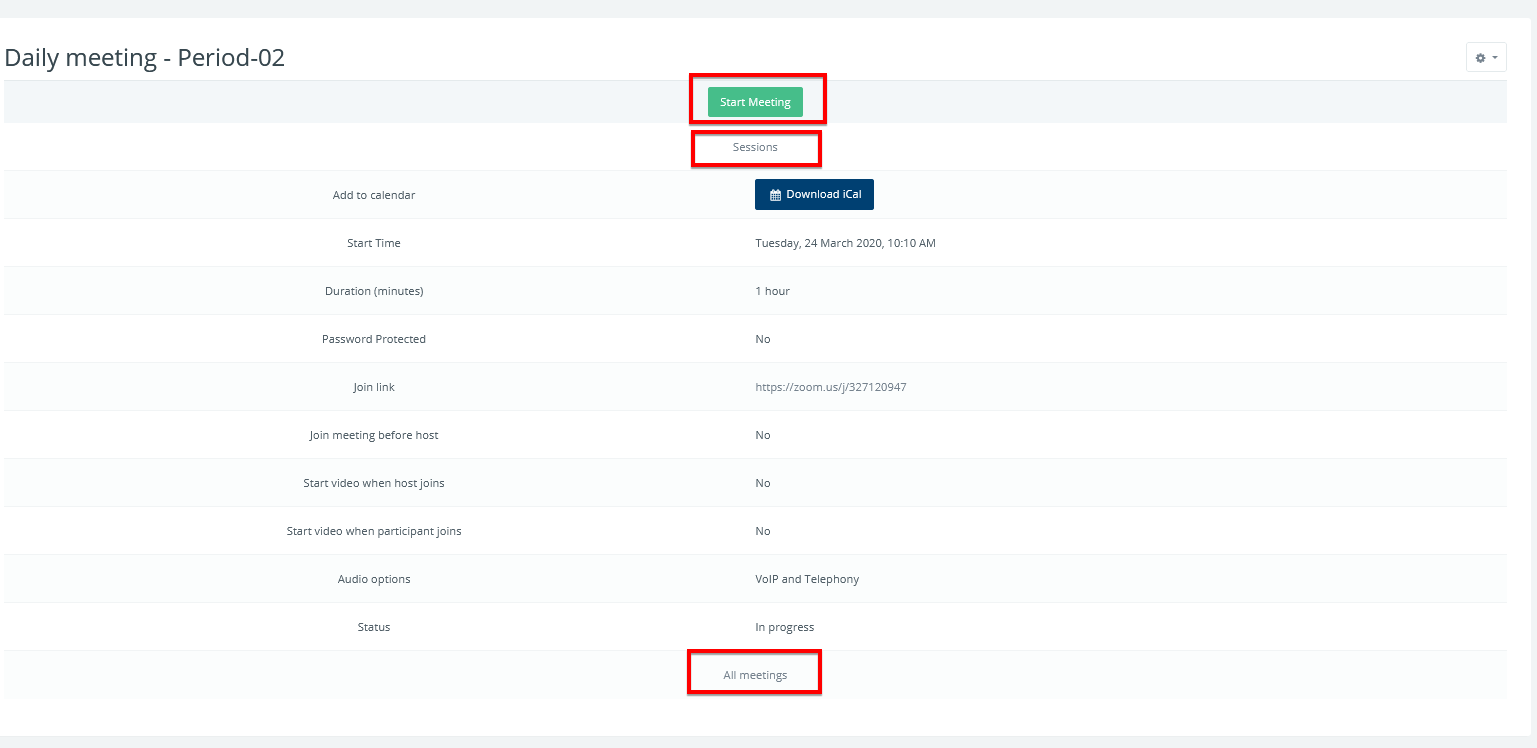
Here you will see the detailed information about your zoom meeting. Start/Join link, ical integration, link to the sessions and all of your meetings.
Click on "start meeting" (or Join Meeting for students) to start your live session. if this button is not visible, that means the meeting has not ended or not yet started.
You can see list of your meetings in this course by clicking on "All meetings" link at the bottom of the activity page.
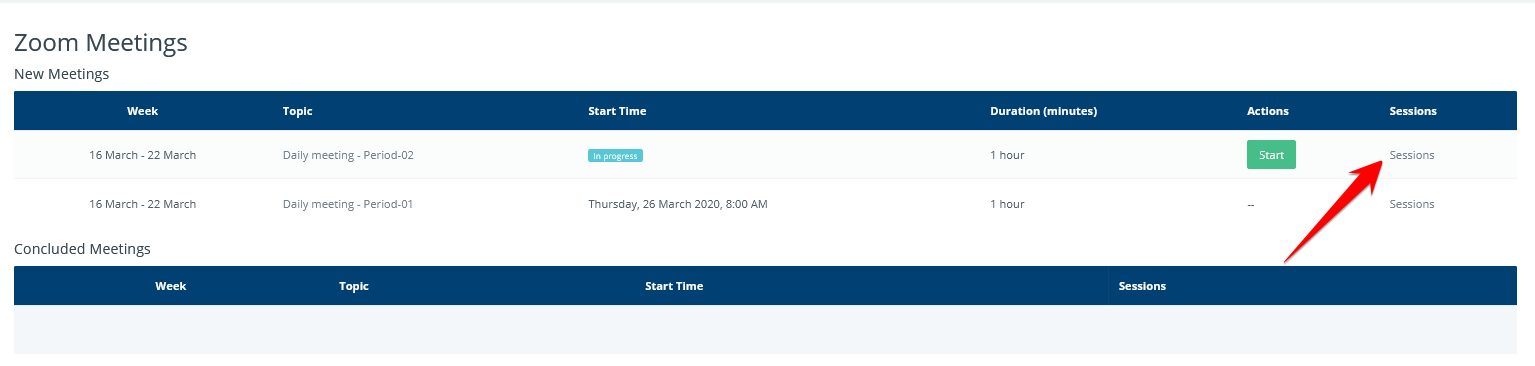
List of attendees
if you want to see who participated to your live meeting, click on the "sessions" link of your meeting. In here, you will see how long this meeting lasted, start-end times and number of participants.
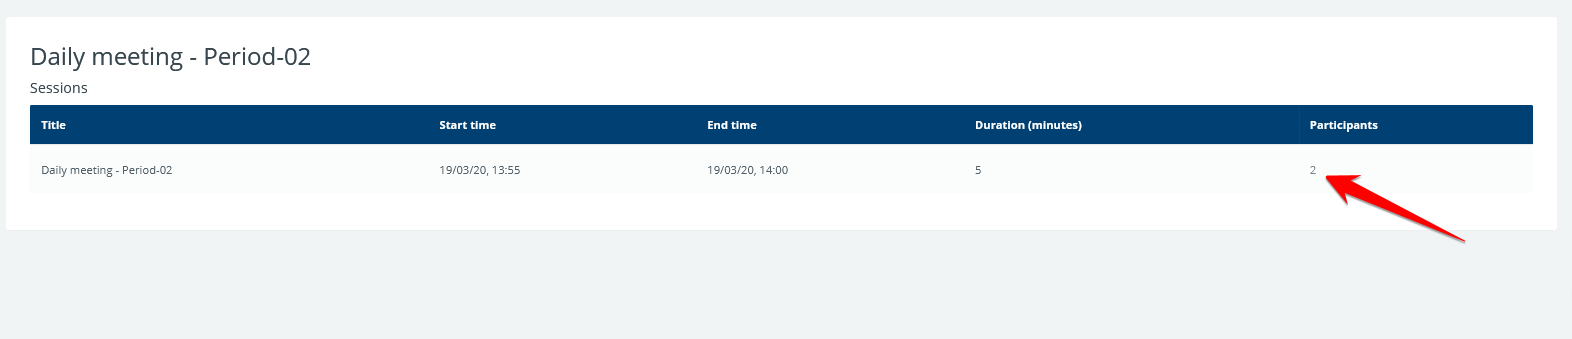
Click on the number to see the list of participants attended this meeting.
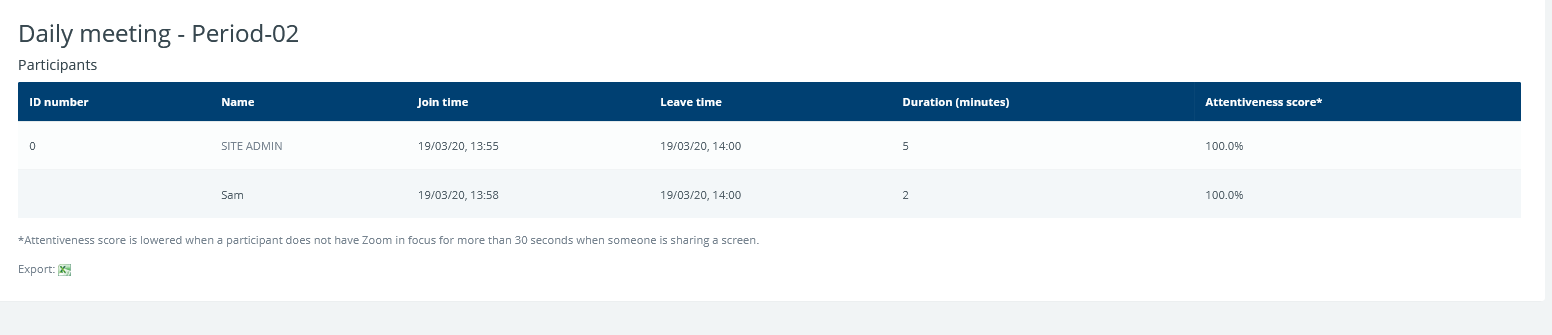
List of participants, duration of their participation, and attentiveness score. This report can also be downloaded to excel spreadsheet.
Attendee Attention Tracking in Zoom can help you monitor your students’ attention to your shared presentation. Whether it’s a video, a PowerPoint, or your desktop, if Zoom is not the app in focus on a student’s computer for more than 30 seconds, their attentiveness score will be lowered.
It may also be helpful to let your students know that you will be tracking their attention to increase engagement.
Adding Zoom Meeting LTI to your course
Once your administrator integrated the Zoom to your site as an external tool, you can start using it in your course.
Only one Zoom LTI activity per course is needed to access your meetings.
- Click the Turn editing on button in the upper right-hand corner of your site page.
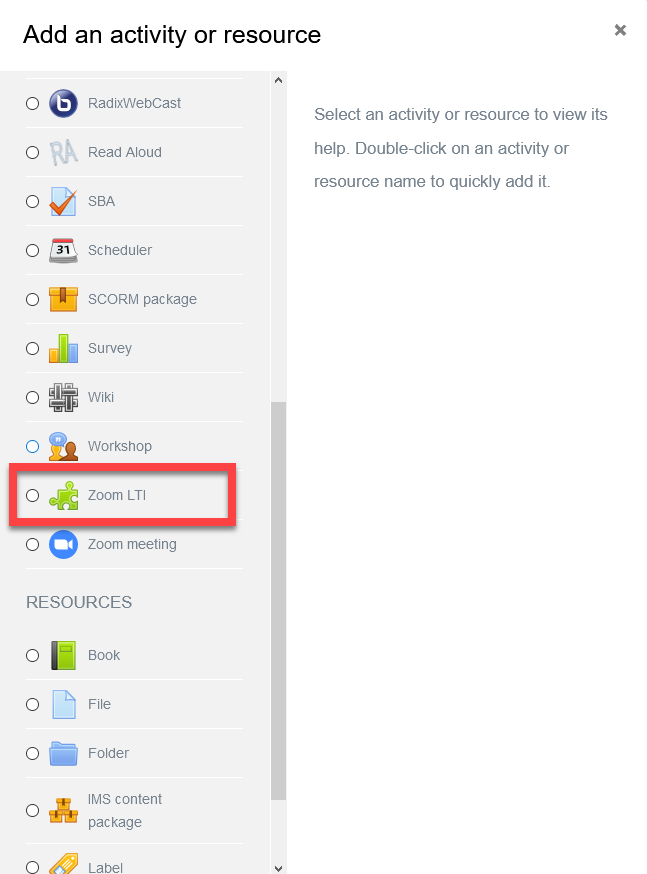
- Click on the Add an activity or resource button where you want your Zoom LTI activity to be placed.
- Select Zoom LTI from the Add an activity or resource pop-up window and click Add.
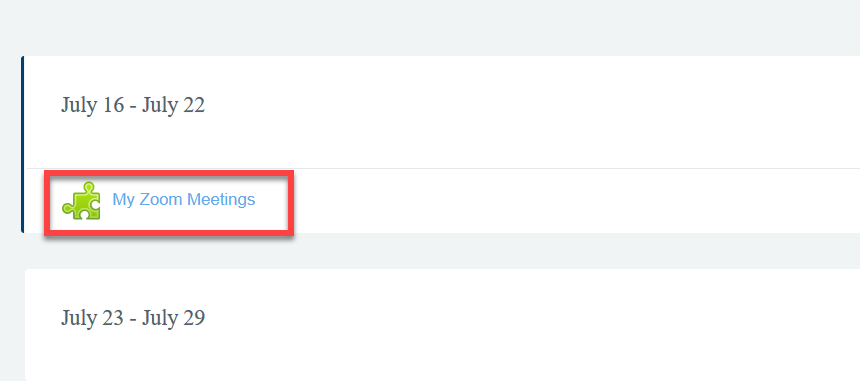
4. On the next window, name your Zoom LTI activity and give a description if you like. Notice that you are not yet creating a session at this step, only embedding your zoom account into your course. So a name like "My Zoom Meetings" or "Algebra 1 Zoom Meetings" would make more sense.
Since the LTI is pre-configured for your site, you do not need to change other settings on this screen.

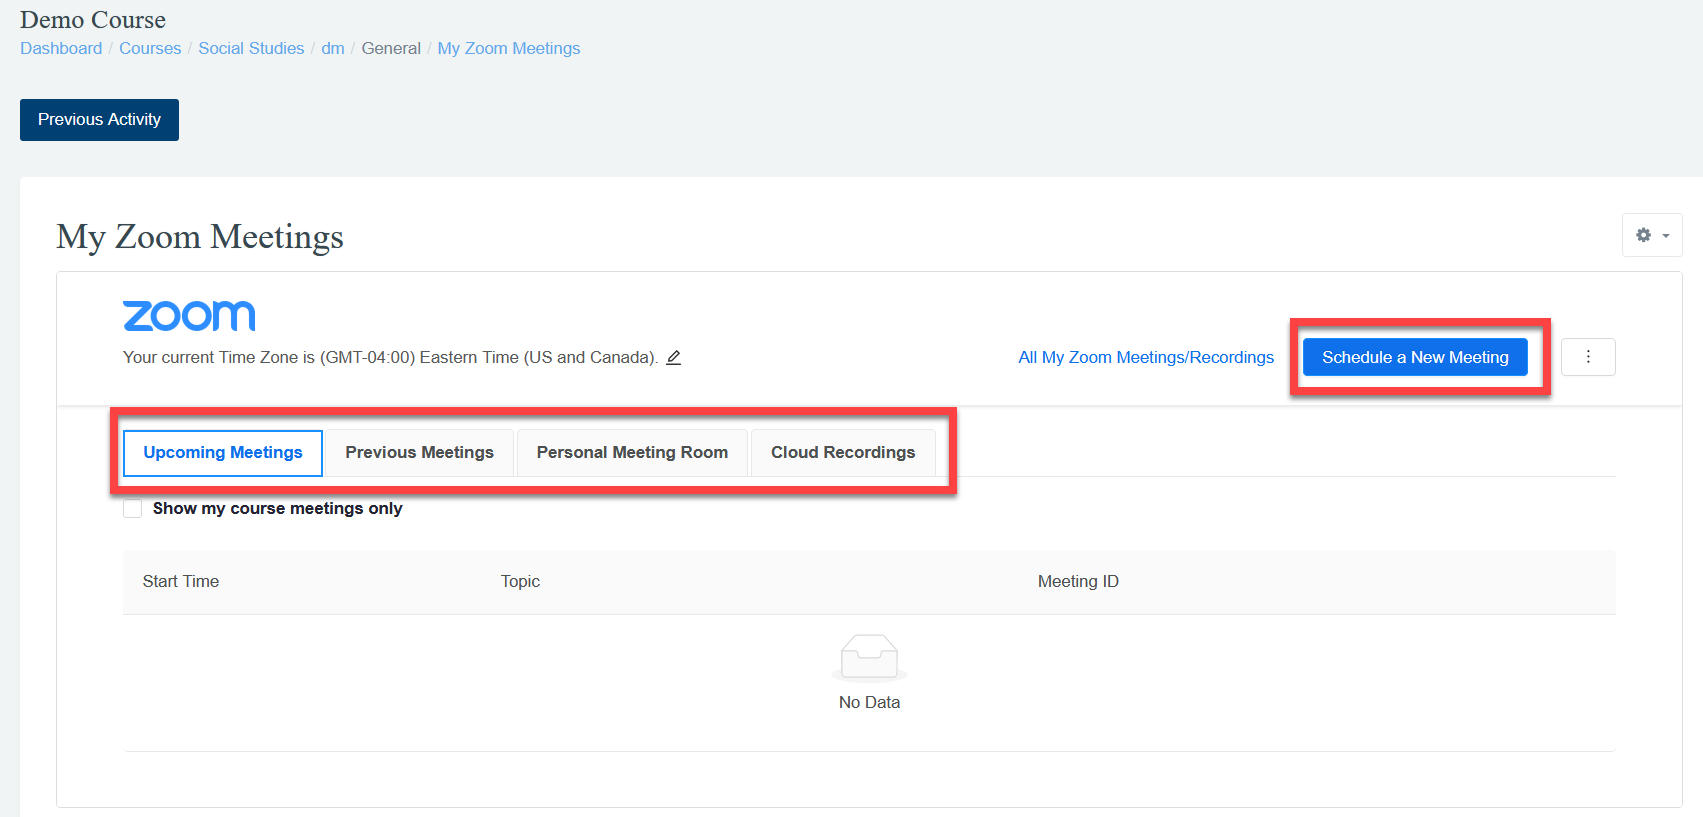
5. Once you click on save and display, the Zoom menus will be displayed as embedded into your course. From this point on, you can schedule a new meeting, access previous meetings, cloud recordings, or your personal meeting room without leaving the Radix LMS site.
6. you do not need to create another Zoom LTI activity to schedule more meetings, Just click on the Zoom LTI activity link located in your course to access the embedded zoom menus.