Quickmail
Quickmail is a convenient way of sending bulk emails to the users in a course or on the site for their courses or on the site. When students are the recipients of the message, their mentors and registered parents can be sent a copy of the message with a click of a button. You can also set automatic notifications to be sent to students and their parents/mentors based on the term grades or course participation using Quickmail.
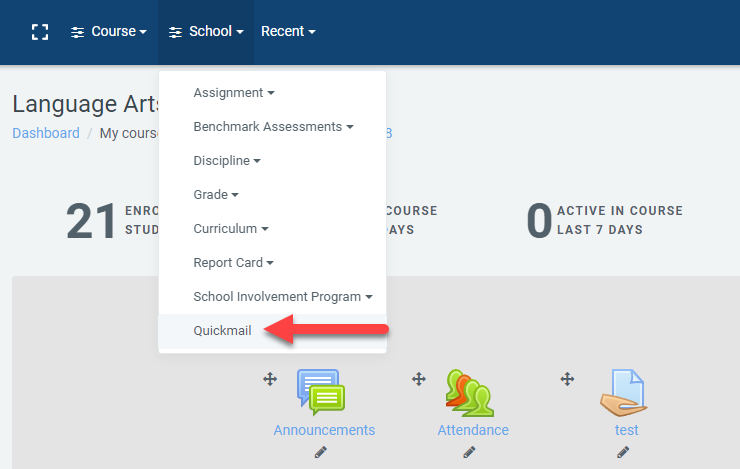
To access the Quickmail, go to your course main page, expand the “School” quick menu on the top menu bar and click on “Quickmail”. This will take you to the Quickmail main menu.
School admins can access the Quickmail link via the dashboard page.
Below is the Quickmail menu for the course you are in. You can start composing new messages, set up notifications, change your signature, or see the draft messages.
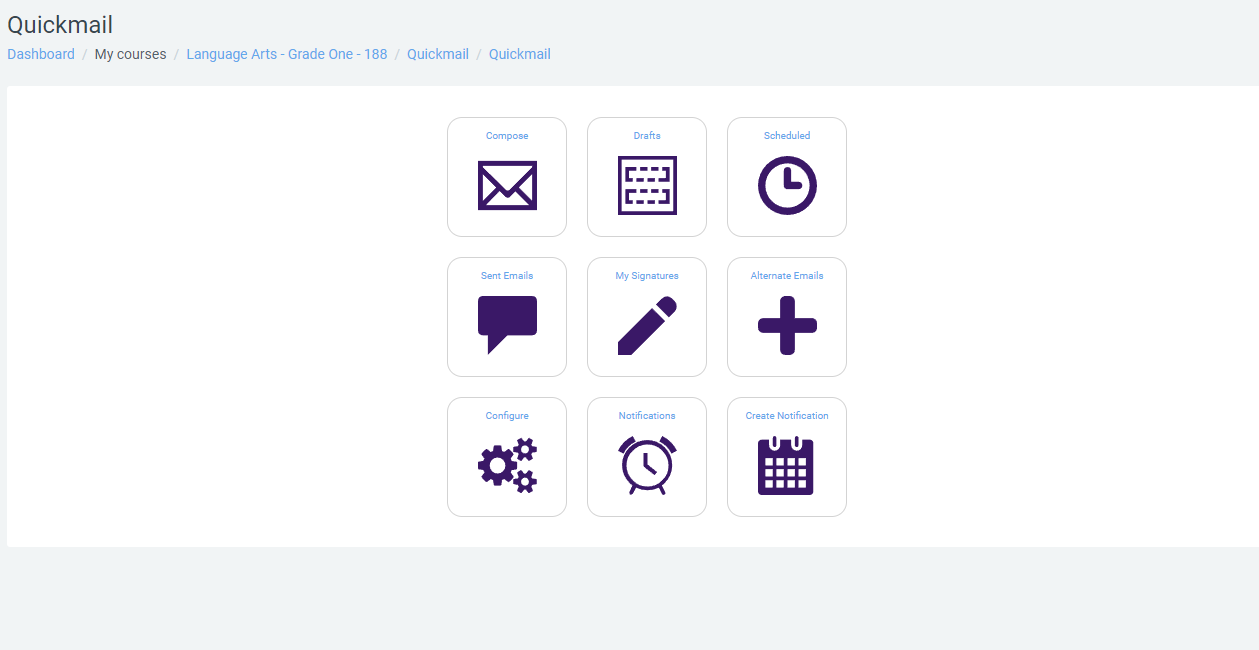
Quickmail main menu for “Language Arts-Grade One” course.
The Quickmail is a course-based block, which means the teachers can only send messages or set up notifications to the participants of a single course at a time. To compose a message to the participants of another course, please navigate to that course and start composing a message there.
Composing a message
To start composing a message, click “Compose” on the main menu. On the “compose course message” page, select your recipients one at a time, by role or by groups/periods. Next, add your subject, additional emails (people who are not participants of your course), and the body of the email.
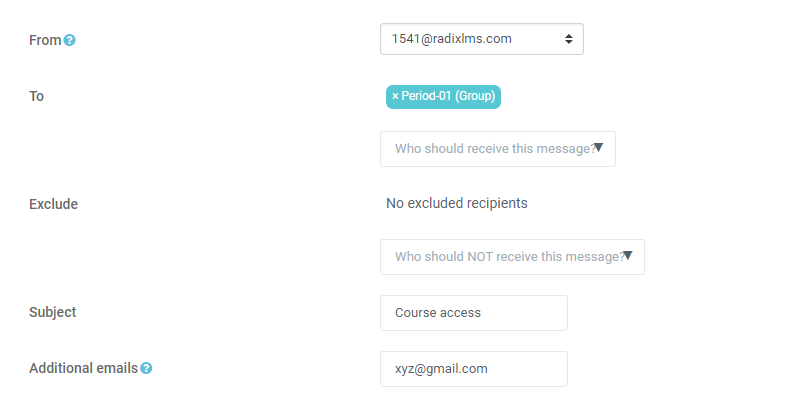
Next, add the message body. You can include dynamic content using the supported user data fields. This will allow you to personalize the email message as in the example below.

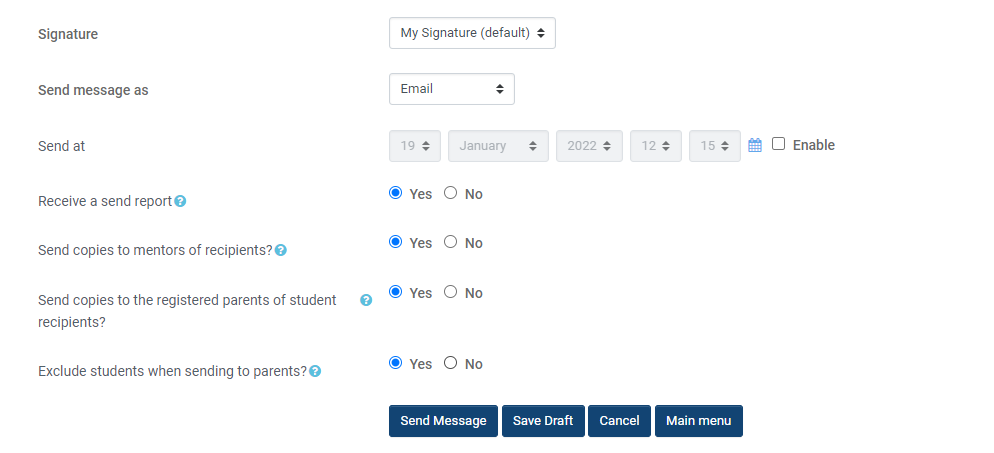
Next, select your signature, message type (email or instant message via Radix LMS), date and time you want this message to be sent (leave disabled to send right away), and select to send copies to the mentors and/or parents of the selected students.
Please keep in mind that only the registered parents of the students will be sent copies of the email.
When you copy the message to the parents, you may exclude the students from the recipients' list. This comes in handy for schools that do not have active email accounts for students.
You can see the history and the details of the sent messages by clicking on the “Sent Messages” button on the main menu.

Message history.
Setting up automatic notifications
There are two types of notifications; Reminders and Events.
Reminder: A recurring message that will automatically be sent on a scheduled basis. Reminders can be used to alert recipients based on the current term grades or course non-participation.
Event: An automated message that is sent as a reaction to a specific event. Events can be used to notify recipients of the first access to the course.
To start a notification, click on “Create notification” on the main menu. On the first page, give a title to your notification and select the type of notification you want to use.
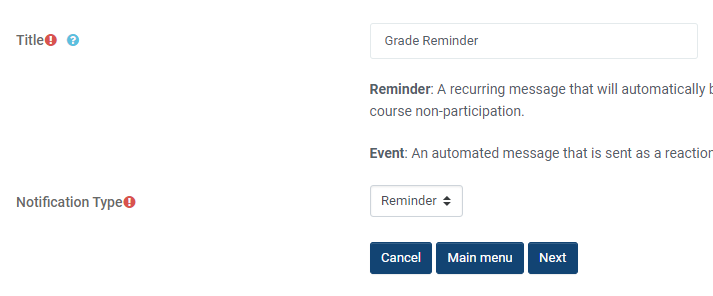
Next, select the model you want to use. Currently, we have two models; Course Non-Participation: Notify course participants who have not accessed the course in a given amount of time, Current Term Grade Range: Notify course participants who currently have a grade within the given range.
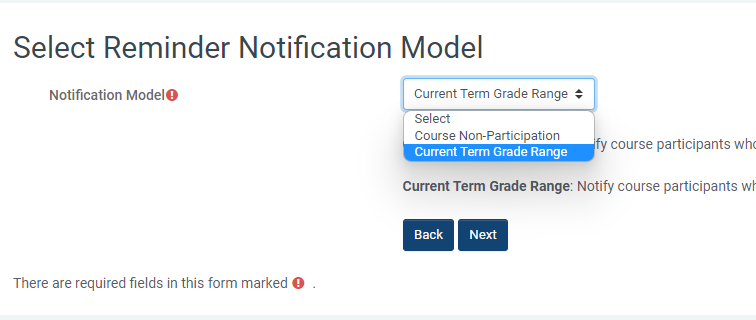
In this example, we selected the grade range model, and on the next page, determine the range of the grades. These are the students' current term grade in the course.

Next, determine the frequency of the messages to be sent and the begin-end dates of the messages.

The above example will send the notifications once a week starting from January 15 to March 15
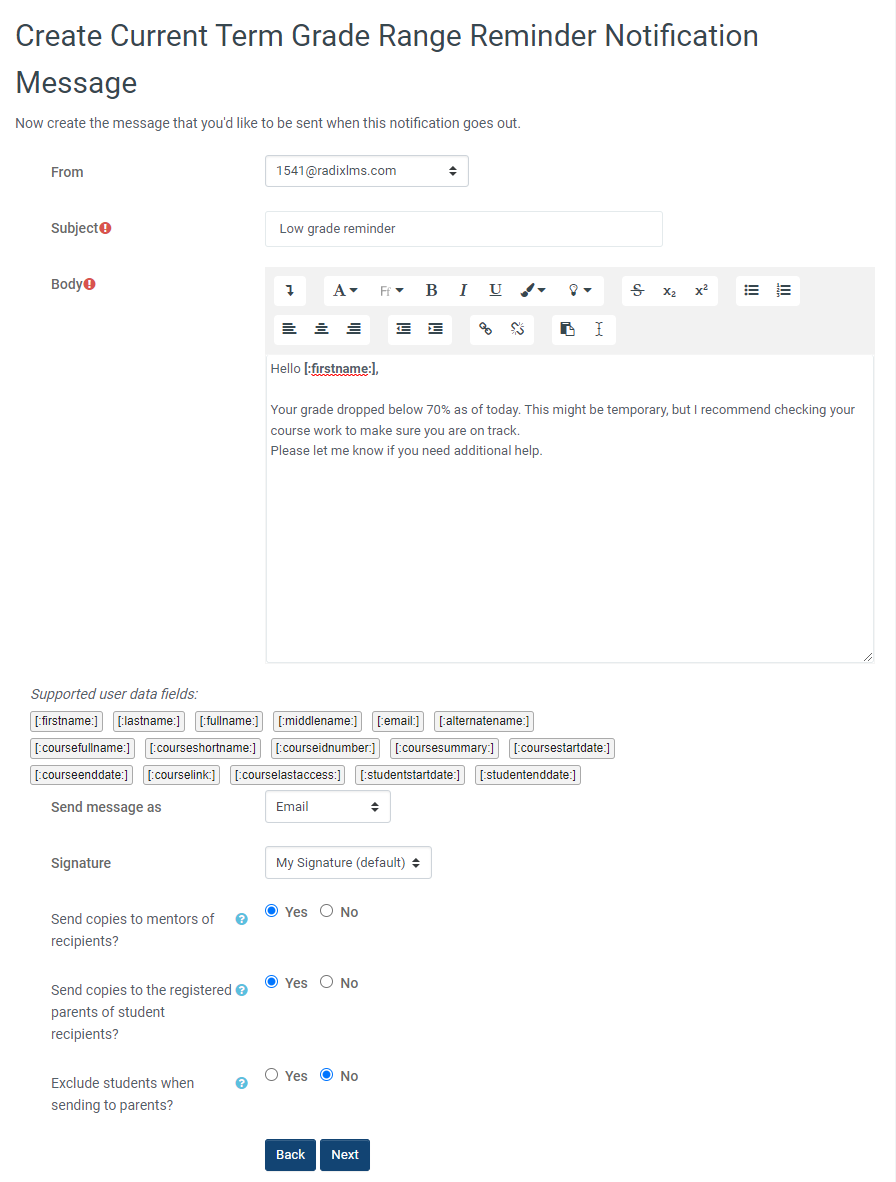
On the next page, type the subject and message you want to send with this notification. The message body can be personalized just like in the email message example above.
You can also copy the message to students' mentors and registered parents, and exclude the student from the recipients' list.
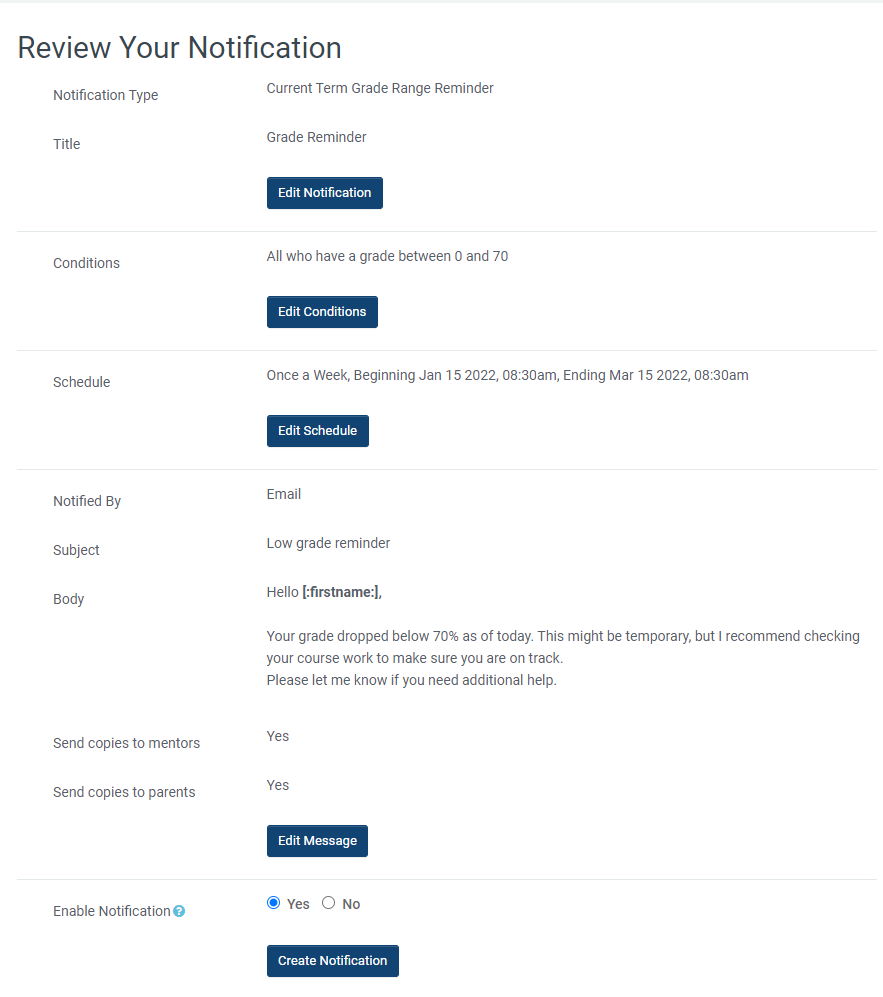
On the next page, you will be able to review your notification settings before creating it. You can chose to enable your notifications right away or later.
