Report Cards / Progress Reports Overview
Report Cards: Printable PDF reports that include academic, behavior, and attendance records. Generated by school admins, usually at the end of grading periods (quarters/semesters).
Progress Reports: Instant, unofficial reports generated by teachers, students, or parents. These reflect the student's current data at the time of generation.
Generating report cards (Admins)
School admins can generate report cards at any time, usually at the end of a term or quarter. Mid-term progress reports are generated using the same settings.
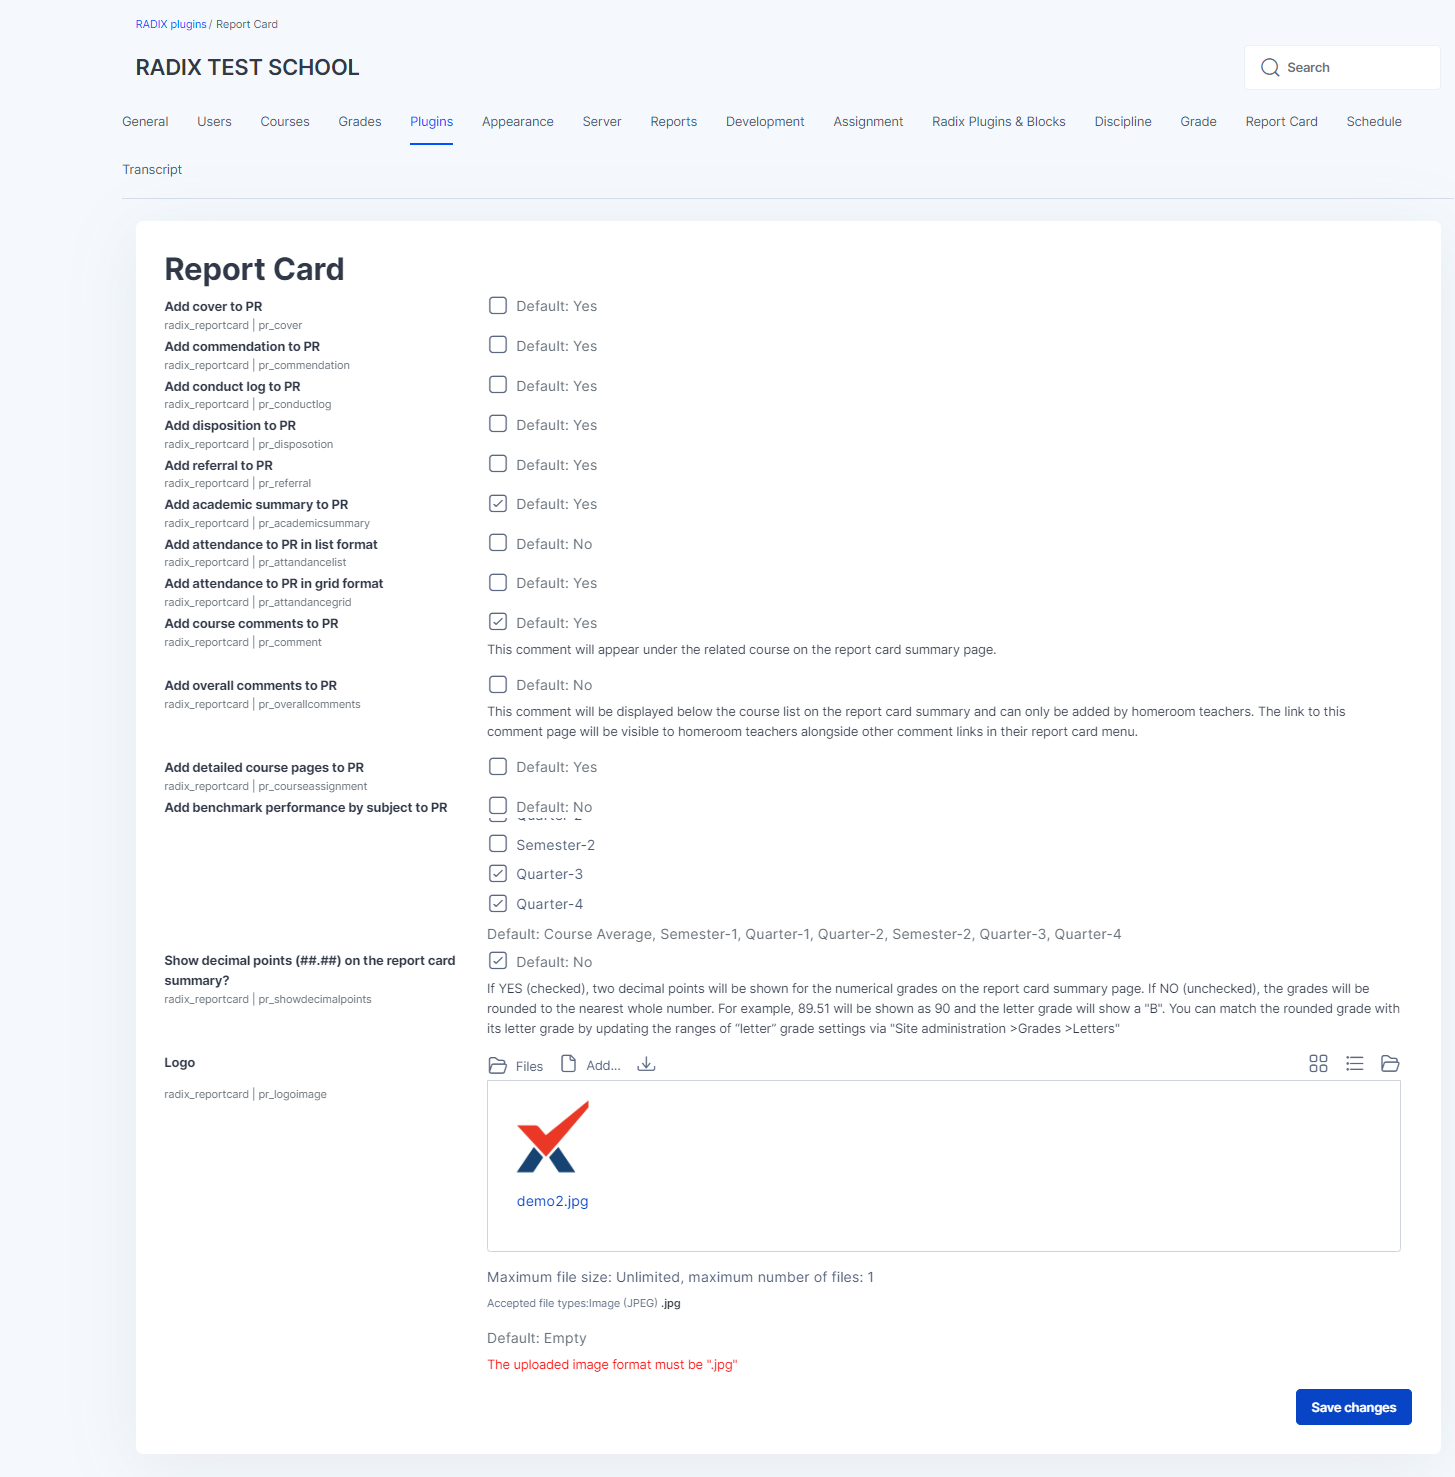
To begin, configure the global Report Card Plugin settings under School > Report Card.
Report card plugin settings
The report card plugin settings are global configurations that will determine the content of both report cards created by the admins and instant progress reports generated by the parents or students on their dashboards.
 Report card plugin settings |
|
Category Averages on Report Cards
Include category averages under each course on the report card summary page. Configure this setting under School > Report Card > Courses for Category Grades. You can select specific courses or departments where you want to show these averages.

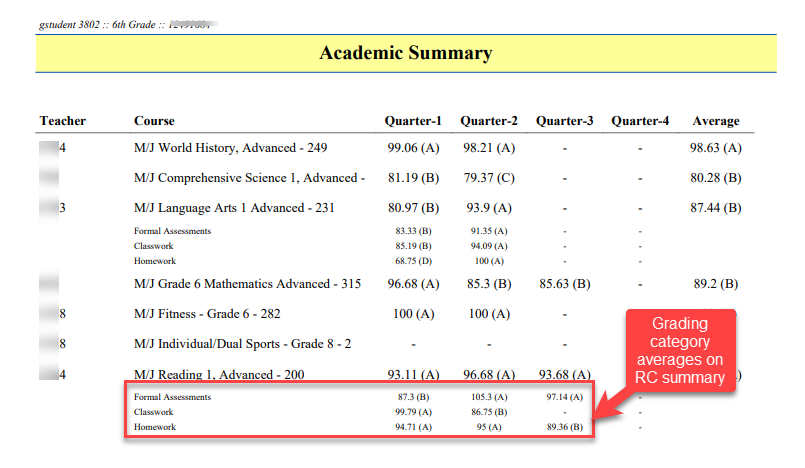 Category averages on the summary page will be shown like below. | 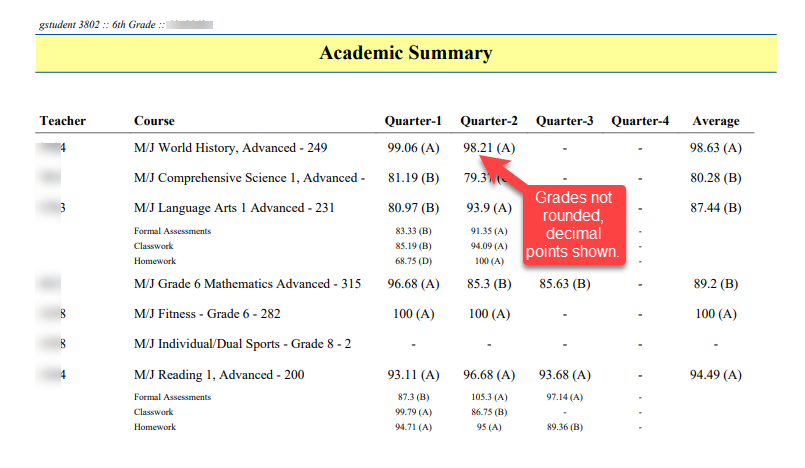 Decimal points shown on RC summary, grades not rounded. |
Percent scales on the summary page
To display percentage scales on the report card summary page, ensure the option to show percentage information is enabled. These scales will appear at the footer of the summary page and are usually tied to elementary courses if they are being used.
 Settings to include letter (%) scale information. | 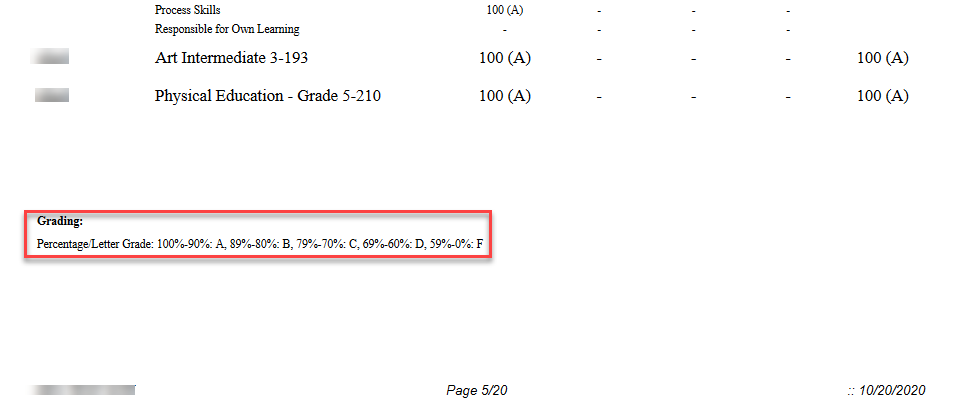 Grading scales on the report card. |
Adding & Generating Report Cards
Once the global settings are configured, you are ready to generate your report card.
Adding Report Cards:
Navigate to School > Report Card > Report Cards.
Assign a name for the report card folder and select the appropriate settings (enable for students, grades, allow teacher comments, etc.). You can modify these settings later as needed.
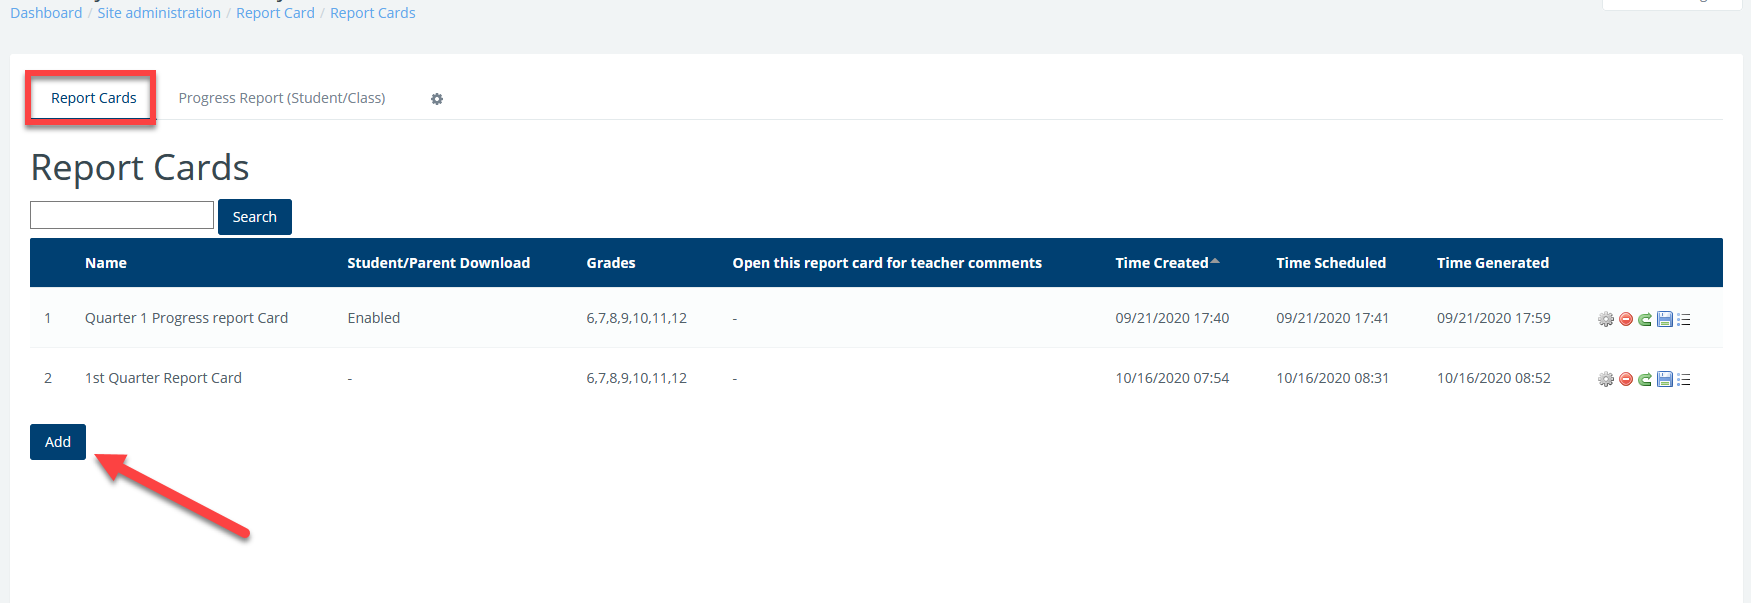 List of report card generated, click add to add your RC | 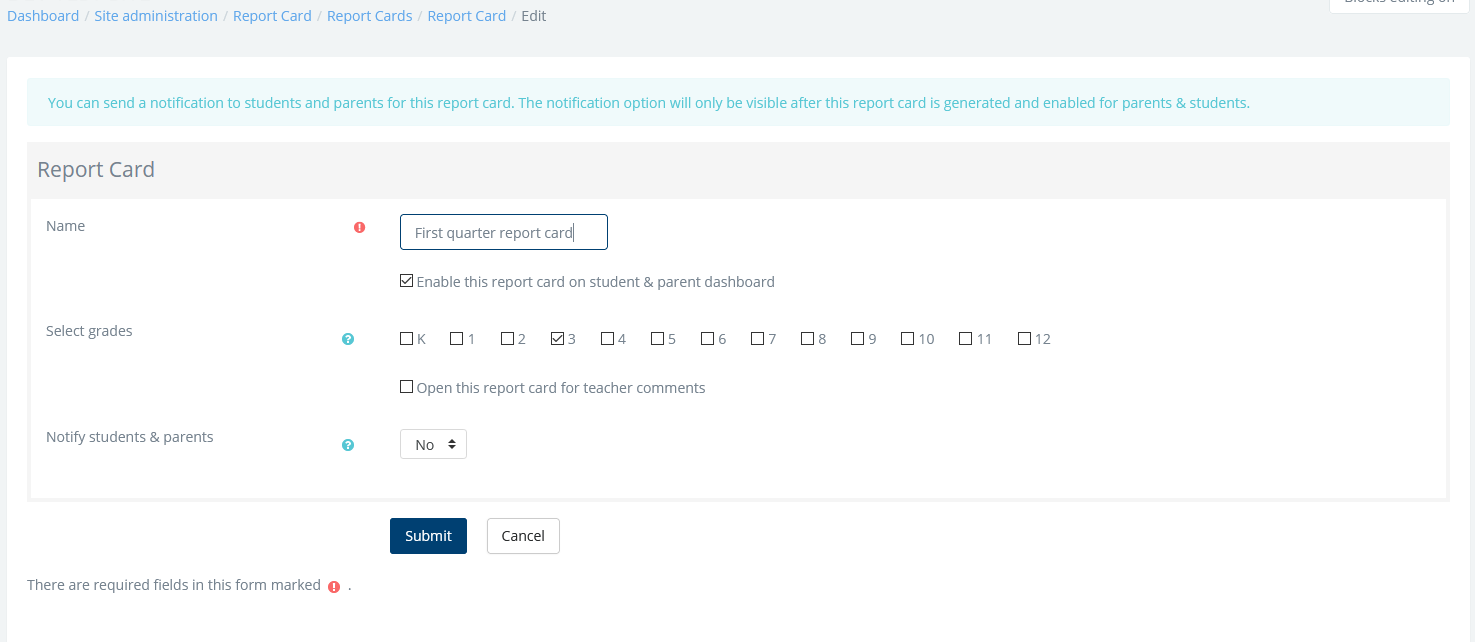 Name and save your RC to go back to the list. |
Generating Report Cards:
Once the report card is added, click the play button to start the generation process.
Configure titles, and sorting options, and select the term for which you’re generating the report. Make sure to enable teacher comments if desired.
Notifications will be sent to the specified email addresses in addition to the user who generates them once the report cards are ready (typically 5-10 minutes).
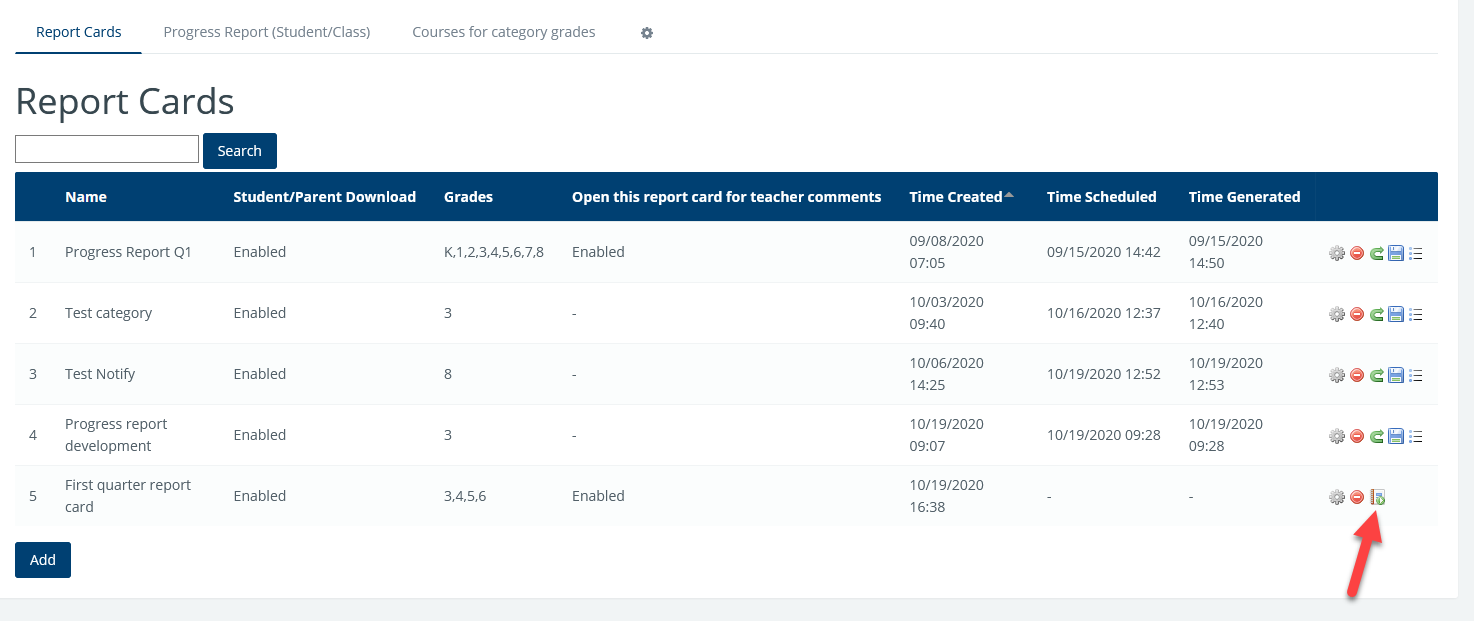 Click on the play button to go to the page where other information will be added and the process will be started. | 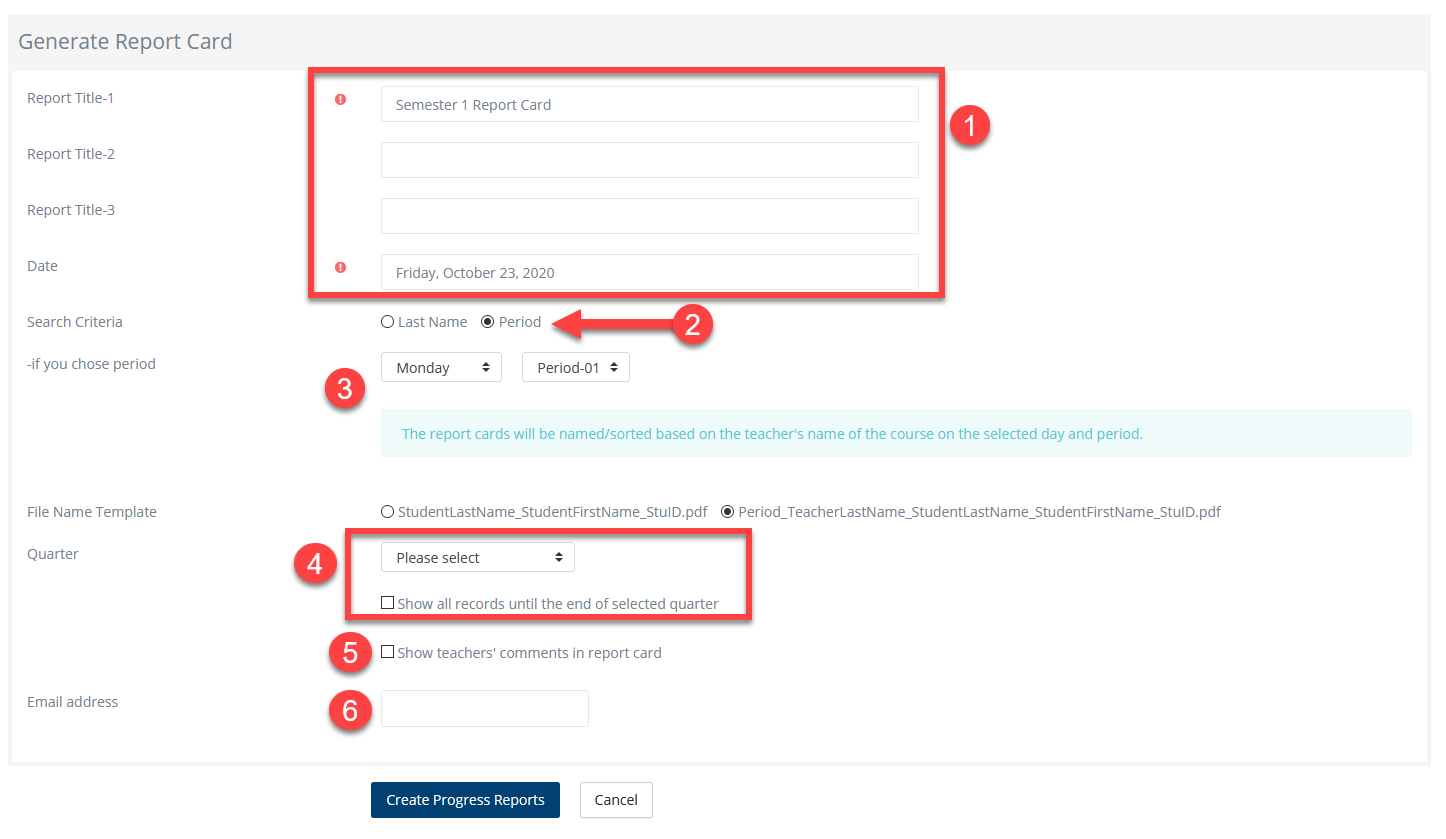 Report card configurations |
Review or re-generate report cards
After generating report cards, new icons will appear in the report card list for reviewing, re-generating, or enabling them for students.
If you need to re-generate the report cards, note that this will delete the previously generated PDFs and replace them with new ones based on updated settings.
 | Edit report card settings such as to enable for students/parents, open for comments, notify parents/students. |
 | Delete report cards. If the report card has any comments added by teachers, you can not delete them. |
 | Re-generate the report cards. When you click on this button, you will have a chance to change report card settings before re-generation. This operation will delete the previously generated PDFs for this report card and generate the new ones. |
 | Save all of the generated PDFs to your computer as a zip file. |
 | See the list of the report cards generated for each student. You can search by student's name and check the accuracy of the reports. |
Teacher Comments on Report Cards
Teachers can provide individualized feedback on students’ performance by adding comments directly to report cards. They can access this feature under School > Report Card > [Report Name]. Teachers can filter students by course, period, or name, and then add comments in the designated text boxes. Comments can be course-specific or overall comments (for homeroom teachers). These comments are automatically saved and can be edited up until the report cards are finalized. Once the report cards are generated, comments are locked and will appear in the final PDF.
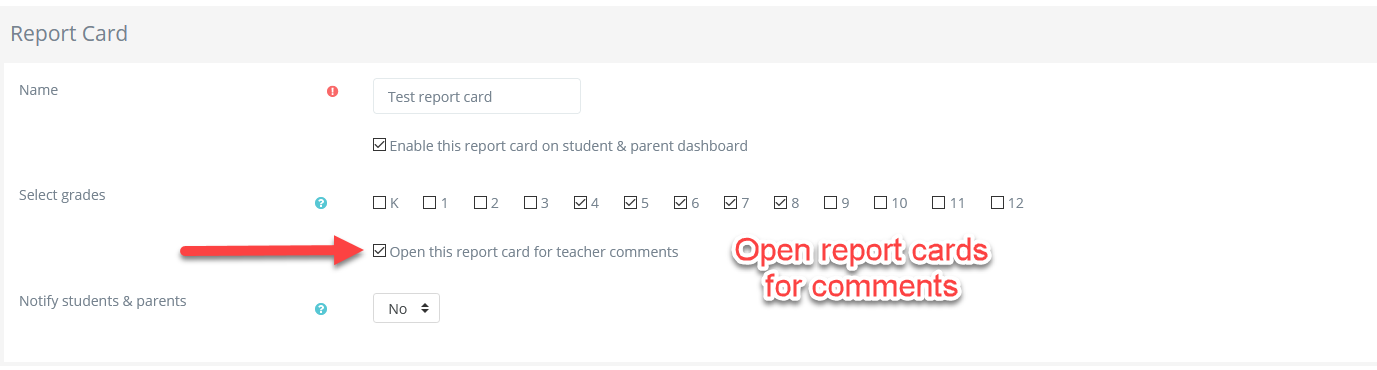 Open report card for teachers to comment | 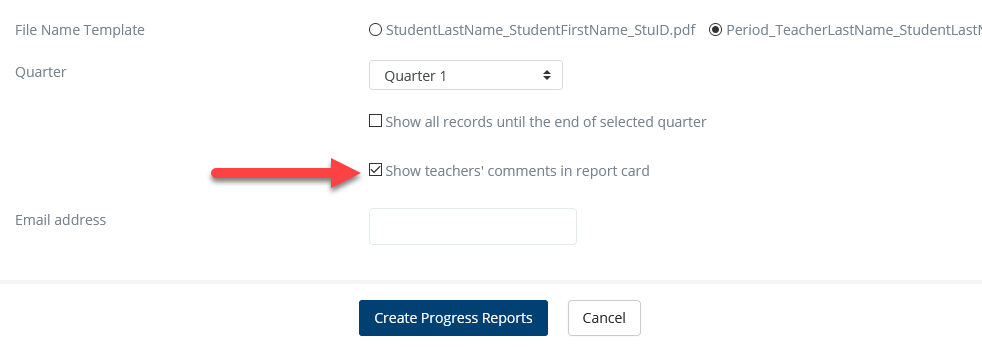 Show report teacher comments on the report card |
Comment Visibility: Administrators can choose whether or not to display teacher comments on the final report cards.
Overall Comments: Homeroom teachers have the option to add overall comments for their students, which will appear on the summary page.
Editing Comments: Comments can be edited until the report cards are finalized and generated. Any changes made after the report generation will not be reflected in the final PDF.
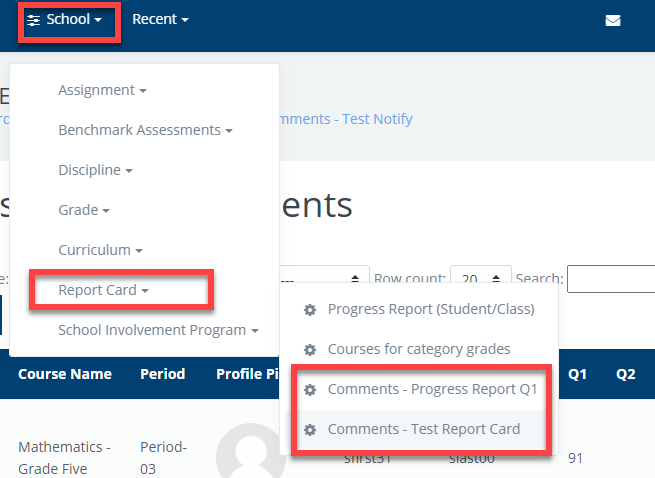 Accessing the report card comment page | 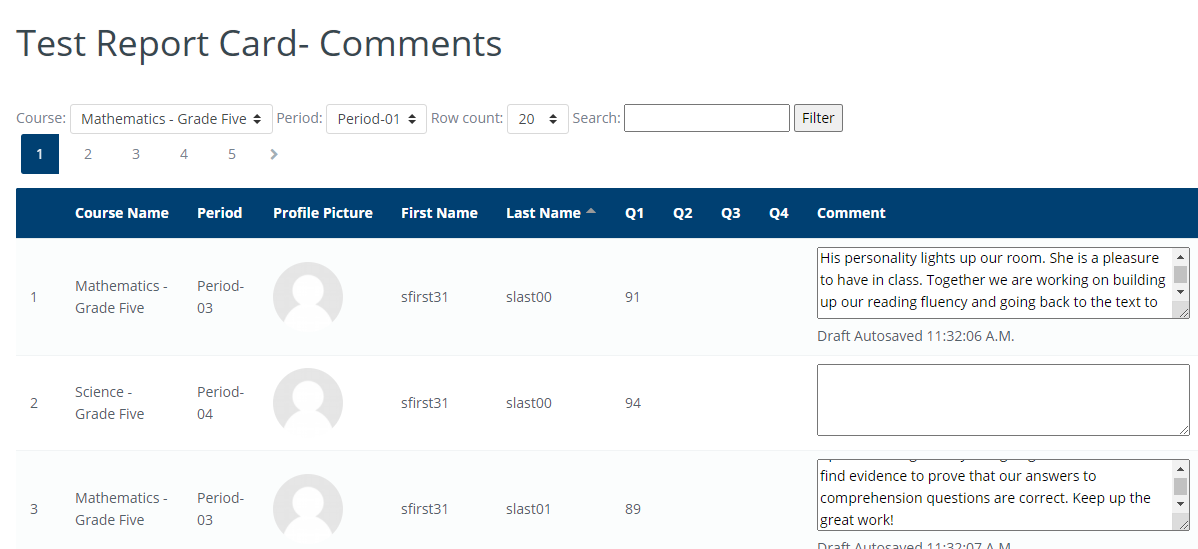 Add report card comments |
Note: From the same menu link, administrators can see the comments teachers add, but they can not add/change any comments.
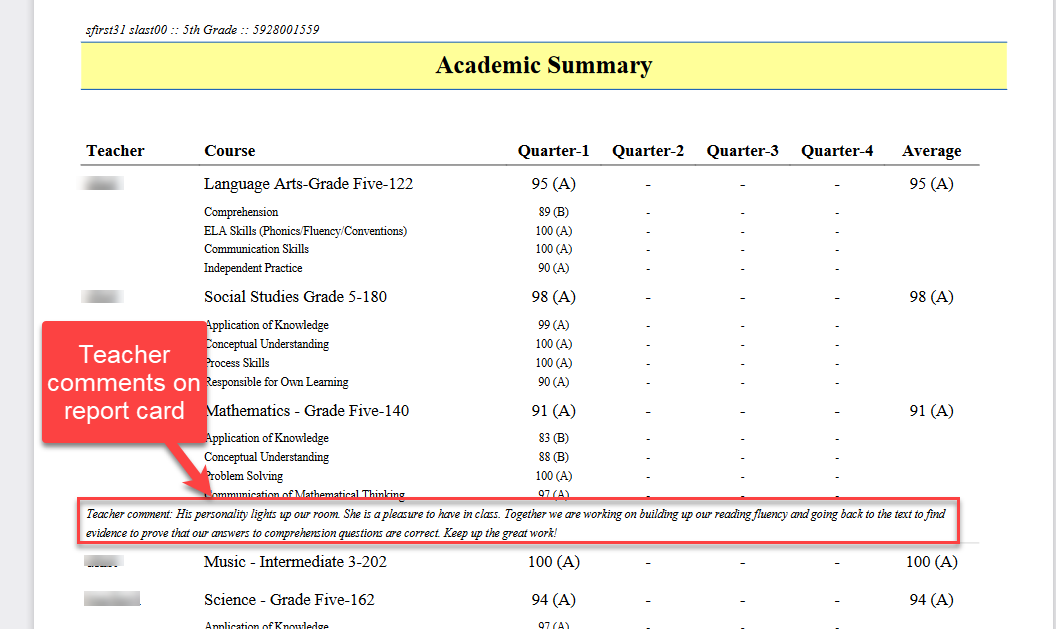 Course comment example on report card | 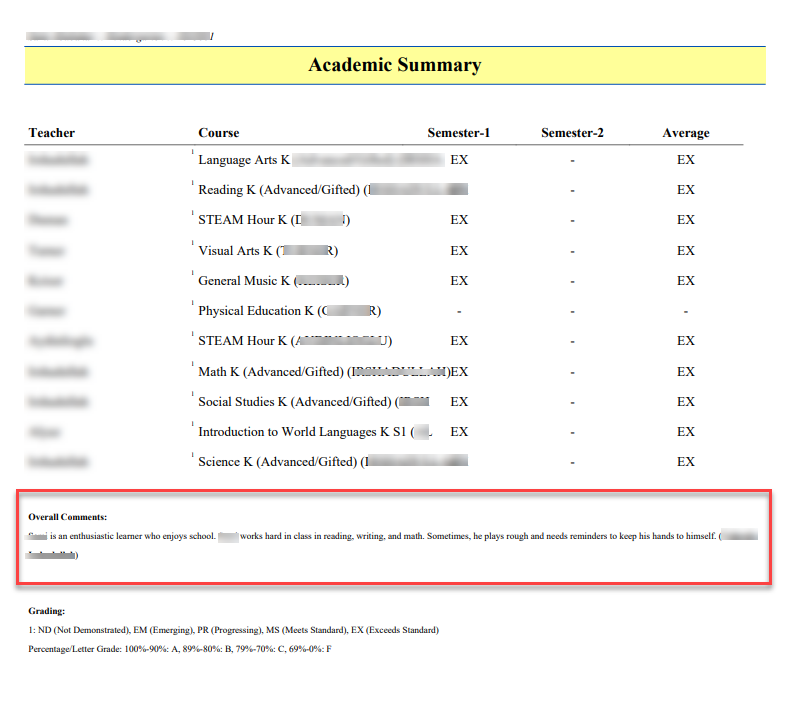 Overall comment example on report card |
Notifications for Parents and Students
Once report cards are generated and enabled for viewing, notifications can be sent to parents and students via the mobile app, browser, or email (depending on user preferences).
Ensure the parent role has the required permissions to receive these notifications.
 Edit report card | 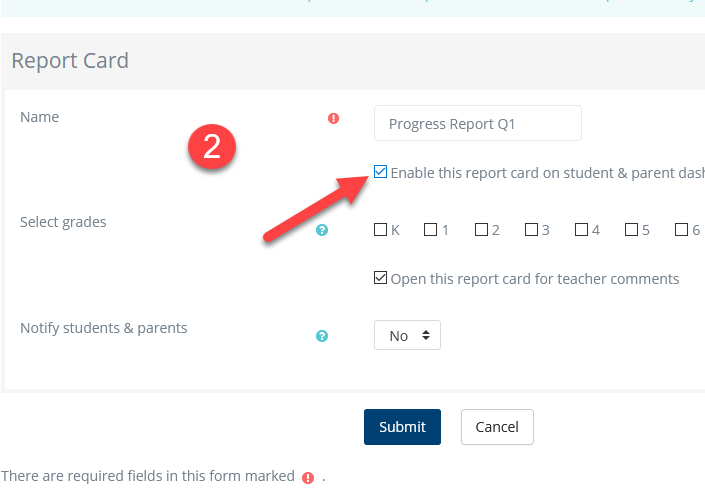 Enable to see notify option | 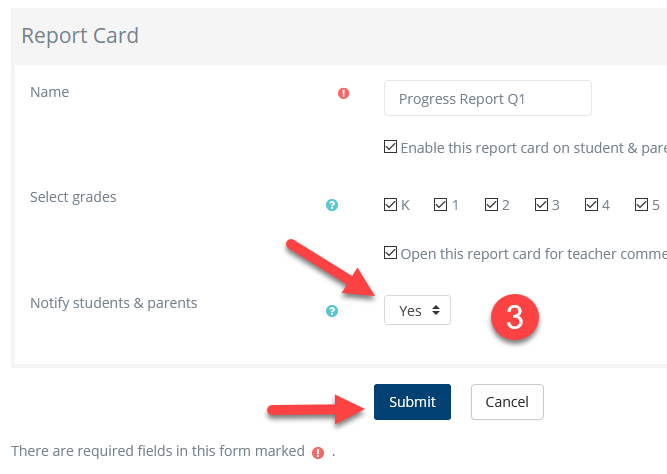 Select "yes" and submit |
Uploading External Reports
External reports allow administrators to upload pre-existing PDF progress reports from external sources into Radix LMS. Each report must be uniquely named using the student’s ID number (e.g., 1234567.pdf). If you're uploading multiple files, compress them into a zip file for bulk upload.
Steps:
Navigate to School > Report Card > External Reports.
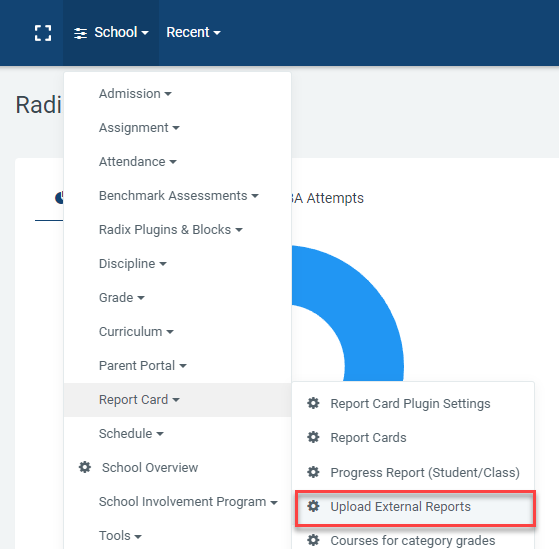
Upload External Reports
Click “Add” to create a new external report folder, giving it a name that students and parents will see.
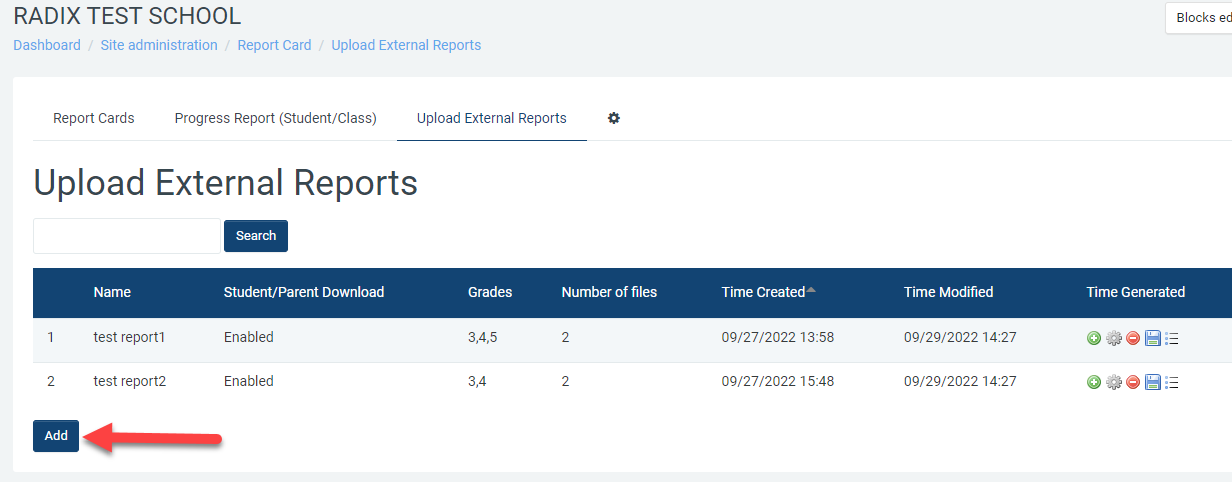
List of external reports
On the next page, name your external report. This will be the name students/parents see on their dashboards. If you want to, enable this report for parents and students and select which grade levels should see this report. After you save and upload the reports, you can come back to this page to send a notification message to the parents and students letting them know that the report is ready for them to view. Click “Save & Next” to go to the upload page.
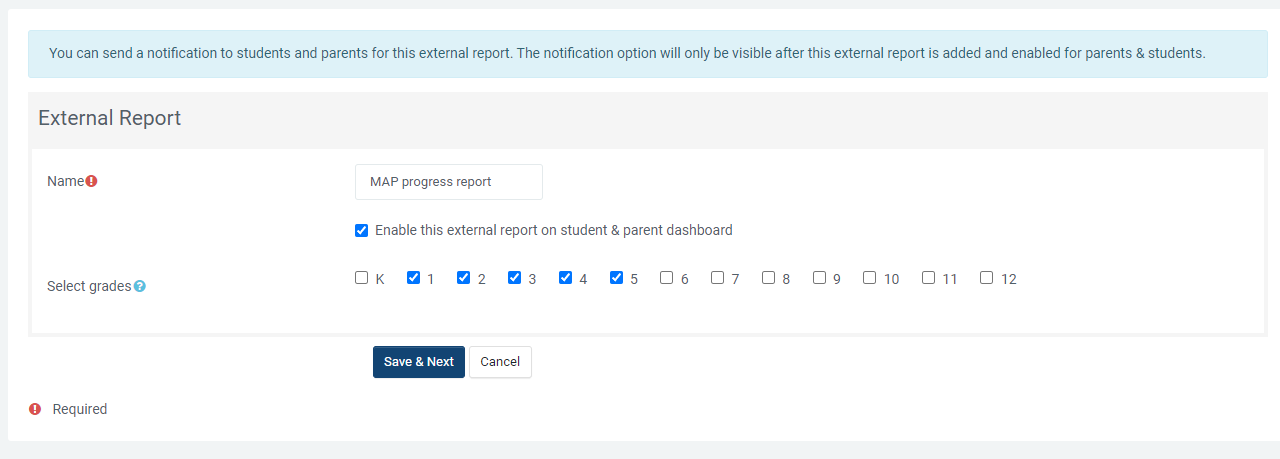
Add an external report
Upload the individual or zip file containing the PDFs. The system will map each file based on the student ID.
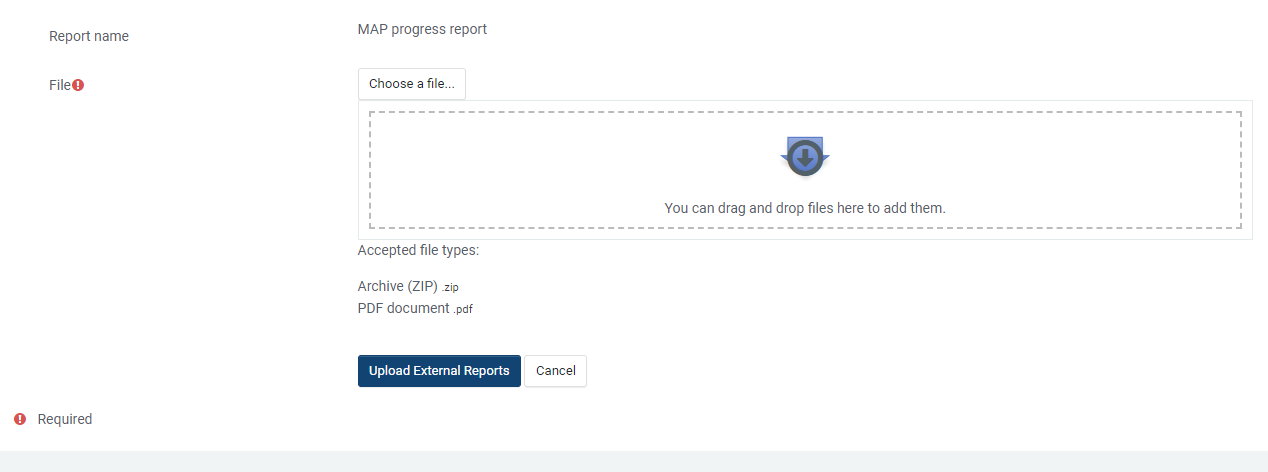
Upload the files
After uploading, you should see an output like below showing the result of upload for each file. From here on, you can go back to the external reports list and see the uploaded pdf files.
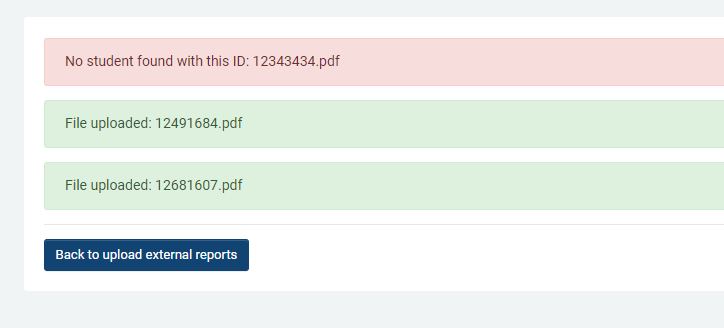
Upload output
Once the reports are uploaded, you can enable them for students and parents to view and send notifications to inform them of the new reports. Administrators can also download the uploaded PDFs as a zip file for backup or archival purposes.
Action icons:
 | Upload pdf files to an existing report. This operation will overwrite the previously uplaoded PDFs for this report. |
 | Edit external report settings such as name, enable for students/parents, notify parents/students. |
| Delete external report and ALL uploaded pdf files. This operation can’t be reversed! |
| Save all of the uploaded PDFs to your computer as a zip file. |
| See the list of the external pdf reports uploaded for each student. You can search by student's first and last name or ID number. |