Teacher Quick Guide
A teacher has responsibility for the materials in his/her own course. This quick start guide introduces Radix LMS's course management features to those with the Editing Teacher Role in a course.
Login & Navigation
Your Radix LMS site URL is different than your school website URL. Please ask your school to provide you with the URL you should be using to log in to your account on Radix LMS. This URL is also used to access your account via Radix LMS mobile app. Although Radix LMS works on all browsers, we highly recommended using Firefox and Chrome.
Once you are on the site, there are a couple of ways to log in to Radix LMS. The first option is to use your username and password provided by your school. If your school allows you to use your email address as your username, you can do so as well. In this case, the username input box would have "Username/email" as a placeholder.
The other way to log in to the site is by using your email account. If this feature is turned on, you would see the corresponding buttons under "Log in using your account on." Login with an email account will only work if you have an official email from the school. Personal emails may not work with this feature.
An advantage of login in using your email account is to have easy access to your drives such as Google Drive or One Drive from within the Radix LMS. For example, you would have the ability to attach files from your drive to your assignments without leaving the Radix LMS site.
Log in to Radix LMS
Course
A course is a space on the Radix LMS site where teachers can add learning materials for their students. A teacher may have more than one course and a course may include more than one teacher and more than one group of students usually called "periods". By default, a regular teacher can't add a new course. See Scheduling for information on how courses may be created and students may be scheduled/enrolled in courses.
A course can display its materials in a number of ways or 'formats'. By default, courses in Radix LMS are in a weekly section format. You can show all the sections at once or just reveal them one at a time. See Course settings for more information.
Course sections are named by the first and last date of each week and may be renamed by turning on the editing and clicking the configuration icon next to the section name. Sections may also be moved by drag and drop and sections added or removed by clicking the + or - underneath the bottom section.
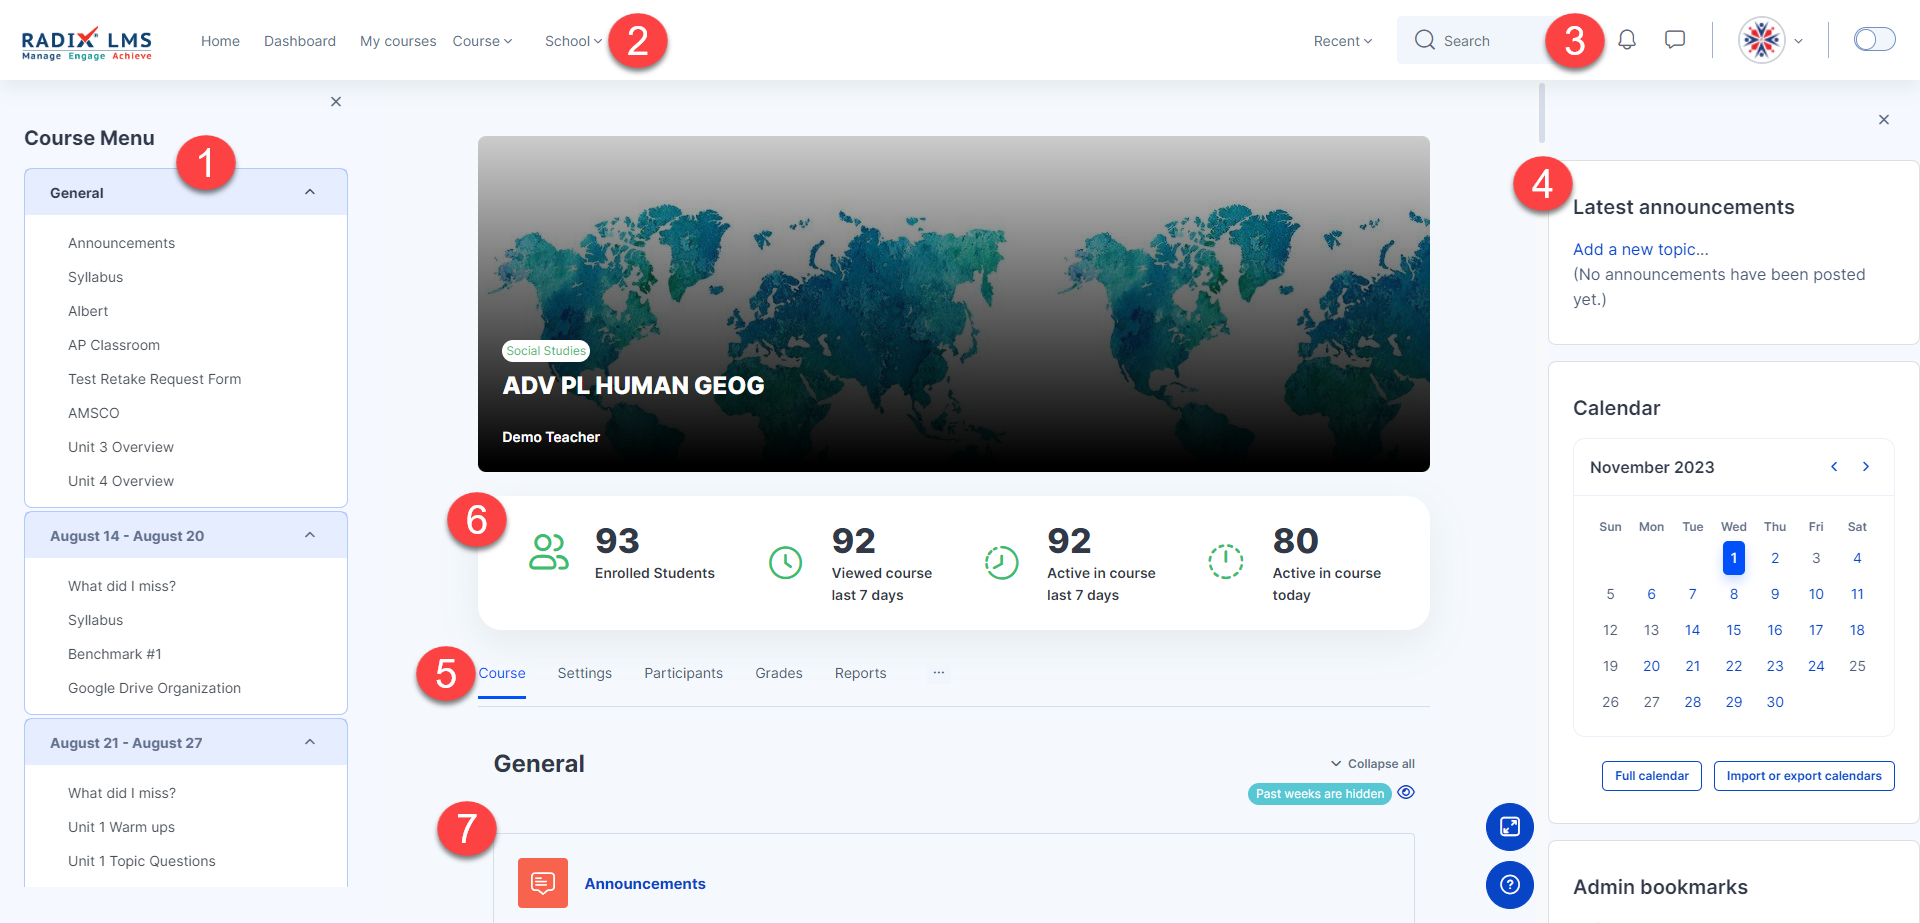
Parts of a course homepage
A default Radix LMS course page looks similar to the one below with a standard weekly format.
 |
|---|
Course navigation menu: This course navigation menu helps you find your way around the course. It will have the list of all the activities and resources that you have in the course separated by sections (weeks). The course navigation will scroll when you start scrolling the course page. It will highlight the activity you are on within the course’s main section. The course navigation can be hidden by clicking on the “X” hamburger icon on the corner.
Quick menus: Dropdown menus where you can navigate through the site from any page. A related page menu is added to the left once you land on the page.
Notification, messaging icons, user menu, and edit mode switch: Users can change their notifications and other preferences via the user menu. Use the edit mode switch to turn the editing on/off for your courses.
Side blocks: These blocks help you access things easily such as calendar events, announcements, bookmarks etc. Which blocks you see depend on what the administrator has selected and what you, as a teacher, choose to add.
Course menu: This menu is the same as the course drop-down menu for convenient access to course-related pages.
Course stats: This section will show the number of students enrolled and how active they are in your course.
Course sections: Course sections are named by the first and last date of each week and maybe renamed by turning on the editing and clicking the configuration icon next to the section name. The top section “General” will always be pinned on top, but the other sections will be hidden when that week is passed.
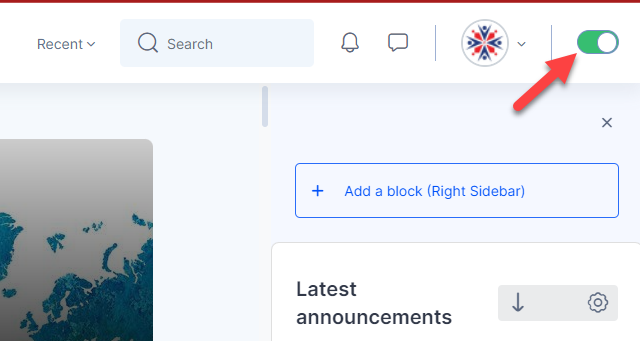
Turn editing on
To add, edit, or delete anything on the course page, you must turn the editing on. The edit mode switch is located in the top right corner of the page. If you see the edit icons next to activities and resources on the course page, that means the editing is now turned on. Once the editing is turned on, it will always stay "on" unless it is turned off which can be done by clicking on the same link.
Activities and resources - Adding an assignment
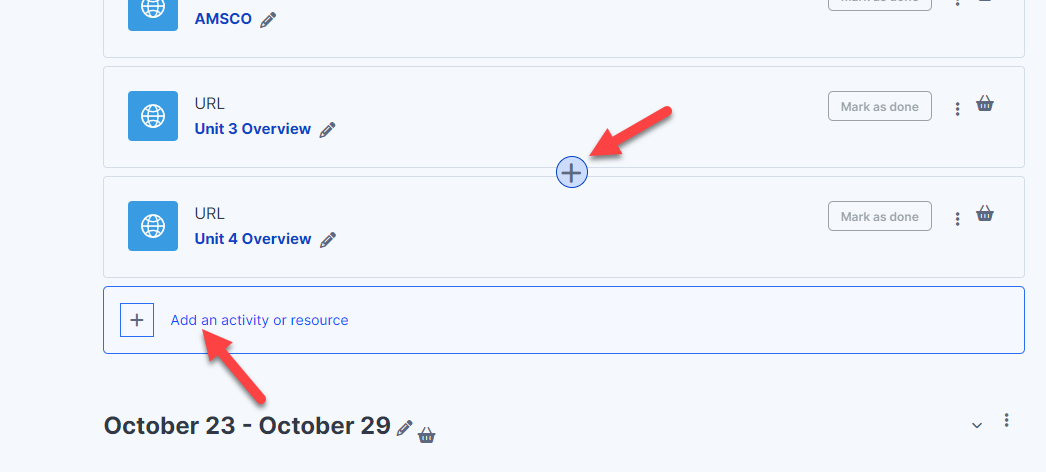
To add an activity (assignment, SBA, forum, chat, blog, etc.) or a resource (documents, links, videos, etc) to your page, turn on the editing from the switch on the top right corner. Decide which week/section you want to add your activity to and click the "Add an activity or resource" link of that week to open the new activity chooser. You may also click on the Plus sign in between the activities which will place your new activity/resource you are creating in that location. Click on the activity or resource you want to add to your course on the activity chooser pop-up window.
More information about types of activities and what they are used for can be found here: Activities & Resources, And how to grade an assignment can be found here: Grading
 | 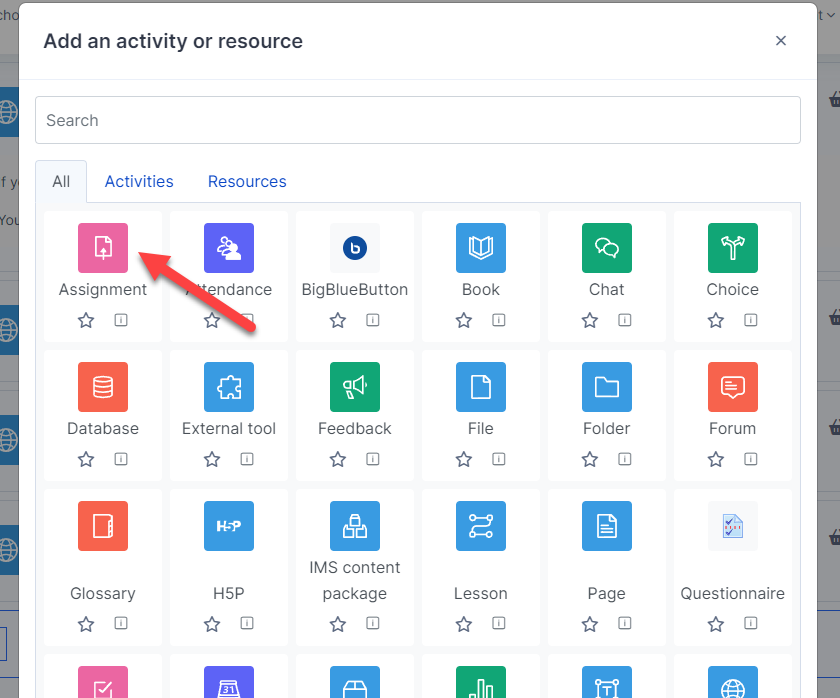 Activity chooser |
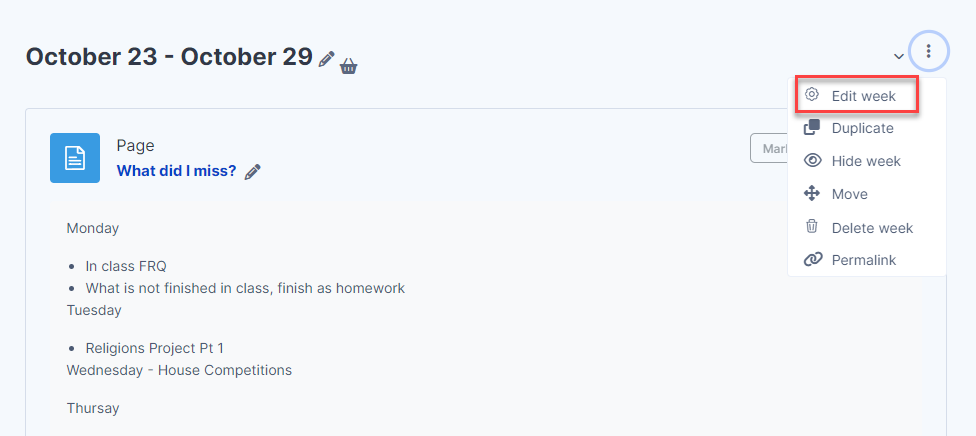
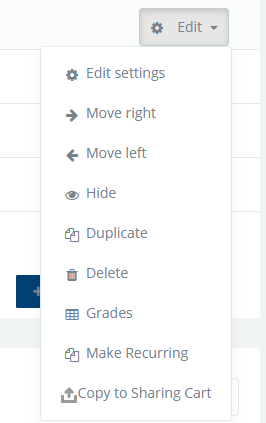
Edit a course section
To edit any course section, 1-Turn editing on, 2- Click the Edit menu next to the section/week you are editing. You can edit its description, change the title, or other settings. You can also hide the entire section/week from your students or get a permalink of the section.
Course image
The course banner has a background image by default. This image is the course's image and is accessible to anyone from outside of the course just like the course name and/or summary. This image can be changed by going into the course settings. Upload the image of your choice in jpg, gif, or png format into the "Course image" box on the course settings page.
This will also change the course's thumbnail image on the teacher or student my courses page.
Drag&Drop files, folders, or videos
Certain resources and activities may be added using drag and drop with the editing turned on:
To add a file, simply drag and drop it onto the course section where you'd like it to appear
To add a folder of files, simply zip the folder, then drag and drop it onto the course section where you'd like it to appear, answer 'Unzip files and create folder' to the popup dialogue, then click the upload button
To add a video to your course page, simply drag and drop it onto the course section where you'd like it to appear, answer 'Add media to course page' on the popup dialogue, then click the upload button.
File or media:
Using the text editor
The text editor (sometimes referred to as the 'HTML editor') has many icons to assist the user in entering content. Many of these icons and functions should be familiar to anyone who uses a word processor.
Some examples of where you will see the text editor include Editing Section headings, a description of an activity, writing an answer to a quiz question, or editing the content of many blocks.
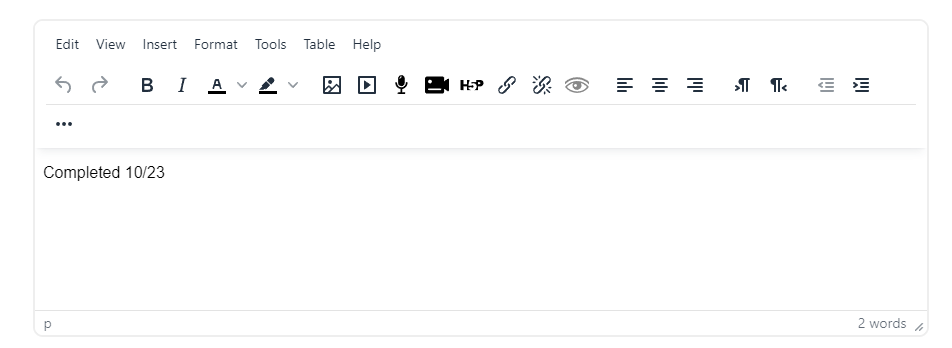
Text editor with the menu shown above. Move your mouse over each icon to see its name in the tooltip.
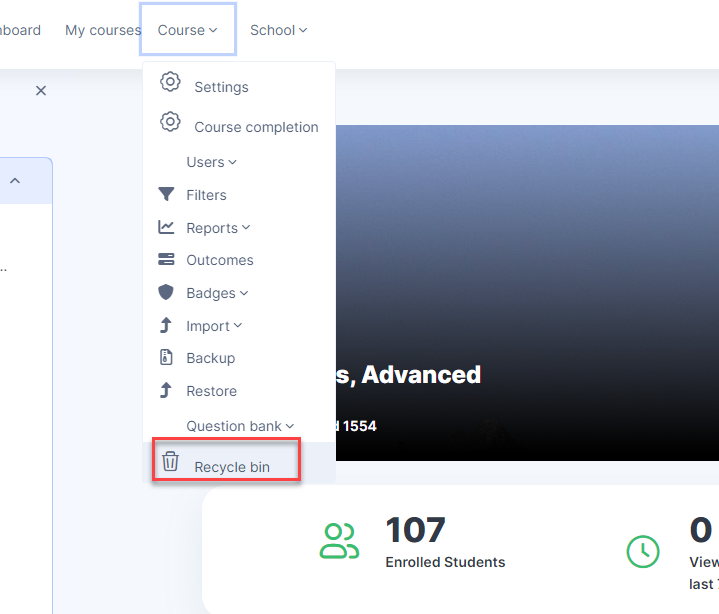
Recycle bin
Any deleted elements (activity, resource, section) on a course can be restored within a certain time period from the course recycle bin. The content in the recycle bin will be permanently deleted after the final recovery date/time passed. The number of days to keep items in the recycle bin is set by the site administrators.
The recycle bin can be accessed via the "Course" quick menu. To restore a deleted item, click on the restore icon as seen below.
Editing elements on your course homepage
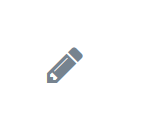 | the pencil icon allows you to edit inline the title of the resource/activity |
 | This icon groups the actions together for easier editing on smaller screens. |
 | The move icon allows you to move items or sections by dragging and dropping. |
 | The eye and arrow icon to hide past weeks and jump to the current week respectively. |
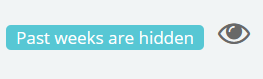 | By default, the past weeks are hidden with the exception of the current and the week prior. |
Sharing cart
The Sharing Cart is a block for duplicating course items into a personal library and an easy way to move those resources and activities between multiple courses you teach or administer. With just three clicks, the Sharing Cart copies and moves a single course item from one course to another. It copies without user data—similar to the “Import” function in Course Administration. In addition, items can be collected and saved in the Sharing Cart indefinitely, serving as a library of frequently used course items available for duplication. The Sharing Cart is viewable only by teachers, course creators, and administrators.
To see the items in your sharing cart, open up the block area of your course with the editing turned on. If the sharing cart is missing in your block area, contact your site admin.

Turning On and Off: With editing on, the Sharing Cart block will always be available inside blocks in all the courses. If not, please contact your site admin.
Copying to the Sharing Cart: You will notice a small basket icon that appears for each resource. Click on that icon to send a copy of that resource/activity into the Sharing Cart. User data will be removed, and only the activity itself will be closed.

Copying from the Sharing Cart: Click the "Copy to course" icon in the Sharing Cart, and then you will see many dotted boxes appear in the center column. Choose the location you wish to place your item, and it will be copied there directly.
Making folders inside the Sharing Cart: Click the "move" icon on a course content item and an input box will appear. Input the name of the target folder there. To move an item into a folder, click the "Move to folder" icon in the Sharing Cart, then a drop-down list appears, and select the target folder. If you click the “Edit” button, you will replace the drop-down list with an input box.

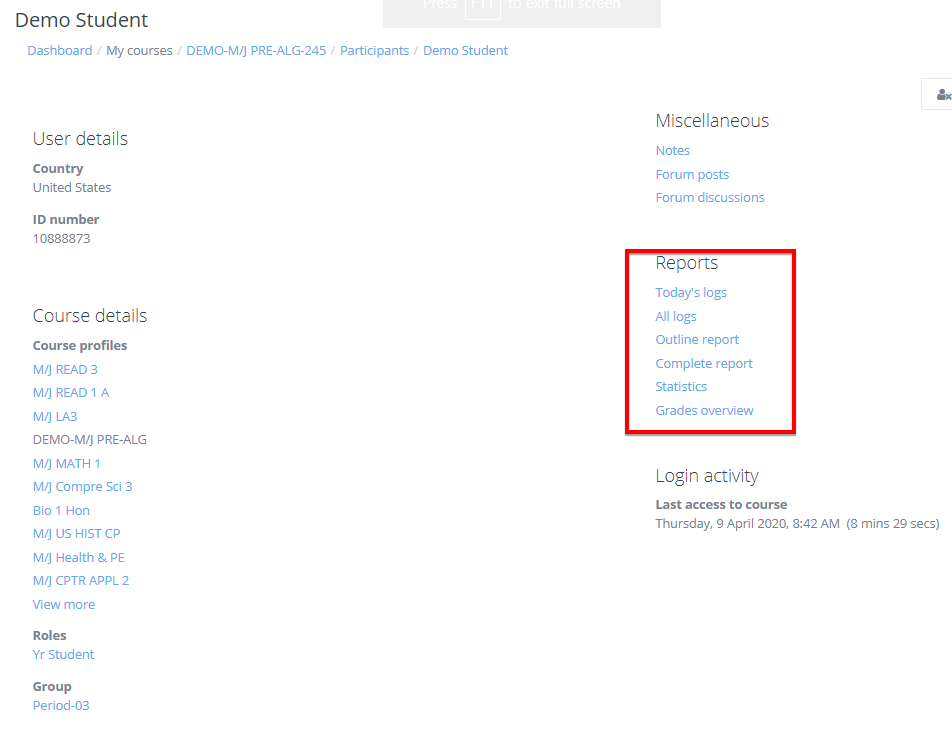
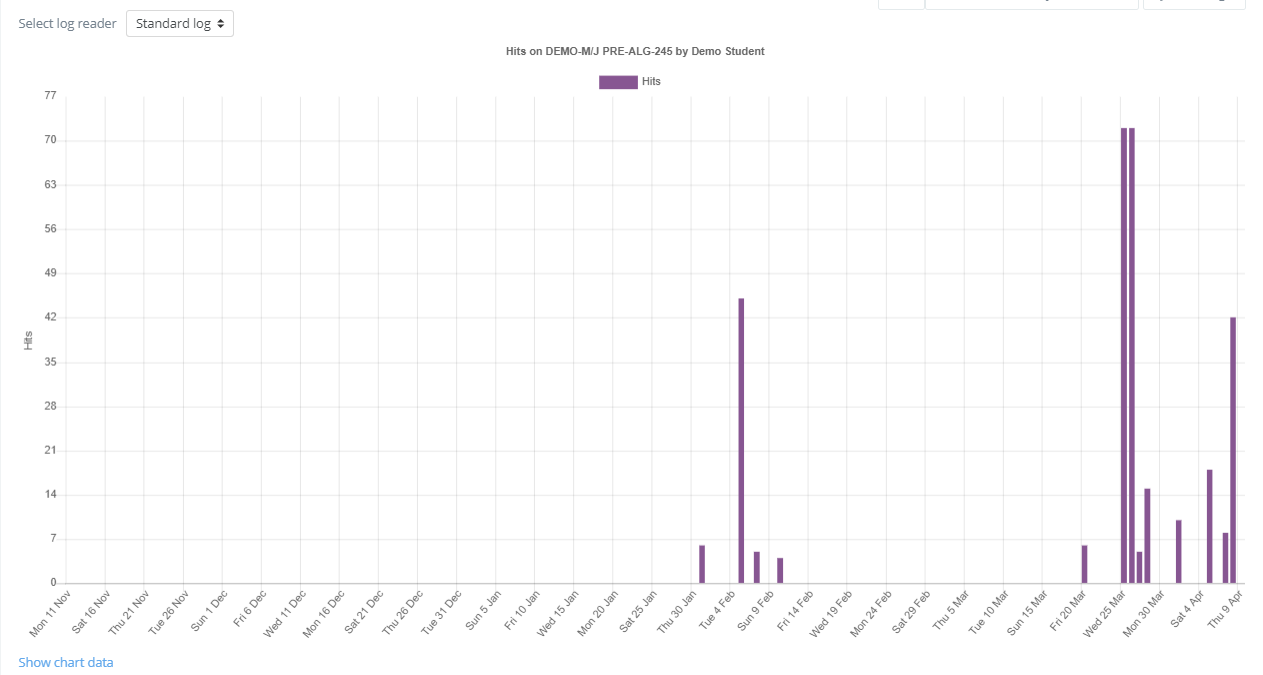
Student access report
Teachers can see their students' complete log history to the course. To access this course, go to your course, click on participants on the left side menu, and click on any student's name. This page is the student's profile page where you see his course details, last login activity, and reports.
Click on the "All logs" link under "Reports" to access the student's daily activity chart and detailed activity report.
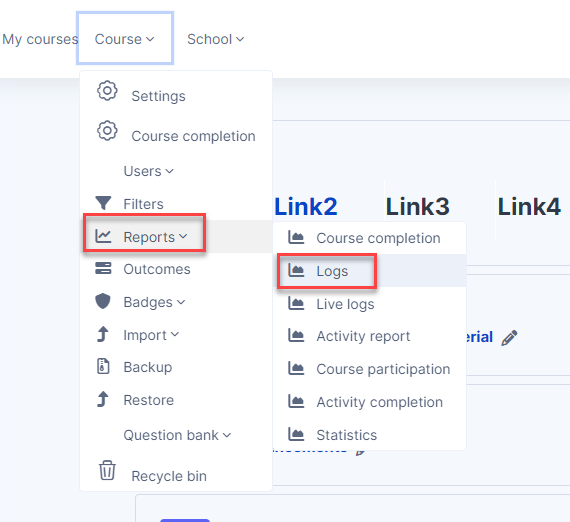
Teachers can also access the full course access logs via course reports: