Working with Files
Adding files to your course
Radix LMS provides an easy way for a teacher to present materials to their students. These materials may take the form of files such as word-processed documents or slideshow presentations. The materials can be displayed on the page either as individual items or bundled together inside folders. One teacher might for instance wish to share a single research document in pdf format; another might have a folder of sample past examination papers for students to download. Most types of files can be uploaded and accessed through Radix LMS but the student needs to have the correct software to be able to open them.
To add files to a Radix LMS course, you must first ensure you have the editing turned on.
Drag and drop
- If you are using a modern browser, you can simply click, hold and drag and drop a file directly onto your course page. You will know if drag and drop is available to you because you will (briefly) see a message at the top of your screen:

To drag and drop a folder, you must first compress/zip it using whichever program your computer has.
Dragging and dropping files
Add a resource or activity
- Instead of drag and drop, you can click the link 'Add an activity or resource' and select either File or Folder from the activity chooser.
Uploading files
- The screen for uploading and displaying a file (or folder of files) includes an "add" button. Clicking on this button takes you to the File picker which is the name given to the file storage and access area within Radix LMS. Find out more about the places you can upload or add files from in the File picker page.
- There is also a block (with an arrow) into which you can drag and drop a file straight from your desktop into Radix LMS.
Unzipping uploaded files
If you upload a single zipped file, Radix LMS will automatically unzip it for your students to see it in Radix LMS.
If you upload a number of files as a single zipped file, either as a File nor inside a Folder, Radix LMS will force the download.
Viewing uploaded files
- Once uploaded, files appear as thumbnails in the file manager for easy recognition.
- Files view can be easily toggled between icons view or a table view with sizes and dates, or a hierarchical list view.
|  |
|
| File picker icon view | File picker table view | File picker hierarchical list view |


Editing or updating uploaded files
- Clicking on the name of an uploaded file opens up a pop-up dialogue box which allows file details quickly to be altered.
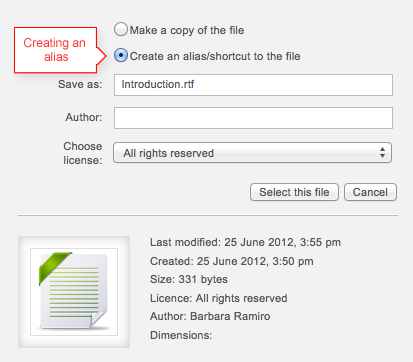
Creating an alias/shortcut
- When an uploaded file - or a file from the Content bank, User files, Dropbox, File system, or Google Drive repositories - is re-used elsewhere on Radix LMS, the teacher has the option to make a copy (a new, unconnected version) or to create a shortcut or alias.
- If an alias is created, then when the original file is updated, it will change in all instances of the alias. So a teacher might add course notes to their private files for example, and then add them into a number of courses. When the teacher makes an alteration in the file in their private files, this alteration will be reflected in all instances of the course notes.
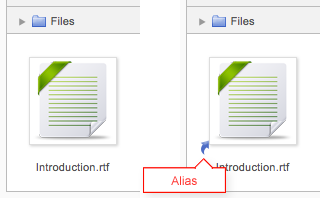
- An alias can be recognized by its thumbnail. See the difference in the screenshot below between the original file (left) and the alias (right):
- To update a file, go to its original location (for example Private files) and upload your new version with the same name. You will be prompted to override or rename the file. Choose "override" and this file will replace your original file and the alisas/shortcuts will remain and all be updated to your latest version.
|
|
| Creating an alias |
Areas in which aliases cannot be made
An alias cannot be made in the following areas of Moodle:
- an assignment submission
- a forum post attachment
- a workshop submission
- a SBA essay
- a database activity file field
This is to prevent cases such as a student uploading an item for assessment and then subsequently changing the original in their private files. When a student uses a file from their private files in one of these instances, they do not see the options to "copy" or "create an alias".