Distance Education Tips and Tricks
How to accept "Google Docs" or "Office 365" submissions to my assignment?
Prerequisites:
- Students must have their own Google or office 365 account. If they do not have any of these accounts, they can still download the document to their computers, work on it, and submit it by uploading to the assignment.
- The school must have a Google Drive or Onedrive integration.
Teachers create the assignment and grade the work:
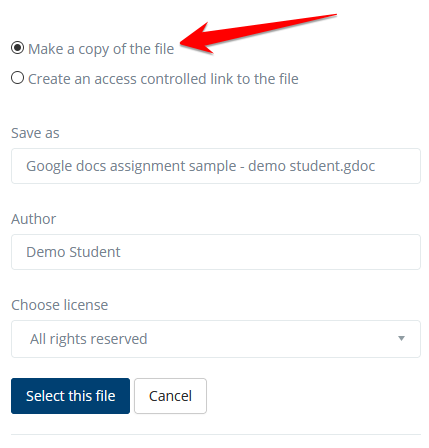
Step1: Create your Google Doc/Office 365 doc you want your students to work on. Make sure that your google doc's sharing setting is "Anyone who has the link can view". Your students will have to make a copy of your doc into their own google accounts or office 365 accounts.
Step 2: Create your assignment with "file submission" turned on
Step 3: Share your online doc's link by placing the link in the description of the assignment using link sharing icon: 
There are two ways to share a document you created on the cloud.
- Share the document's original link or browse your repository and share your document as an access controled link: Students will have read access to the document and required to make a copy of the document in their account to start working on it.
- For google docs only: Share the document's link by replacing the /edit?usp=sharing with /copy at the end the URL. This option will force the students to make a copy of the document before they can proceed to see/edit it.
Step 4: Complete the other configurations of your assignment and click "Save and Display" to see the assignment details and make sure the link in the description is working.
Step 5: Students submit their assignments by following the steps listed below
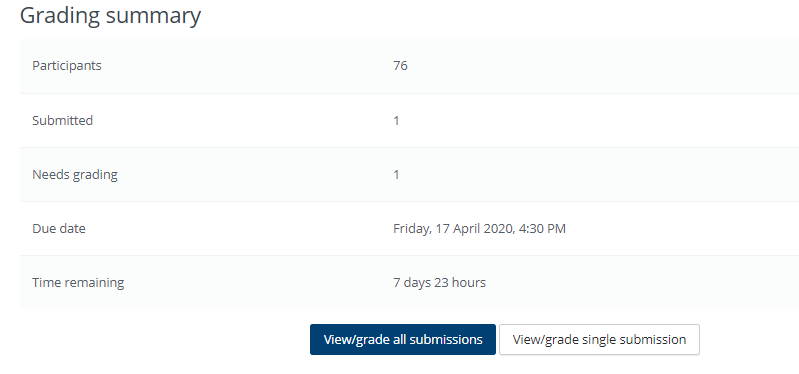
Step 6: Once submissions are done, you will see the numbers on the assignment details page. Click on "View/grade single submission" to see the document submitted and annotate them.
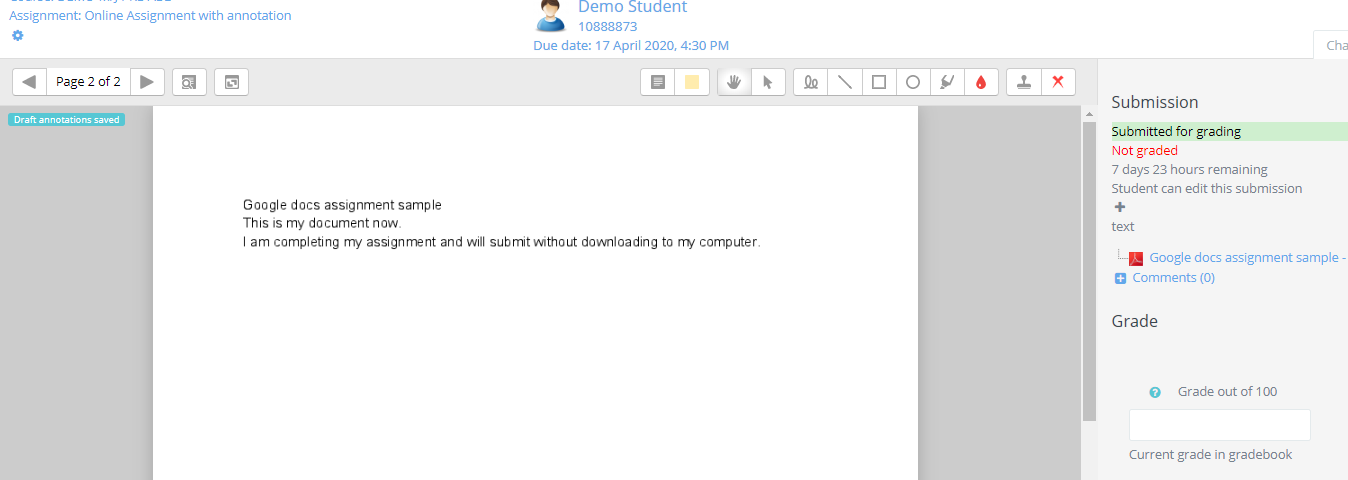
Step 7: On this screen, student's work will be displayed in the middle with annotation tools and grade box to enter the grades. Click here for more information about annotation.
Students submit the work via google docs/drive:
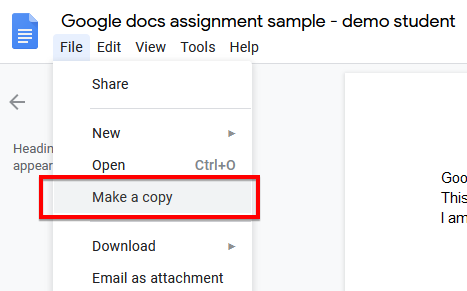
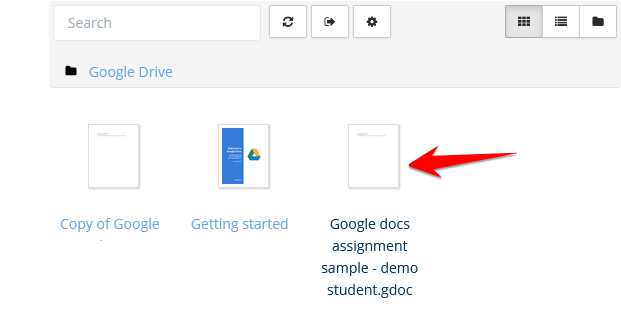
Step 1: Copy the google docs to your account: Once the students click on the online document link, they can login with their own Google or Microsoft account and make a copy of the document to start working on it.
Copy Google Docs to your account |
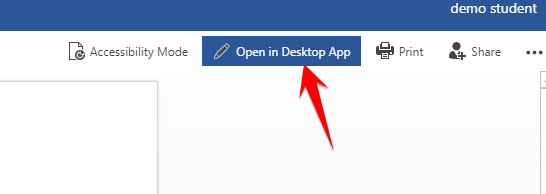
Open the shared online word document in Desktop App to edit and save back to your OneDrive. |
Step 2: Your work on google docs/online word will be saved into your google drive/OneDrive as well.
Step 3: Go to your assignment and click on "submit assignment" button.
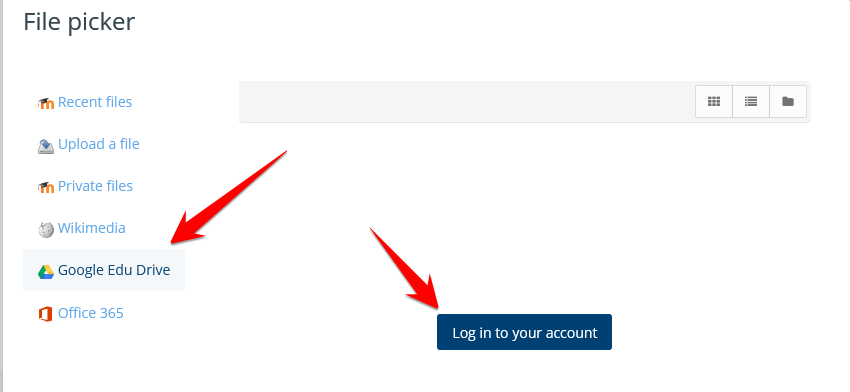
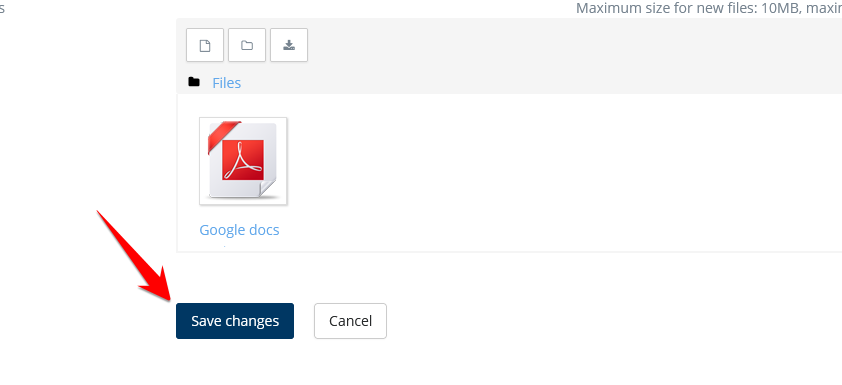
Step 4: On the file submission box, click inside the dotted lined box to open the file picker.

Step 5: On the file picker window, select "Google Drive" or "OneDrive" (these names may be named differently by your school) repository and click "Login to your account" button. If you do not see the "Google Drive", "OneDrive" or "Office 365" options in the repository list, please contact your school administrator.
Step 6: Once you are successfully logged in, you will be able to see all the documents/files that are saved in your google drive. Select your assignment and "make a copy of the file" on the next screen. Click select file. This will upload your document to the assignment as a pdf document.
|
|
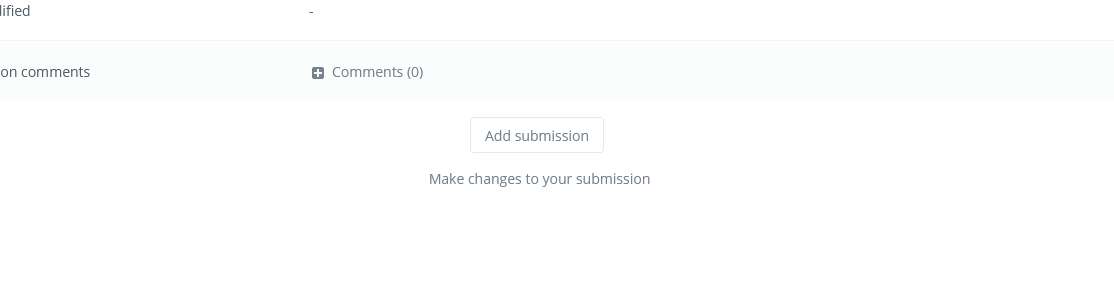
Step 7: Click "save changes" to submit your work. You can edit your submission before the due date or before all the allowed attempts are exhausted.
How can I embed a web page or a video in my course?
Using an iframe in a page allows external or internal web pages to be displayed in the middle of the Radix LMS screen (instead of just putting a link to them)
How:
- Create a page activity or a label (use a label if you want it to appear in one of the weeks, and page if you want it to appear on a separate page)
- To embed website: In the "Page content" or "Label text" text editor box, Display raw HTML code (use the editor button </>)
- Insert code like: <iframe width="100%" height="600" align="middle" src="https://www.brainpop.com" border="0"></iframe>
- Replace the web URL with any page you want and adjust the height can be adjusted to a bigger value but no more than 800 since it would not fit in most screens.
- Once the students click on the page activity, they will be able to interact with the embedded web-page without leaving the Radix LMS
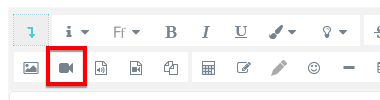
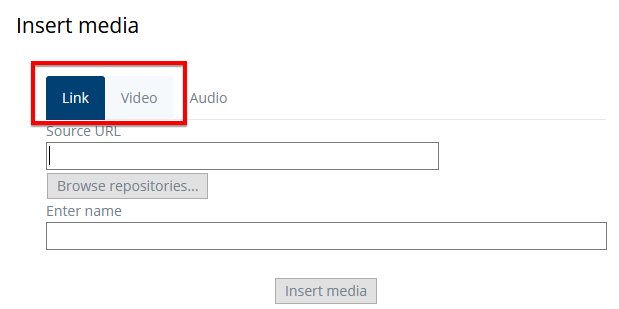
- To embed video: Click on the camera icon and fill in the information. You can simply insert the video link under the "link" tab, or select the "video" tab to have more advanced options.
|
|
Embedded web site on a page. |
Embedded video in a label |


How can I embed a Google form or Microsoft forms in my course
Using an embed HTML code, any form or online document can be displayed inside of the Radix LMS screen
How:
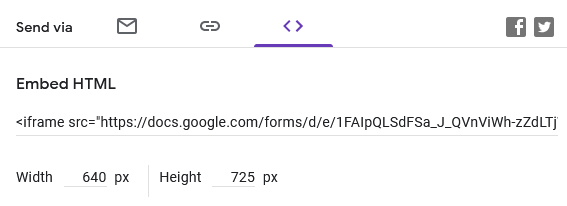
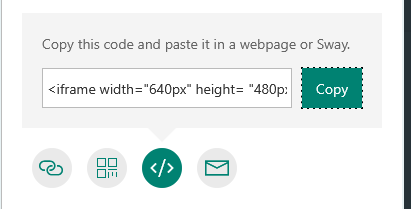
- Create your Google form or Office 365 Forms
- Copy its embed code
Google form |
Office 365 forms |
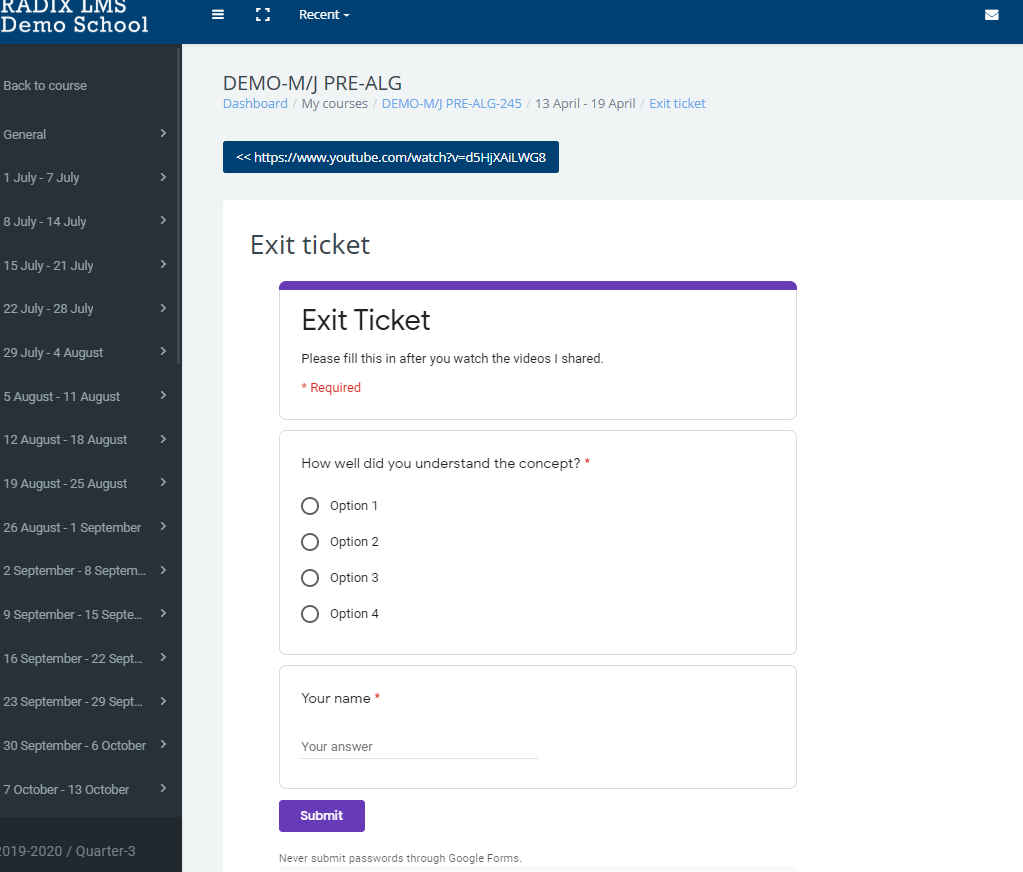
- Create a page activity
- In the "Page content" text editor box, Display raw HTML code (use the editor button </>)
- Insert the embed code, save and display
- Once the students click on the page activity, they will be able to fill in the form without leaving the Radix LM
How can I test the reading fluency of my students online?
Using Read Aloud activity could be a great way of testing fluency or a pronunciation quiz in a foreign language course. Students must have a microphone connected to their computers to be able to do this activity.
Read Aloud allows students to:
- Read passages of text (in any language
- Receive feedback on reading attempt
- Strive for target WPM
- Have the ability for unlimited attempts
How to create a read-aloud activity
How to display announcements on the sidebar of a course?
The Announcements and News Forums are special types of forums that can be used to relay information to the entire course (including the parents of students). This forum type is automatically added to the newly created courses. If you do not see a default announcement activity in your course, please contact your administrator.
Click here to learn more about how to create a forum activity!
To display the posts on your course page you added in the announcements, you will have to add a block to the sidebar (blocks area) of the course. To do that, turn the editing "on" in your course and click "add a block" on the left navigation bar. You will see a list of blocks to choose from, click on "latest announcements".
Once you clicked on the latest announcements in the list, the block will be added to your side block area. Make sure the side block area is not hidden in your course. if you do not see the blocks added to the left side, click on the arrow (third screenshot above) to show your blocks.
| If you would like to change the position of the latest announcements block, you can click and hold the plus sign and drag the bock to its desired position within the side block area. |

Once you add a new post to your announcements activity, they will appear in the latest announcement block. It is better to turn off the editing to get a better view of how announcements look in the block. By default, the announcement block shows the 5 latest topics. If you want to change that, go to "Course settings" and change the number of announcements under the "Appearance" section.

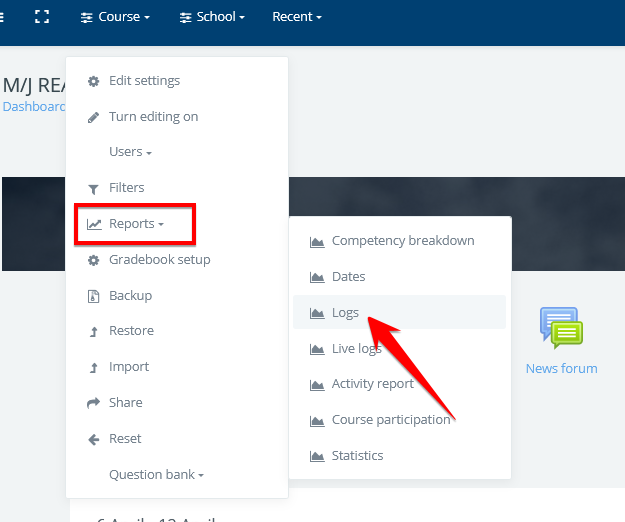
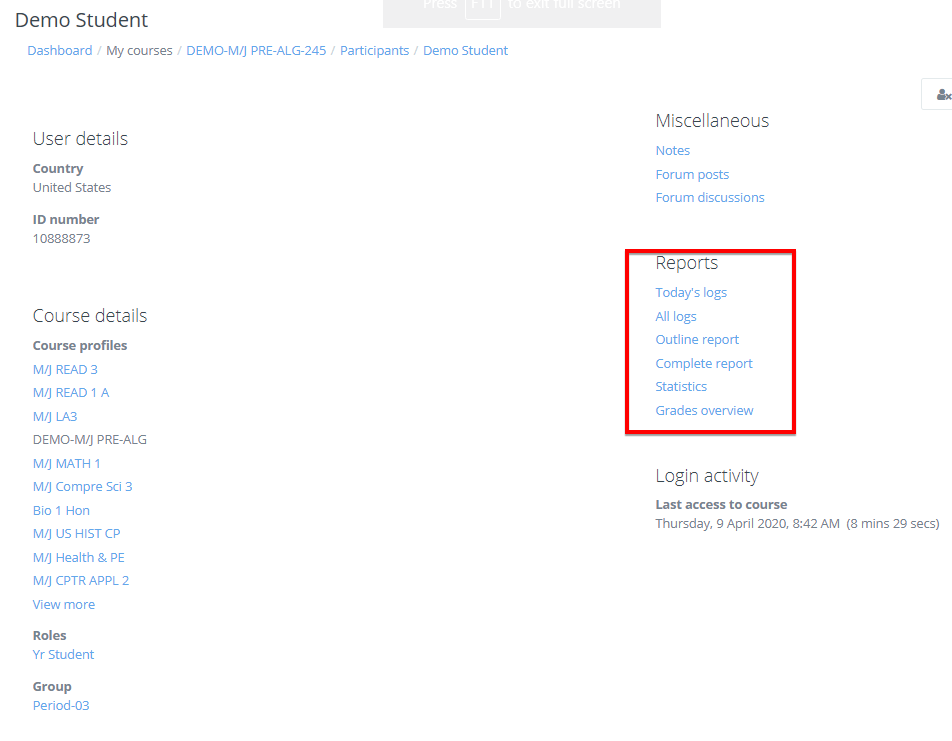
How to see a student's access report for my course?
Teachers can see their students' complete log history to the course. To access this course, go to your course, click on participants on the left side menu, and click on any student's name. This page is the student's profile page where you see his course details, last login activity, and reports.
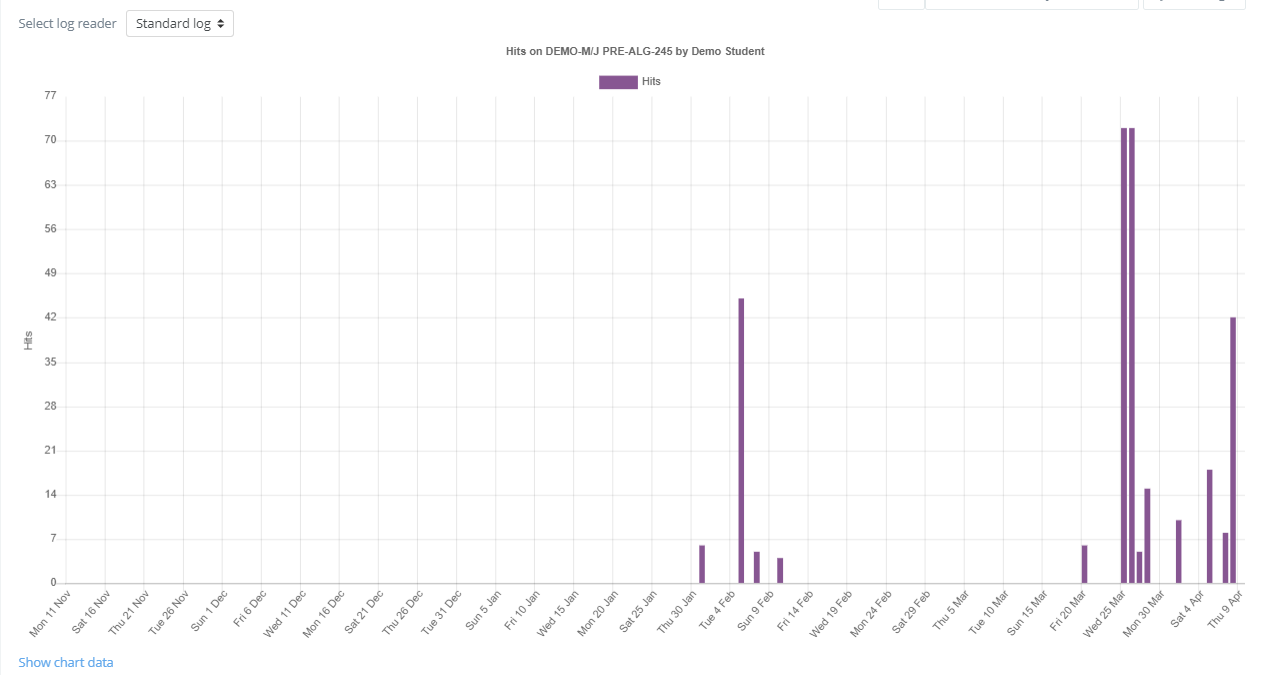
Click on the "All logs" link under "Reports" to access the student's daily activity chart and detailed activity report.
Teachers can also see the entire course access log via course reports: