Page reviewed: June 15, 2026
Updated for grammar, tone, and clarity. Navigation and recipient fixes from recent releases have been incorporated.
Overview
Quickmail is a bulk messaging tool for sending emails to course participants. Teachers can compose messages to students, and optionally send copies to their registered parents and mentors with a single click. Quickmail also supports automatic notifications based on term grades or course participation.
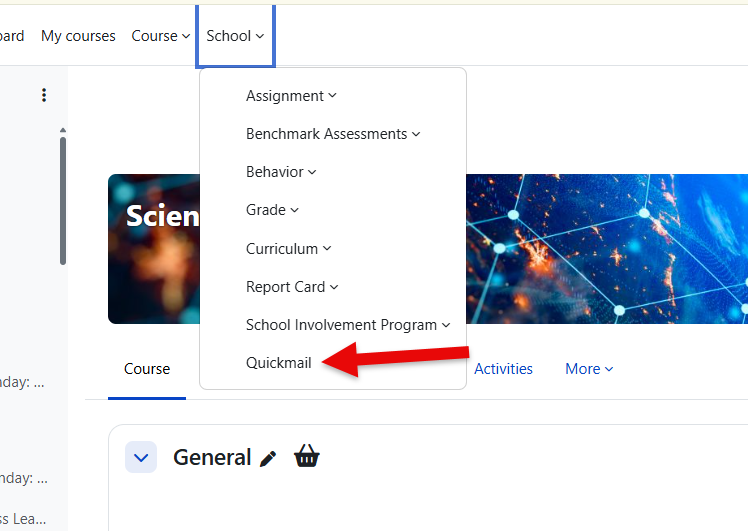
How to access: Navigate to your course → expand the School quick menu on the top menu bar → click Quickmail. School admins can also access Quickmail from the dashboard.
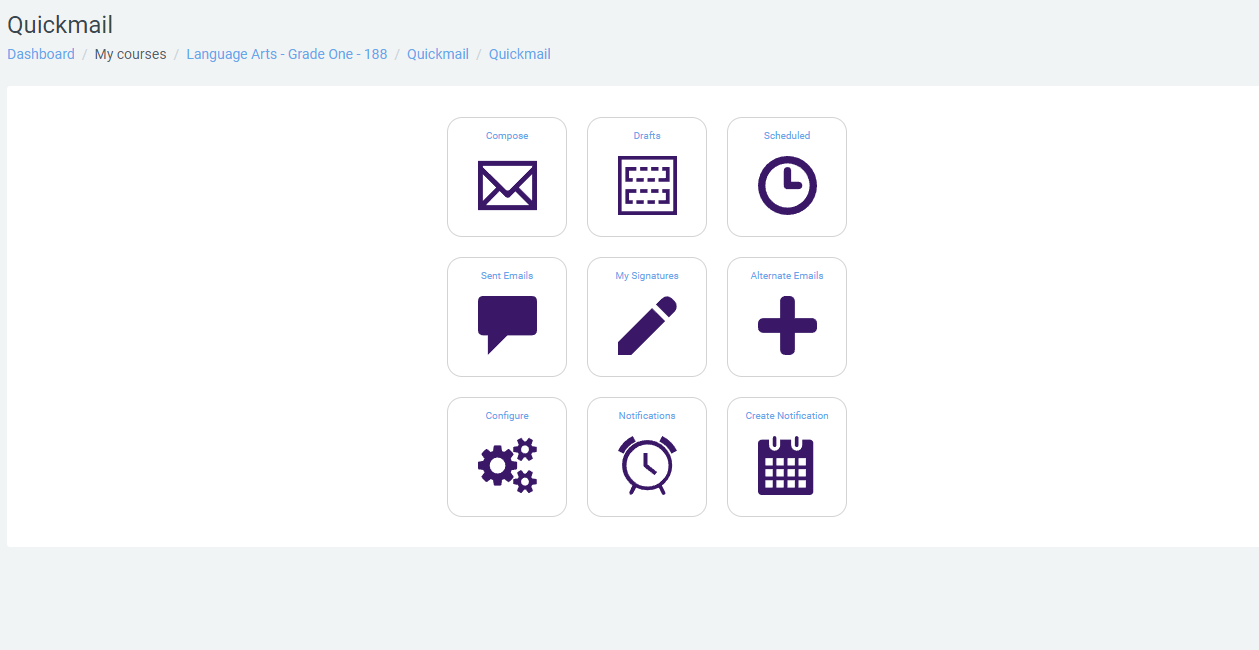
The main menu provides access to:
-
Compose — Write and send a new message
-
Drafts — View and edit saved drafts
-
Queued — View messages scheduled for later delivery
-
Sent Messages — View history and details of sent messages
-
Notifications — Create and manage automatic notifications
-
Alternate Emails — Add alternate sender email addresses
-
My Signature — Create and manage email signatures
Quickmail is course-based. Teachers can only send messages or set up notifications for participants of a single course at a time. To message participants in a different course, navigate to that course first.
Composing a Message
-
Click Compose on the main menu.
-
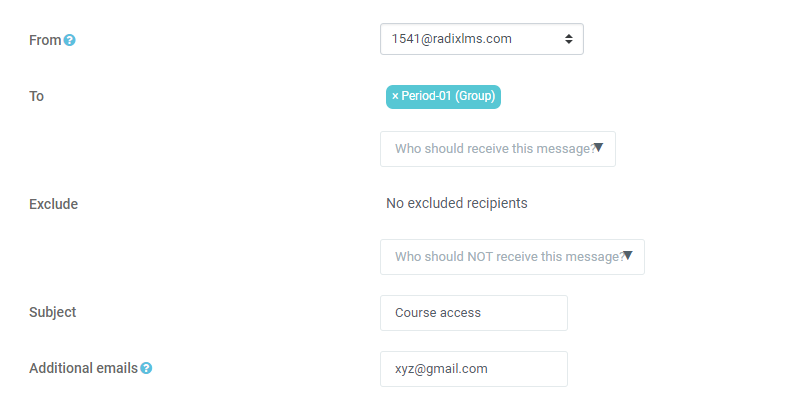
On the compose page, select your recipients individually, by role, or by groups/periods.
-
Add your subject line and any additional email addresses for people who are not enrolled in the course.
-
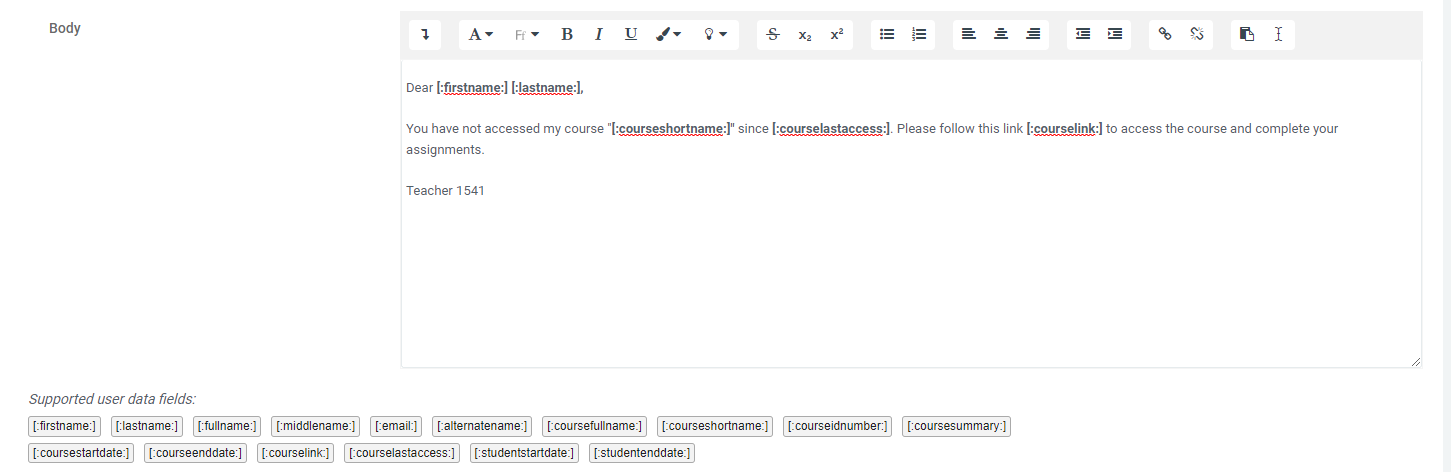
Write the message body. You can include dynamic content using the supported user data fields to personalize each message. For example, insert a student's first name so each recipient sees their own name in the email.
-
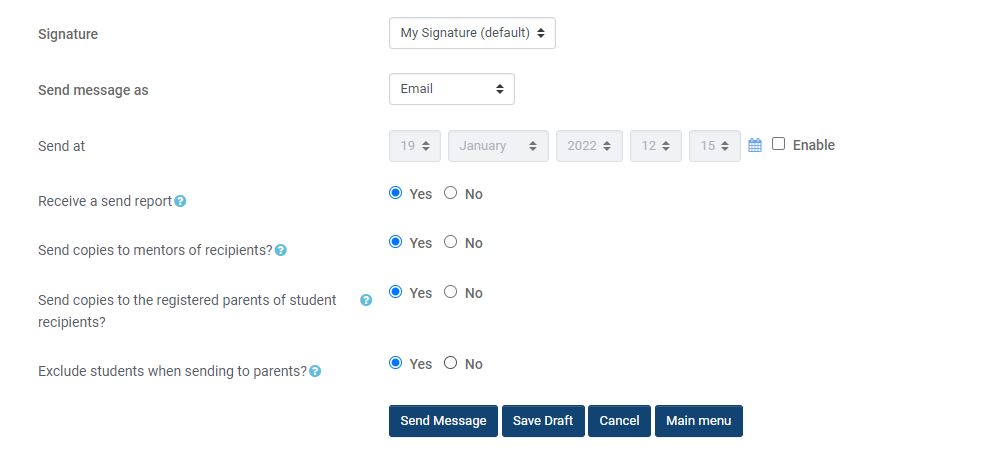
Select your signature and message type (email or Radix LMS instant message).
-
To schedule the message for later delivery, set a date and time. Leave this disabled to send immediately.
-
Optionally, select Send to mentors and/or Send to parents to copy the message to the student's registered contacts.
Important notes:
-
Only registered parents receive copies. Unregistered parents are not included.
-
When copying to parents, you can exclude students from the recipients list. This is useful for schools where students do not have active email accounts.
-
If you save a message as a draft, you are redirected to the Drafts page where you can edit and send it later.
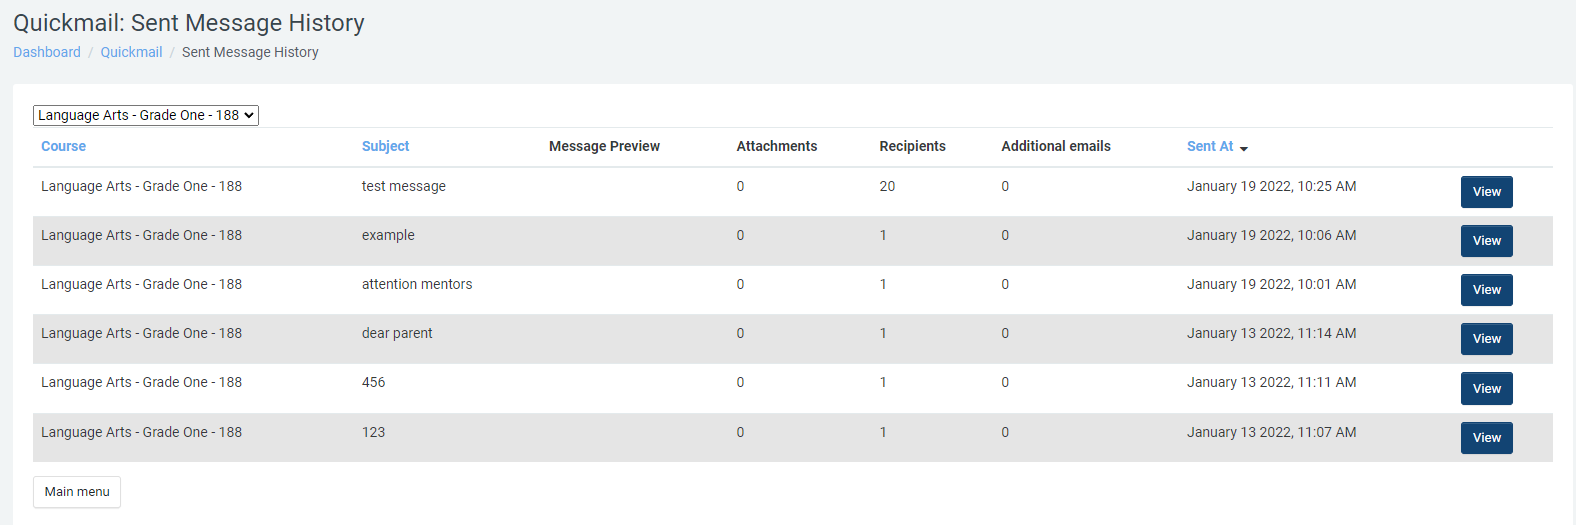
Sent Messages
Click Sent Messages on the main menu to view the history of all messages sent from the current course. Each entry shows:
-
Date and time sent
-
Subject line
-
Number of recipients, including parent and mentor copies
-
Delivery status
Click a message to view its full details, including the list of recipients and their email addresses.
Note: Parent and mentor recipients now appear in the message details and sent history with their correct counts and email addresses.
Setting Up Automatic Notifications
Quickmail supports two types of automatic notifications:
|
Type |
Description |
|---|---|
|
Reminder |
A recurring message sent on a scheduled basis. Use reminders to alert recipients based on current term grades or course non-participation. |
|
Event |
A one-time message triggered by a specific action, such as a student's first access to the course. |
Creating a Notification
-
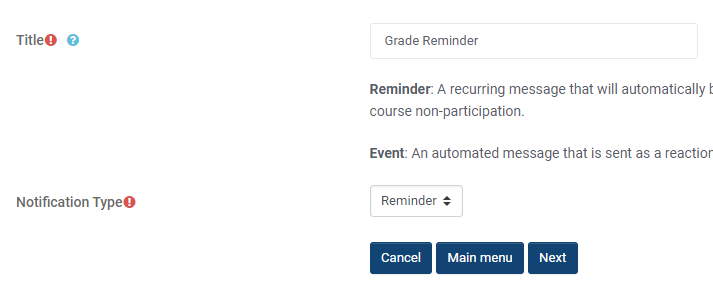
Click Create Notification on the main menu.
-
Enter a title for the notification and select the type: Reminder or Event.
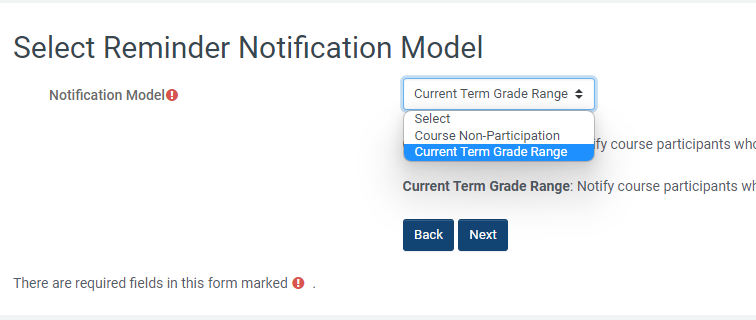
3. Select the notification model:
-
Course Non-Participation — Targets participants who have not accessed the course within a specified number of days.
-
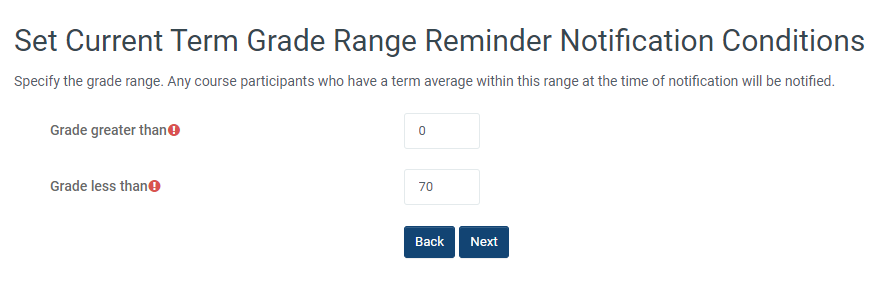
Current Term Grade Range — Targets participants whose current term grade falls within a specified percentage range (e.g., 0–60%).
4. Set the grade range or non-participation threshold based on your selected model.
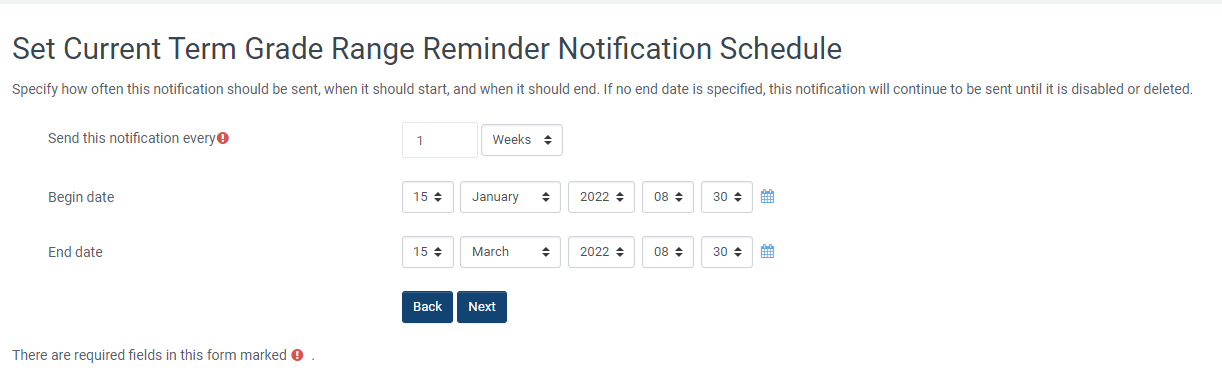
5. Set the frequency (how often the notification sends) and the begin/end dates for the notification period.
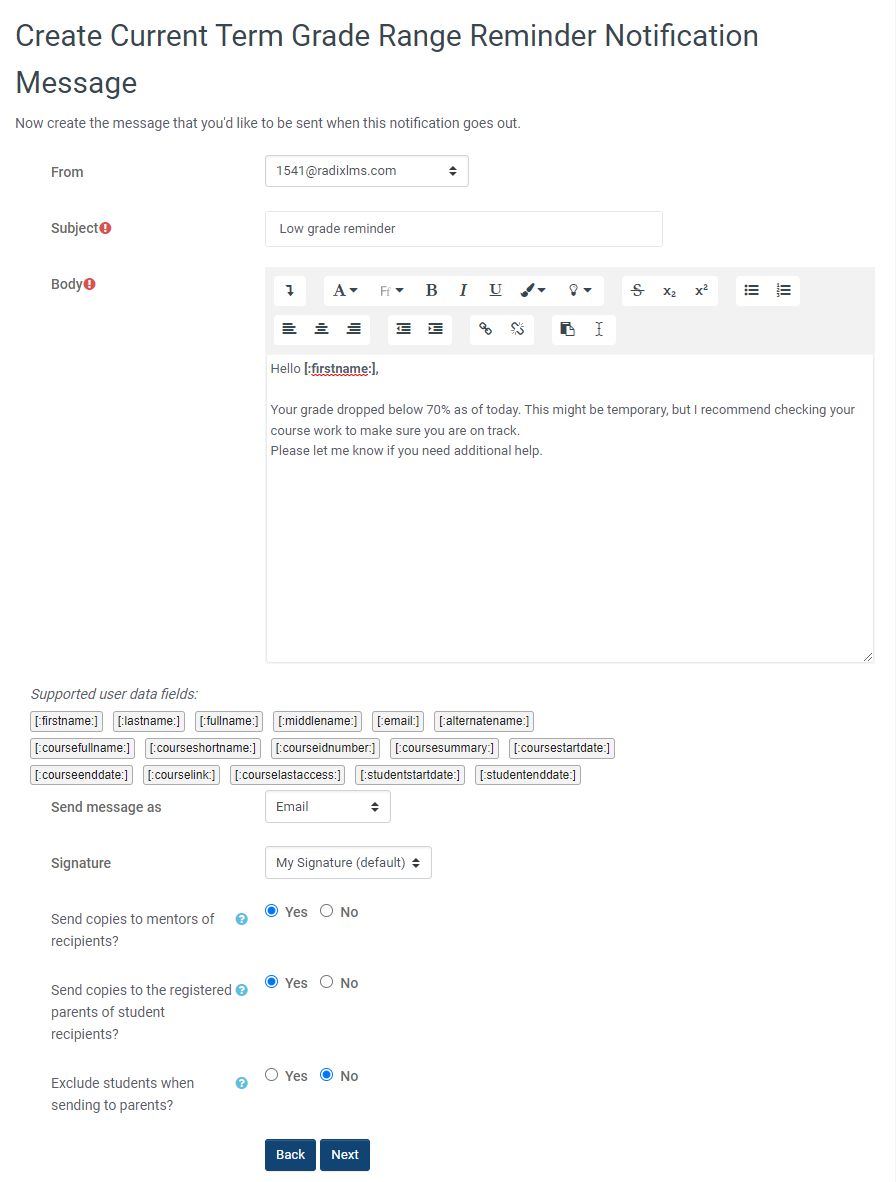
6. Write the subject and message body. You can personalize the message using the same dynamic user data fields available on the compose page.
7. Optionally, copy the notification to mentors and/or registered parents, and exclude students from the recipients list.
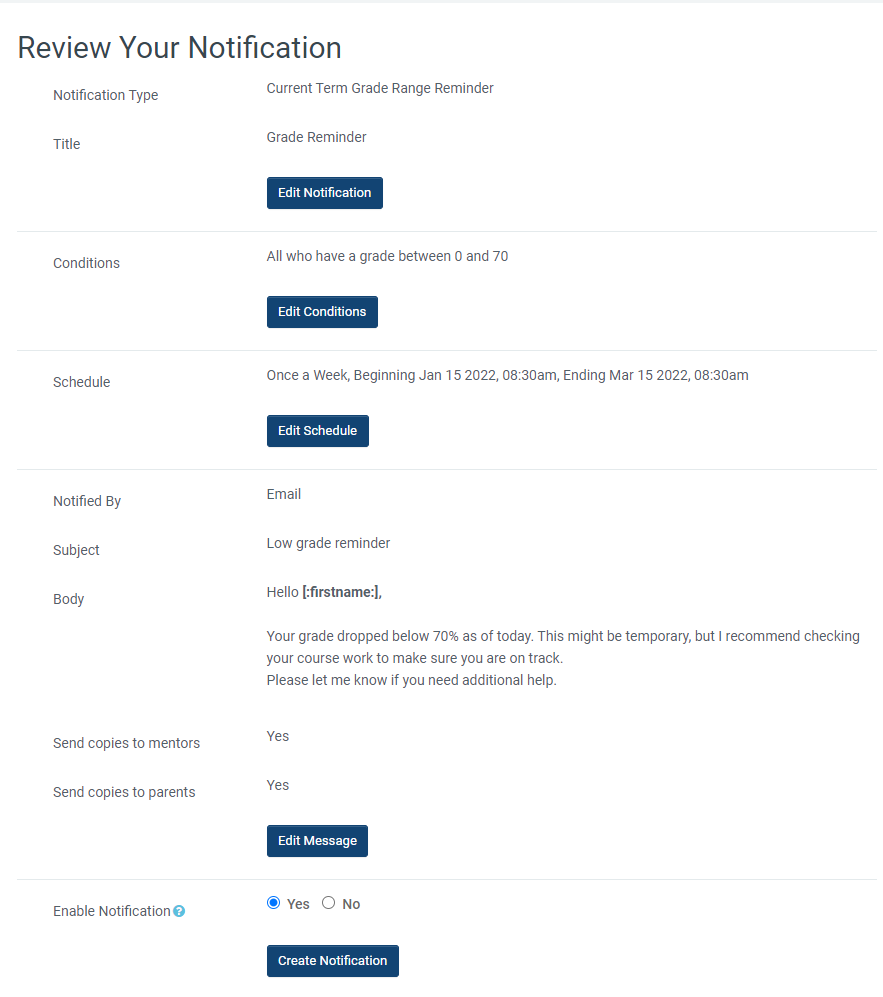
8. Review your notification settings on the summary page. Choose to enable the notification immediately or save it and enable it later.
Managing Notifications
After creating a notification, you can:
-
Enable or disable it from the notifications list
-
Edit the notification settings, message, or schedule
-
Delete notifications that are no longer needed
Tip: Term grade notifications evaluate students' current term grades at the time of each scheduled send. If a student's grade changes between sends, they may be included or excluded from the next notification automatically.
Tips and Troubleshooting
|
Issue |
Solution |
|---|---|
|
Recipients show "0" when selecting by role |
This was a known issue and has been fixed. If you still experience it, clear your browser cache and try again. |
|
Notification not catching students in the grade range |
Verify that the grade range matches the current term and that students have grades posted. Term grade notifications use the active term's grades only. |
|
Saved draft redirects to the wrong page |
This has been fixed. Drafts now redirect to the Drafts page after saving. |
|
Parent recipients not showing in sent history |
This has been fixed. Parent and mentor recipients now appear in the message details with correct counts and email addresses. |