Page last reviewed: — Updated for current course navigation, editing workflows, Sharing Cart guidance, tone consistency, and teacher-facing troubleshooting.
Overview
Teachers use course pages to organize learning materials, assignments, resources, communication tools, and activity reports for students. This guide introduces the course management features available to users with the Editing Teacher role in a course.
Login and navigation
Your Radix LMS site URL is different from your school website URL. Ask your school for the correct Radix LMS login URL. You can use the same URL in the Radix LMS mobile app. Radix LMS works in modern browsers; Chrome, Firefox, Safari, and Edge are commonly used.
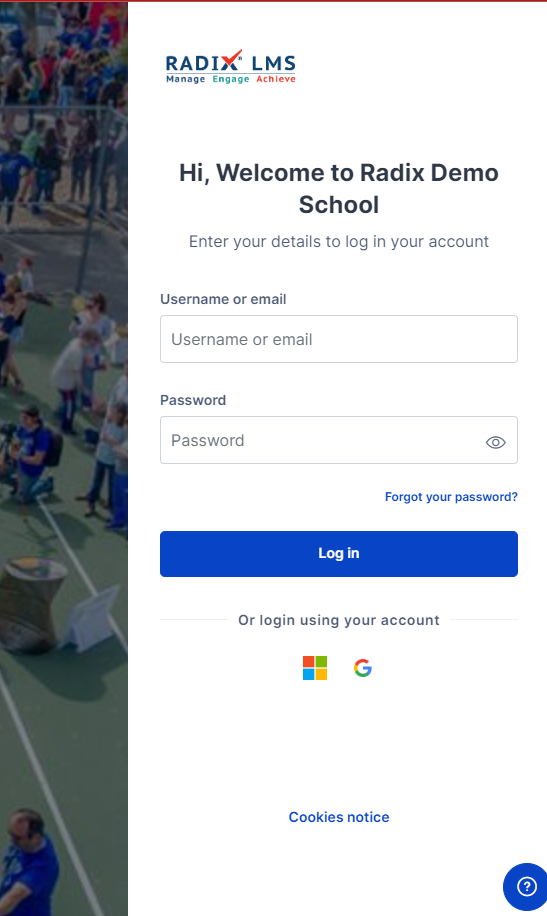
Schools may provide one or more login options. You may sign in with the username and password provided by your school. If your school allows email-based usernames, the login field may display Username/email.
Your school may also enable single sign-on with an official school email account. When this option is available, sign-in buttons appear under Log in using your account on. Personal email accounts may not work unless your school explicitly supports them.
Signing in with your school email account can also make connected storage tools, such as Google Drive or OneDrive, easier to use from within Radix LMS. For example, you may be able to attach files from your drive while creating assignments without leaving the LMS.
Courses
A course is a space in Radix LMS where teachers add learning materials, activities, assignments, and resources for students. A teacher may teach more than one course, and a course may include more than one teacher or more than one student group, often called periods. By default, regular teachers cannot create new courses. Course creation and student enrollment are usually handled through scheduling or administrator processes.
Courses can display content in different formats. Most Radix LMS courses use a weekly section format by default. Depending on the course settings, teachers and students may see all sections at once or view one section at a time.
Weekly course sections are named by date range. Teachers can rename sections, update descriptions, move sections, and add or remove sections after turning on edit mode.
Parts of a course homepage
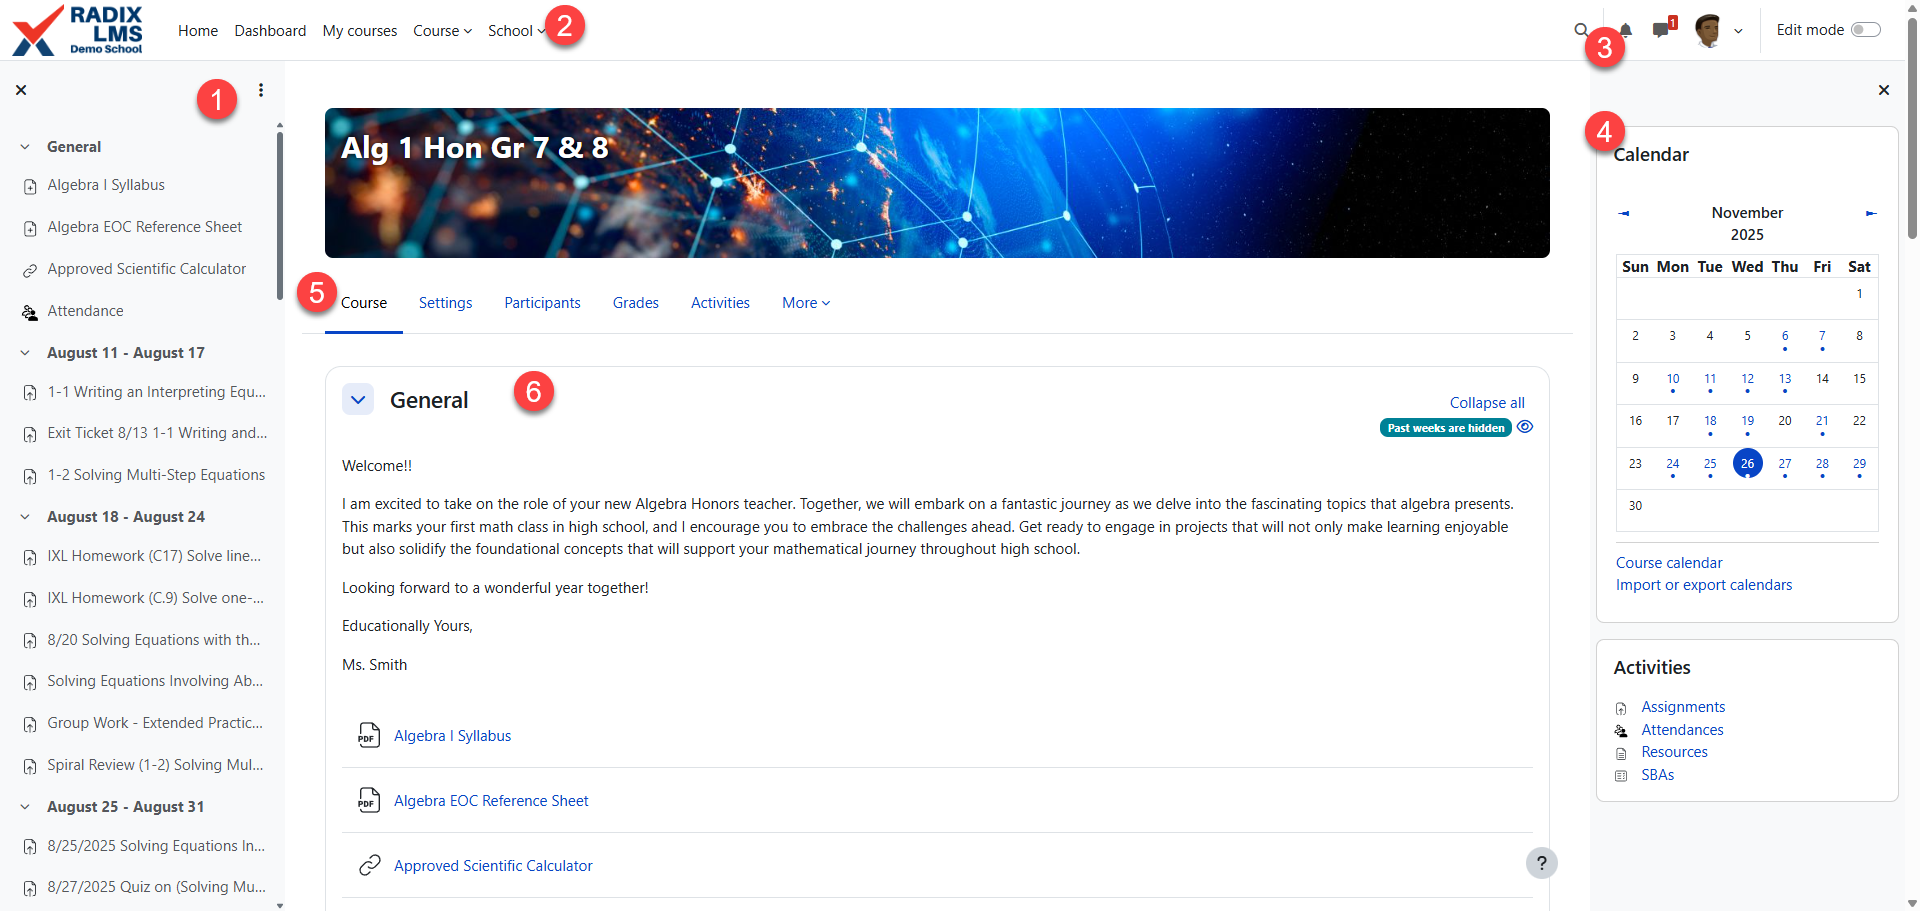
A default Radix LMS course page looks similar to the one below with a standard weekly format.
|
|---|
-
Course navigation menu: This course navigation menu helps you find your way around the course. It will have the list of all the activities and resources that you have in the course separated by sections (weeks). The course navigation will scroll when you start scrolling the course page. It will highlight the activity you are on within the course’s main section. The course navigation can be hidden by clicking on the “X” hamburger icon on the corner.
-
Quick menus: Dropdown menus where you can navigate through the site from any page. A related page menu is added to the left once you land on the page.
-
Notification, messaging icons, user menu, and edit mode switch: Users can change their notifications and other preferences via the user menu. Use the edit mode switch to turn the editing on/off for your courses.
-
Side blocks: These blocks help you access things easily such as calendar events, announcements, bookmarks etc. Which blocks you see depend on what the administrator has selected and what you, as a teacher, choose to add.
-
Course menu: This menu is the same as the course drop-down menu for convenient access to course-related pages.
-
Course sections: Course sections are named by the first and last date of each week and maybe renamed by turning on the editing and clicking the configuration icon next to the section name. The top section “General” will always be pinned on top, but the other sections will be hidden when that week is passed.
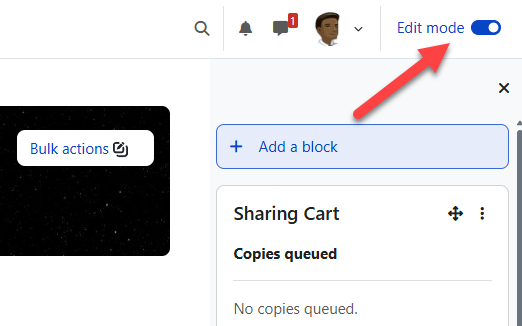
Turn on the edit mode
Turn on edit mode before you add, edit, move, hide, or delete items on a course page. The edit mode switch is in the top-right corner of the course page. When edit mode is on, editing icons appear next to activities, resources, and sections. Turn edit mode off from the same switch when you finish making changes.
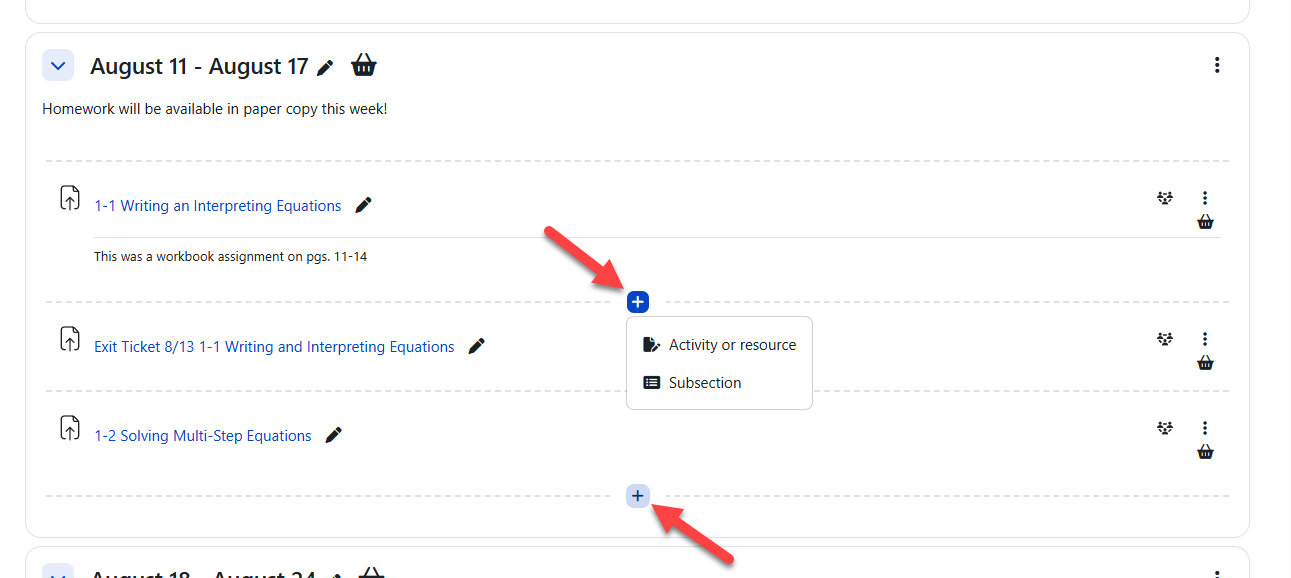
Activities and resources - Adding an assignment
To add an activity or resource, turn on edit mode and choose the section where the item should appear. Click the plus sign, then select Activity or resource to open the activity chooser. You can also click the plus sign between existing items to place the new activity or resource in that exact location. Choose the activity or resource type, complete the settings, and save your changes.
For more details, see Activities & Resources and Grading.
|

|
Edit a course section
To edit a course section, turn on edit mode and open the actions menu next to the section or week. From this menu, you can edit the section title, update the description, change section settings, hide the section from students, or copy a permalink to the section.

Course image
The course banner uses the course image. Students and other users may see this image outside the course, such as on course cards, along with the course name and summary. To change it, open the course settings and upload a JPG, GIF, or PNG file in the Course image area.
The same image appears as the course thumbnail on teacher and student My courses pages.
Drag&Drop files, folders, or videos
Certain resources and activities may be added using drag and drop with the editing turned on:
-
To add a file, simply drag and drop it onto the course section where you'd like it to appear
-
To add a folder of files, simply zip the folder, then drag and drop it onto the course section where you'd like it to appear, answer 'Unzip files and create folder' to the popup dialogue, then click the upload button
-
To add a video to your course page, simply drag and drop it onto the course section where you'd like it to appear, answer 'Add media to course page' on the popup dialogue, then click the upload button.
File or media:
Using the text editor
The text editor includes formatting controls that help you create and update course content. Many controls work like common word-processing tools, including fonts, lists, links, images, tables, and alignment options.
You may see the text editor when you edit section headings, write activity descriptions, create quiz content, or update block content.
When AI tools are enabled for your school, the text editor may also include AI writing functions. Teachers can use these tools to draft new text, rewrite existing text, adjust tone, summarize content, expand short notes, simplify instructions, or generate ideas for course descriptions, assignment directions, quiz prompts, announcements, and feedback.
AI features are meant to support teacher writing, not replace teacher review. Always read AI-generated content before saving it, check that the instructions match your classroom expectations, and revise any text that needs school-specific details, student names, due dates, grading requirements, or accessibility adjustments.
AI availability depends on your school configuration and user permissions. If you do not see AI options in the text editor, contact your site administrator.

Text editor with the menu shown above. Move your mouse over each icon to see its name in the tooltip.
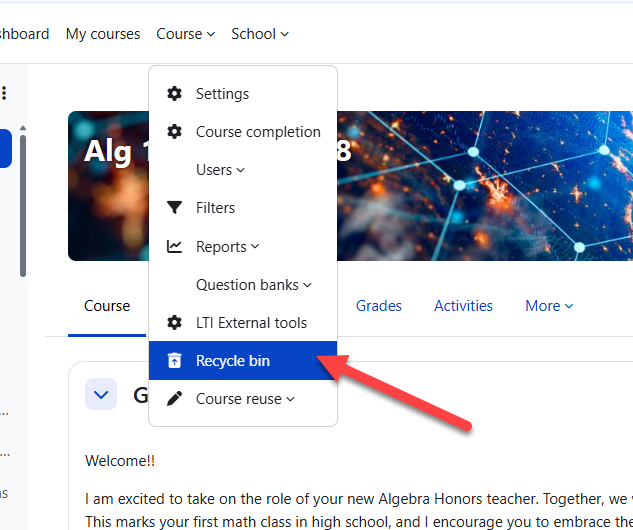
Recycle bin
The recycle bin stores deleted course items, such as activities, resources, and sections, for a limited recovery period. Site administrators set the number of days items remain available. After the recovery period ends, Radix LMS permanently deletes the items.
Open the recycle bin from the Course quick menu. To recover a deleted item, click the restore icon for that item.
Editing elements on your course homepage
|
Icon or control |
What it does |
|---|---|
|
Pencil icon 
|
Rename an activity or resource directly from the course page. |
|
Actions menu 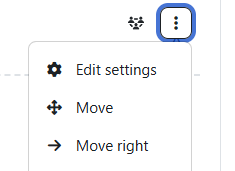
|
Open the available actions for an activity or resource, such as edit settings, duplicate, move, hide, delete, or assign roles. |
|
Move icon 
|
Move activities, resources, or sections by dragging and dropping them to a new location. |
|
Eye and jump icon |
The eye and arrow icon to hide past weeks and jump to the current week respectively. |
|
Current week or section control 
|
By default, the past weeks are hidden with the exception of the current and the week prior. |
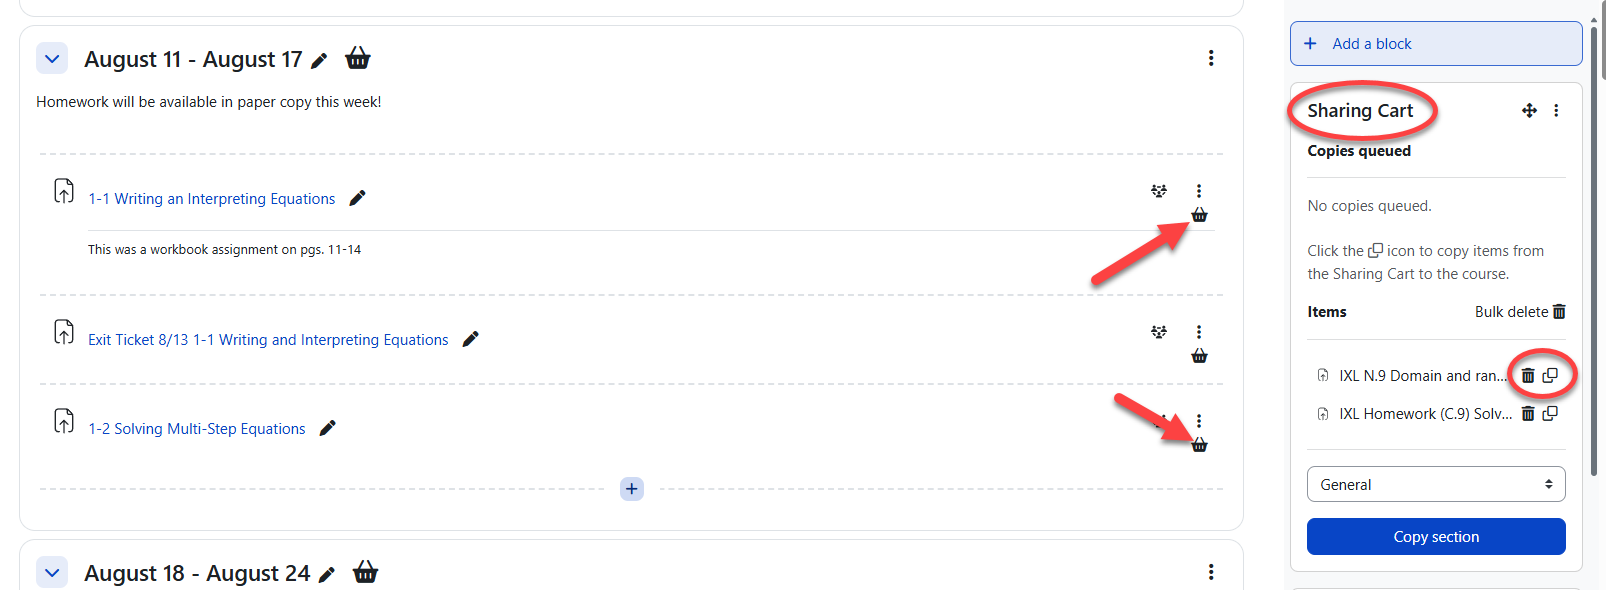
Sharing cart
The Sharing Cart lets teachers copy course items into a personal library and reuse them in other courses they teach or administer. It copies the activity or resource without user data, similar to a course import. Teachers can keep frequently used items in the Sharing Cart indefinitely and copy them into courses when needed. The Sharing Cart is visible only to teachers, course creators, and administrators.
To view Sharing Cart items, turn on edit mode and open the block area in the course. If the Sharing Cart block is missing, contact a site administrator.
-
Turn the Sharing Cart on or off: With edit mode on, the Sharing Cart block should be available in the course block area. If it is unavailable, contact a site administrator.
-
Copy items to the Sharing Cart: Click the basket icon next to a resource or activity to copy it into the Sharing Cart. Radix LMS removes user data and copies only the activity or resource setup. You can also drag activities, resources, or sections into the Sharing Cart.
-
Copy items from the Sharing Cart: Click the Copy to course icon in the Sharing Cart. Dotted placement boxes appear in the course. Select the location where you want to add the copied item.
-
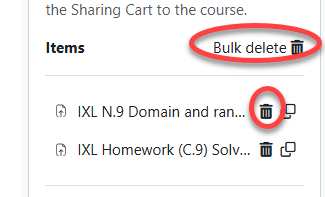
Delete items from the Sharing Cart: Click Bulk delete or the delete icon next to an item to remove it permanently from the Sharing Cart. This does not delete the original item from the course page.
Copy operations run in the background. After you copy an item to or from the Sharing Cart, you do not need to stay on the course page. Large activities or busy servers may take several minutes to finish processing.
Student access report
Teachers can review a student's course activity from the student's profile page. Open the course, select Participants, and click the student's name. The profile page shows course details, last login activity, and available reports.
Click on the "All logs" link under "Reports" to access the student's daily activity chart and detailed activity report.

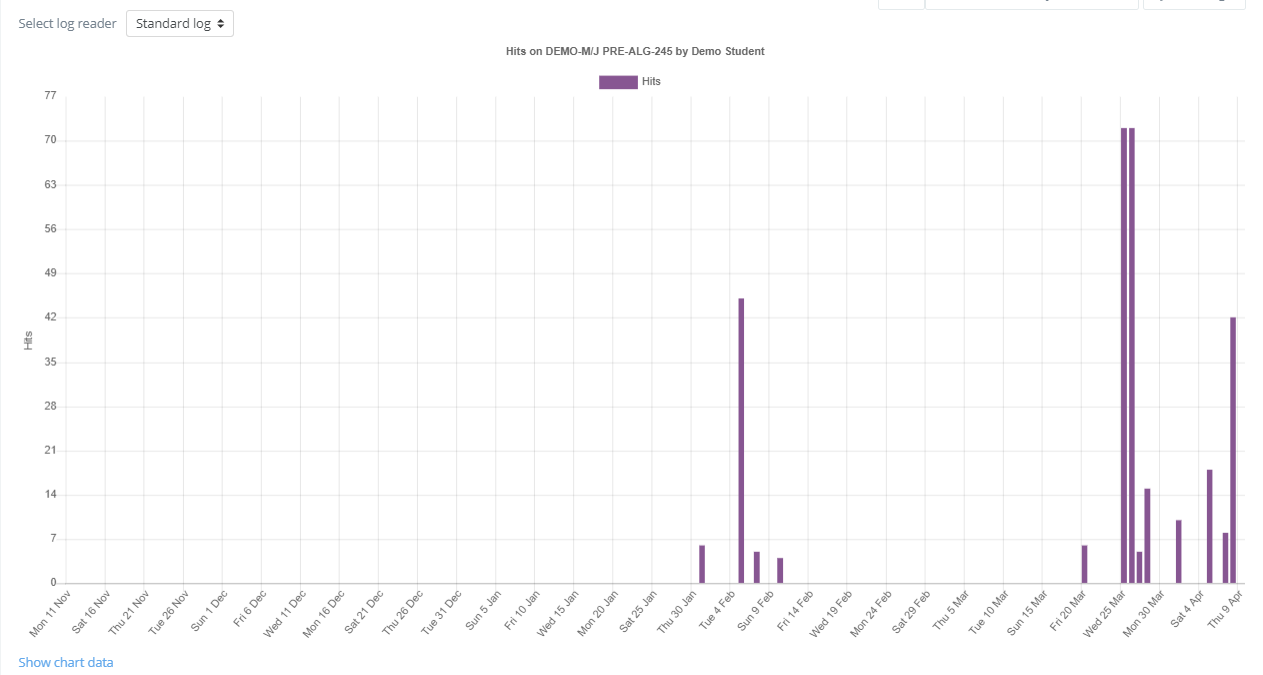
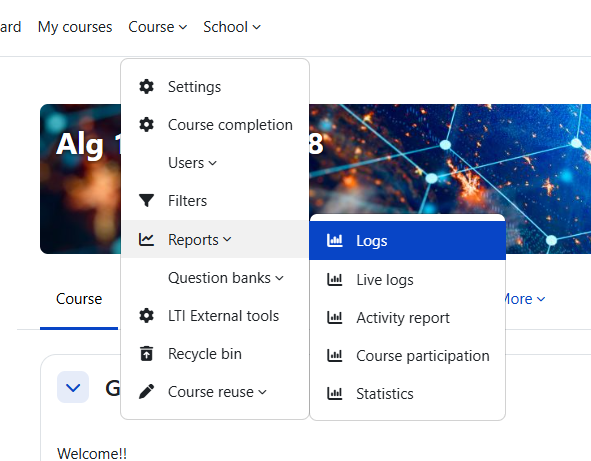
Teachers can also access the full course access logs via course reports:
Troubleshooting
|
Issue |
What to check |
|---|---|
|
Teachers cannot edit a course |
Confirm the teacher has the Editing Teacher role in the course and that edit mode is turned on. |
|
The Sharing Cart block is missing |
Turn on edit mode and open the block area. If the block is still unavailable, contact a site administrator. |
|
Students cannot see an item |
Check whether the activity, resource, section, or course is hidden. Also review availability restrictions and dates. |
|
A deleted item is not in the recycle bin |
Confirm the site recycle bin retention period. Items are permanently deleted after the recovery window ends. |
|
Google Drive or OneDrive is unavailable |
Confirm that the teacher signed in with a school email account and that the school has enabled the integration. |