
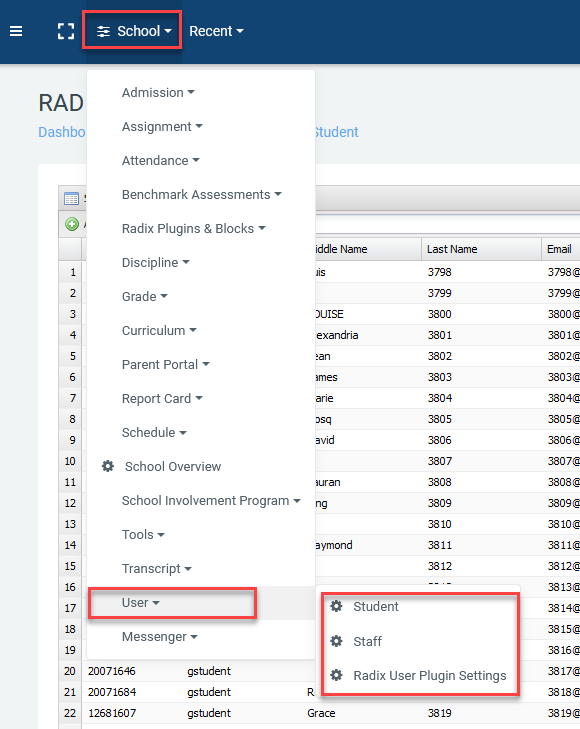
Radix LMS user management menus are located under School >> User where you can add/edit your students and staff information as well as their roles.
How to add/edit students
The student management menu is located under School >> User >> Student. On this page, you can add new students, export the list of students with their demographic and contact information, edit student information, withdraw a student, edit parent information, and print a student grade history report.
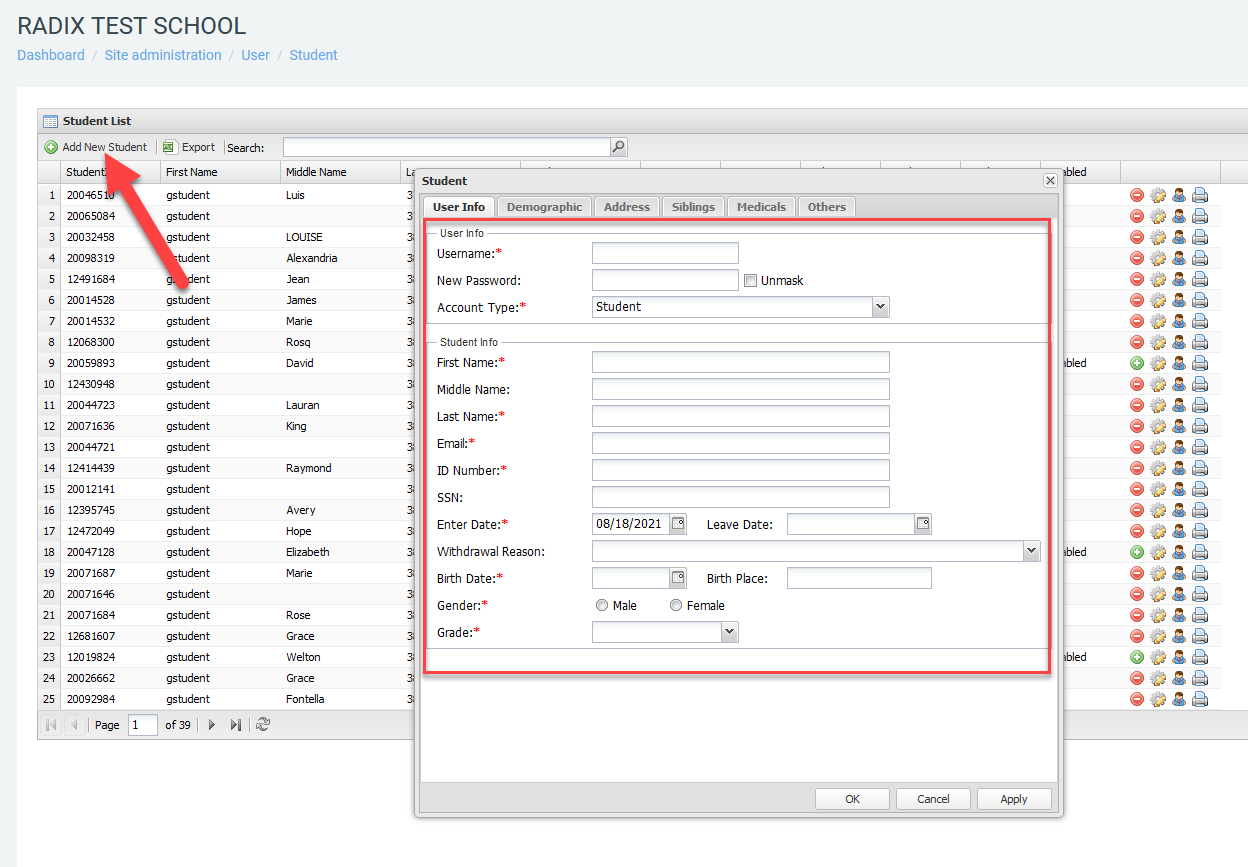
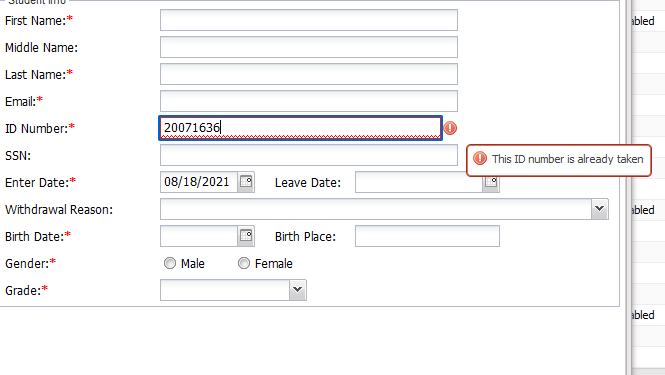
To add a student, click the Add new student button at the top left corner of the report window and fill out the required fields on the pop-up window. The required fields on the first tab are Username, Account Type, First Name, Last Name, Email, ID Number, Enter Date, Birth Date, Gender, and Grade. The other tabs are Demographic, Address, Siblings, Medicals, and Others; information on those tabs is optional. Username, Email, ID Number, and State ID must be unique. The system will show an error message if you try to add a duplicate value for these fields. Once done entering the information, click OK or Apply to save the new student.
Add new student |
Duplicate value warning |
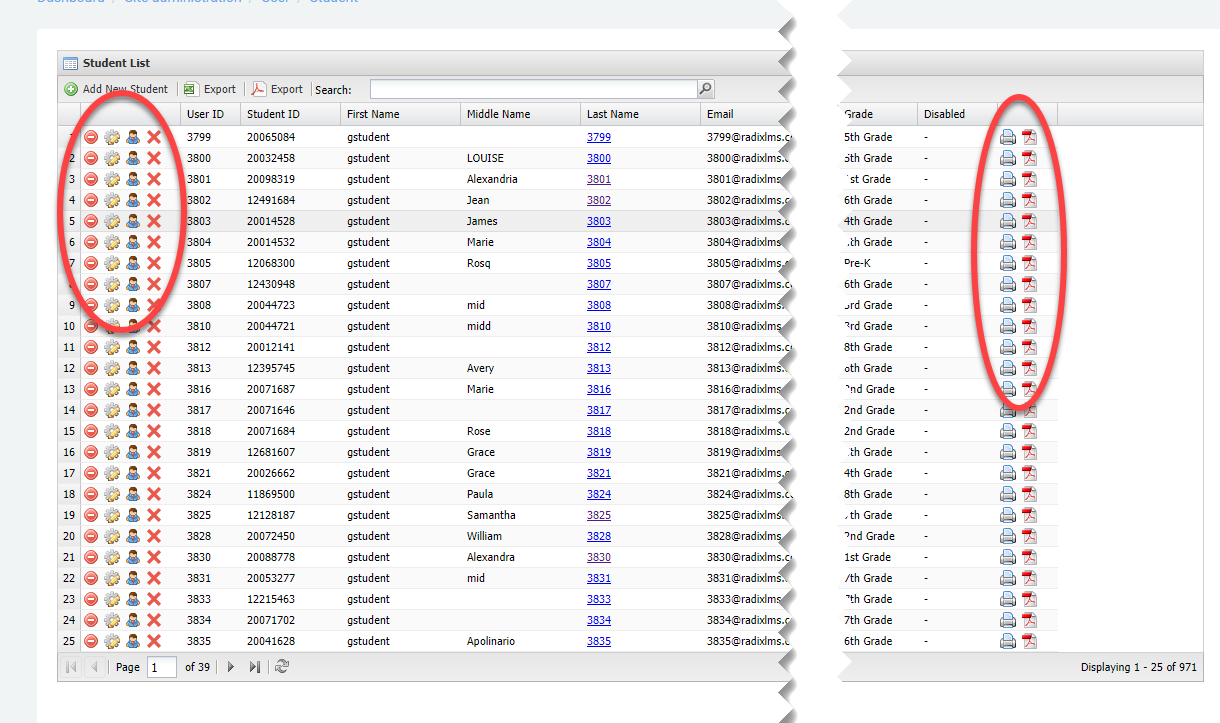
We will use the icons at the beginning and end of each row to withdraw, edit, add/edit contacts, delete, print grade history, or print student schedules.
Tip: Click a student’s last name to open their profile.
How to print student schedules
You can print a student schedule individually by clicking the PDF icon at the end of the student’s row. To print schedules in bulk, click the Schedules button at the top of the student list. The Students button exports the student list to Excel, and the Contacts button exports contact information to Excel.
Note: The per-row schedule icon is greyed out for disabled students, but the bulk Schedules export still includes them unless disabled users are filtered out of the list.
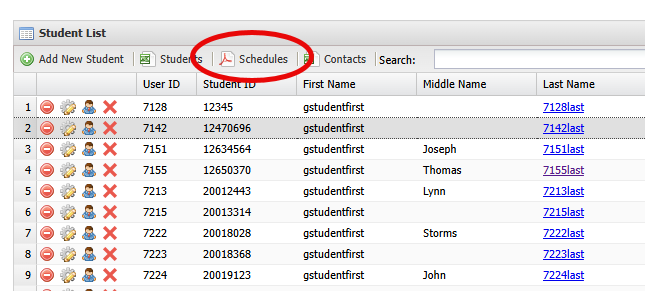
Bulk print action will provide you with a single PDF file with multiple pages, with each student’s schedule being on a separate page. The sorting of these pages reflects the sorting of the student list. You can sort the pdf pages by student ID, first name, last name, grade level, homeroom teacher, or homeroom course. You can also filter or search students based on any value on the list and print the schedules of those found on the search/filter results. Please note that the student schedule pdf export includes withdrawn students too, if you want to exclude them from the export you will have to filter out the disabled users from your list.
How to add/edit staff
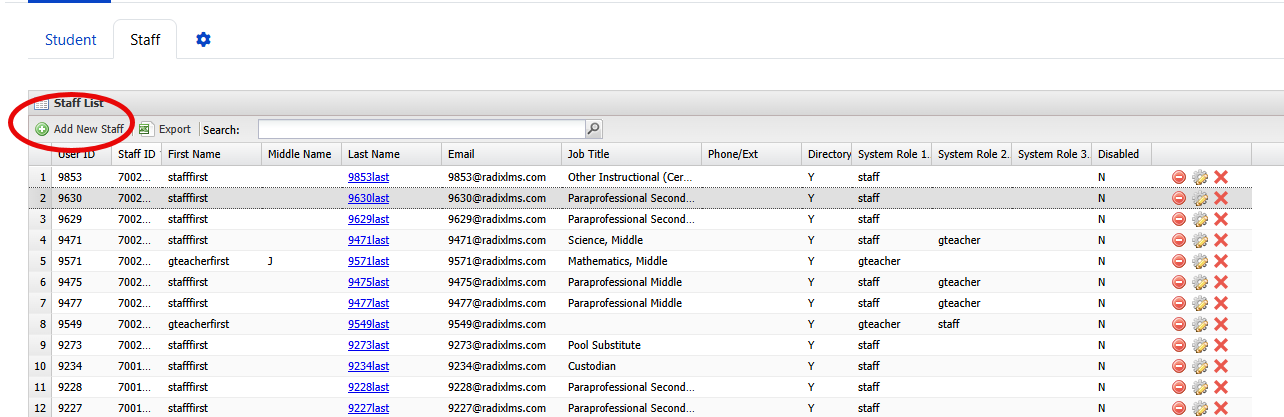
The staff management menu is located in the same place as the student menu: School >> User >> Staff. On this page, you can add new staff, export the list of staff members, change their roles or password, or disable a staff account. When adding or editing staff, System Role 1 is required, while System Role 2 and System Role 3 are optional. Other staff fields include Put in Staff Directory, Job Title, Phone Extension, Department (you can select more than one), and Team Grade. ID Number is optional for staff. When you disable a staff account, the account will be locked and the staff member will no longer have access to the site. Once a teacher's account is disabled, their name will no longer appear on the course participants lists. Enabling the teacher will restore their course enrollments as well as their account.
Tip: Click a staff member’s last name to open their profile.

|
Click this icon to disable a staff account or withdraw a student. Students get a Disable Student Account window with a Leave Date and Withdrawal Reason; staff get a confirmation prompt. This operation will not delete the user account. For students, it will not remove the student from scheduled courses. It will only disable the account so that you can enable it again if the student re-enrolls. When you re-enroll (enable) a student, all course enrollments, grades, and submissions will be restored. |

|
This icon means the student or staff account has been disabled. Clicking this icon will enable the account. For students, enabling the account restores the course schedule and grades and clears the Leave Date and Withdrawal Reason. |

|
Edit student/staff information such as password, birthdate or special programs etc. Special programs indicator: If enabled in Radix User Plugin Settings by a site administrator, this field can identify students in ESE/Special Ed, 504, ELL/ESOL, or Gifted/TAG. Only roles with View special programs indicator can see the indicator. |

|
Add or edit up to four parents/guardians (Parent/Guardian-1 to 4). Only registered parent accounts connected to the student receive progress emails and other notices. In the Parents/Contacts window, a ✔ means the parent is registered and connected to the student. A red ✖ means the student is not confirmed or has no custody. If the parent has not registered but has a primary email, a No registered account; click to invite link opens the parent invitation page. See Parent Portal Management. |

|
Delete a student or user permanently. This operation will completely delete the user from the system, including their enrollments, activity, grades, and any other user data. The user/student cannot be restored after this operation. |

|
Student's grade history report in pdf format. This will include the current year's grades as well |

|
Print student’s schedule. |
How to manage role permissions
The Role permissions page is located under School >> User >> Role permissions. This page lets trusted administrators manage access to Radix reports, pages, and capabilities for Radix custom roles from one permission matrix.
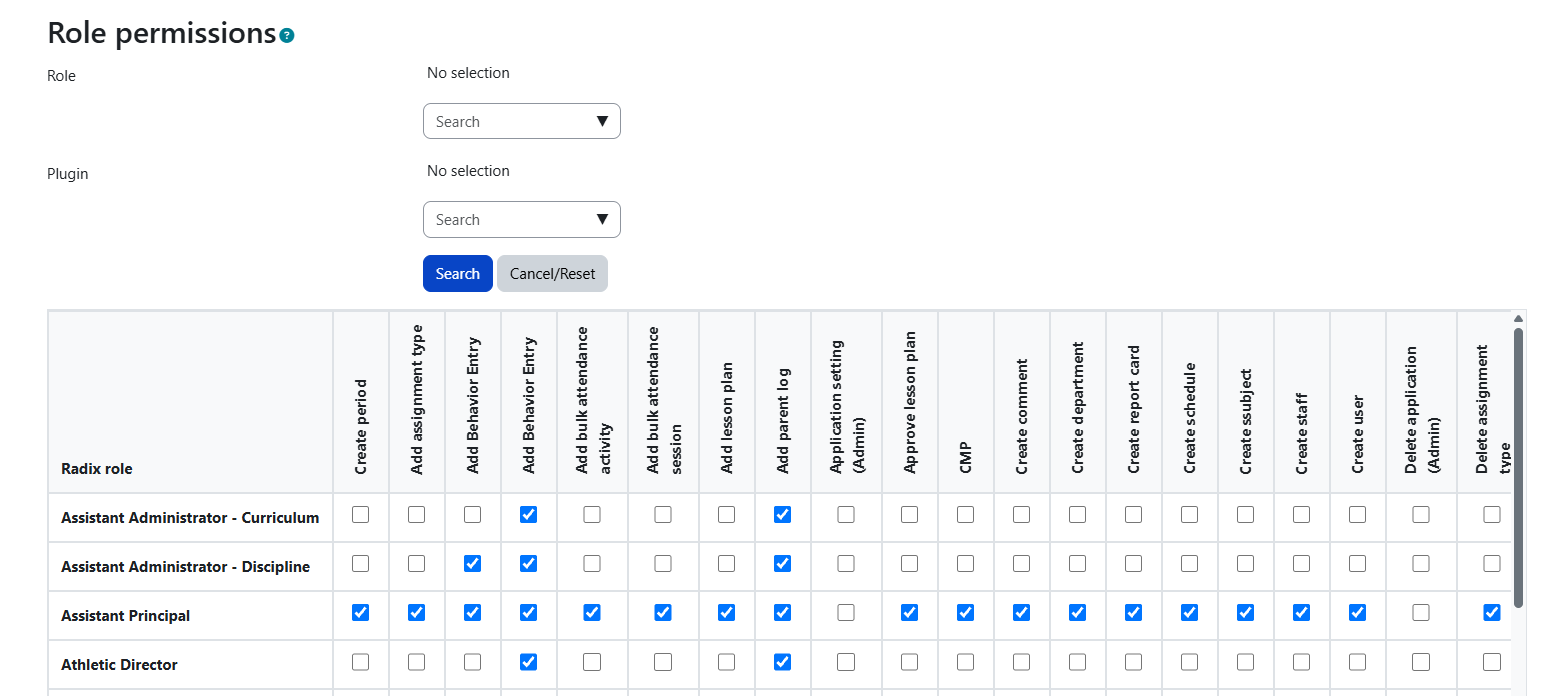
By default, only site administrators can open this page. Site administrators can grant the Manage Radix role permissions permission to another trusted role from this page if that role needs to manage Radix permissions.
The permissions are shown in a matrix: Radix roles are listed in the first column, and Radix capabilities are listed across the header row. Use the checkboxes to allow or remove access for each role and capability, then click Save changes. The header row and role column stay visible while you scroll through the matrix.
You can use the role and plugin filters above the matrix to narrow the list before making changes, then use Search to apply the filters or the reset button to clear them. Student and parent roles are not included in the matrix.
Before you make changes: saved permission changes apply site-wide immediately. Anyone who can open this page can change permissions for any role, including their own. Only give access to trusted administrators, and be careful when granting access to reports that may include sensitive student information such as discipline, enrollment, or contact details.
If a user has more than one role, permissions add up: the user gets access when any of their roles allows it. Clearing a checkbox for one role will not remove access if another role still allows the same capability. This page covers Radix features only; standard Moodle permissions and advanced settings such as Prohibit or course-level overrides are still managed in Site administration > Users > Permissions > Define roles.